Installation Guide: Fedora 8 Desktop (a.k.a. The Perfect Desktop) - Page 3
This tutorial exists for these OS versions
On this page
- 4.4 Nautilus
- 4.5 Services & Startup Programs
- 4.5.1 Enable Services
- 4.5.2 Disable Services
- 4.5.3 Disable Startup Programs
- 4.6 Deinstall Software
- 4.7 System Update
- 4.8 Power Consumption
- 4.9 Special Mouse Buttons
- 4.9.1 Preparation
- 4.9.2 Device Name
- 4.9.3 X-server Configuration
- 4.9.4 The Special Buttons
- 4.9.5 Xvkbd
- 4.9.6 Xbindkeys
- 4.9.7 Autostart
- 4.10 Gnome Keyring
4.4 Nautilus
Nautilus opens a window for every single folder by default - to change this open any folder and edit the settings. It's also a good idea to enable the delete command that bypasses the trash - cause if you delete something from external storages with the standard delete command, the things will not really be deleted but moved to a trash on the device (.trash). This trash will not be affected when you delete the trash on your desktop.
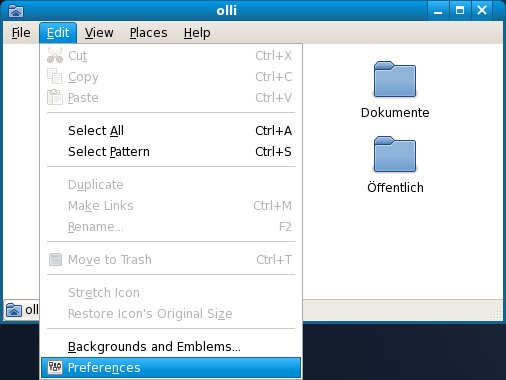
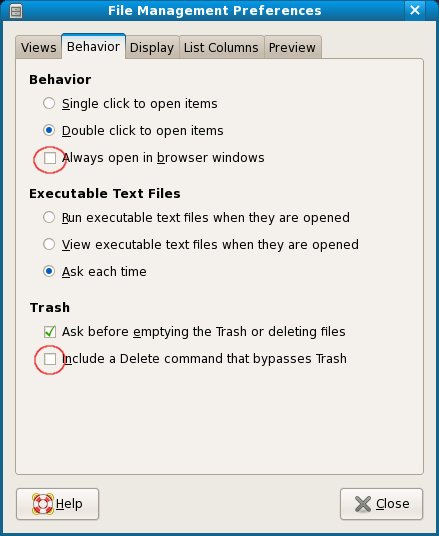
Now it's user-friendly.
4.5 Services & Startup Programs
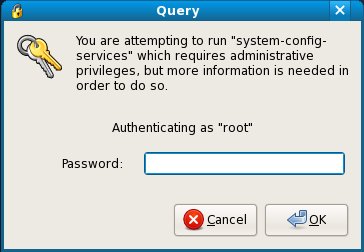
Some services are enabled by default on your System - maybe some of them are needless (depending on your hardware and your needs). The deactivation of needless services will save system resources, so it's worth to take a look on the service settings - they are available in the gnome system menu.

Enter the root-password.
Select all runlevel.

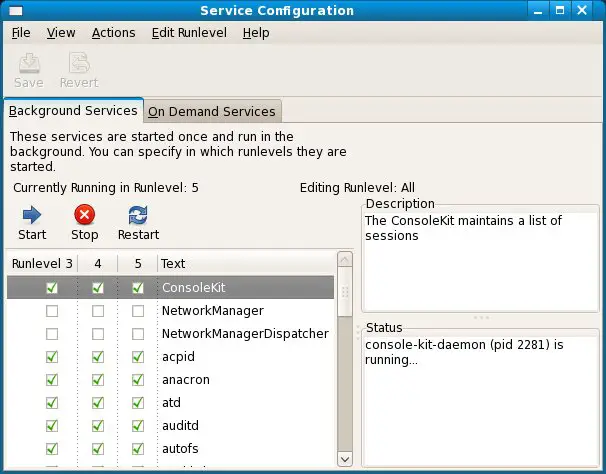
4.5.1 Enable Services
- Network Manager
- Network Manager Dispatcher
4.5.2 Disable Services
- bluetooth (disable this service if there is no bluetooth device connected to your system)
- firstboot (this service is not longer needed)
- mdmonitor (disable this service if you haven't set up a RAID-system)
- pcscd (disbale this service if there is no smart-card reader connected to your system)
- restorecond (disable this service if you deactivated SELinux)
- setroubleshoot (disable this service if you deactivated SELinux)
- smolt (disable this service if you don't want to send monthly hardware-profiles)
- sshd (disable this service if you're not planning to connect to this computer via ssh/scp/sftp etc)
If you have a computer with a wlan-card I recommend to disable "network" in all runlevels - otherwise you'll have a long boot-time cause the system tries to allocate a dhcp-ip to this device (regardless of the configuration). The network manager will enable the network automatically after you logged in.
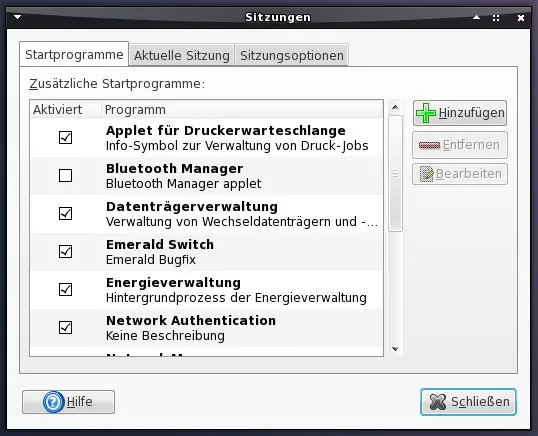
4.5.3 Disable Startup Programs
Handle the startup programs just as the services. The settings for the startup programs are available in the gnome system menu.
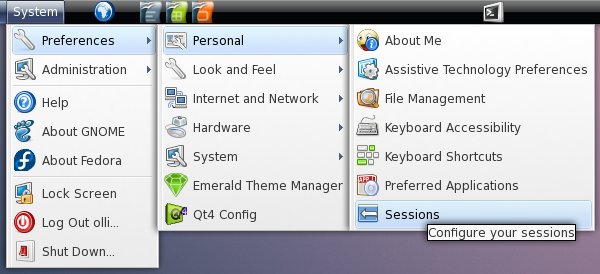
Disable the startup programs that you don't need - e.g.: if you disabled the bluetooth-service there's no need to start the bluetooth manager etc.
4.6 Deinstall Software
Before you are going to update the system for the first time you should check if there is software installed that you don't need, or rather that you want to replace with another software. The goal should be a clean system with only the programs installed that you really need.
Which programs you should deinstall or replace with others is up to you - you'll find a summary of already installed software at step 13 and a little assortment of additional software (including possible replacements for already installed software) at step 14.
You can simply deinstall software with the Yum Extender - have a look at step 5. Afterwards it's time for the first update (if there are updates available) - go to the next step.
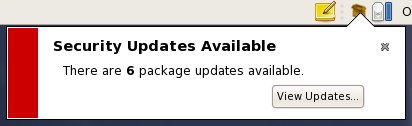
4.7 System Update
The system will check for updates automatically and notify you if updates are available. Click on "View Updates".
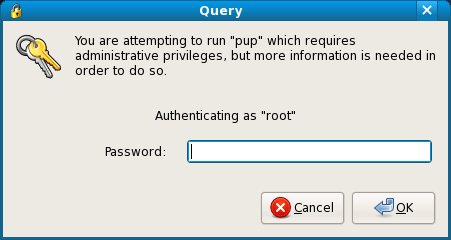
Enter the root-password.
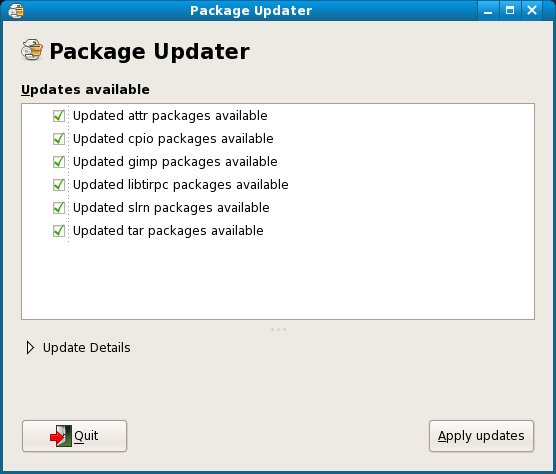
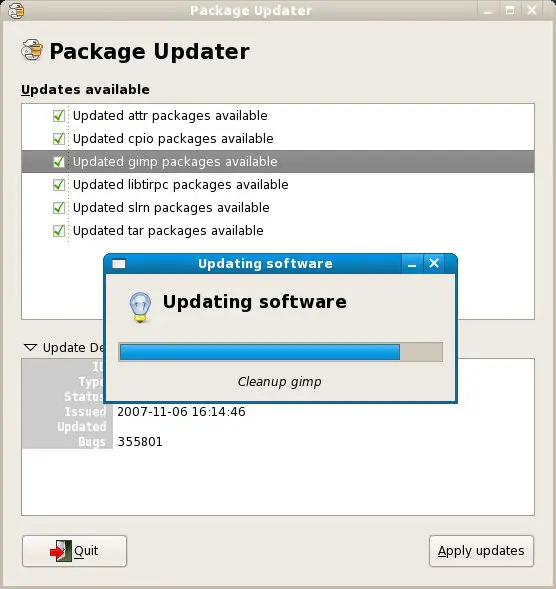
You'll see a summary of available updates...
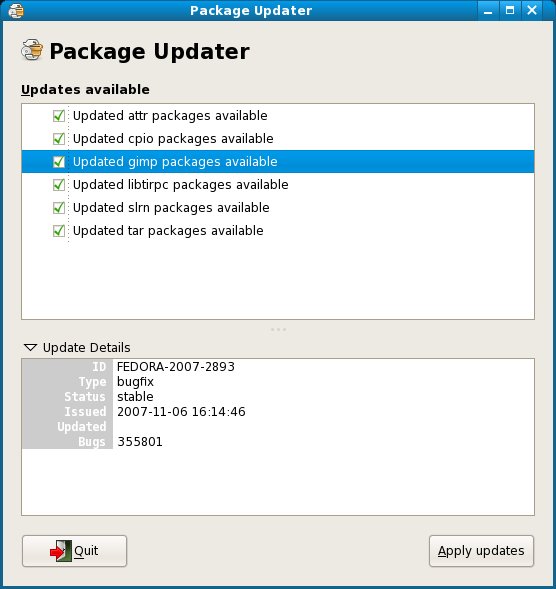
...and details if you want. Click on "Apply updates" to install the updates.
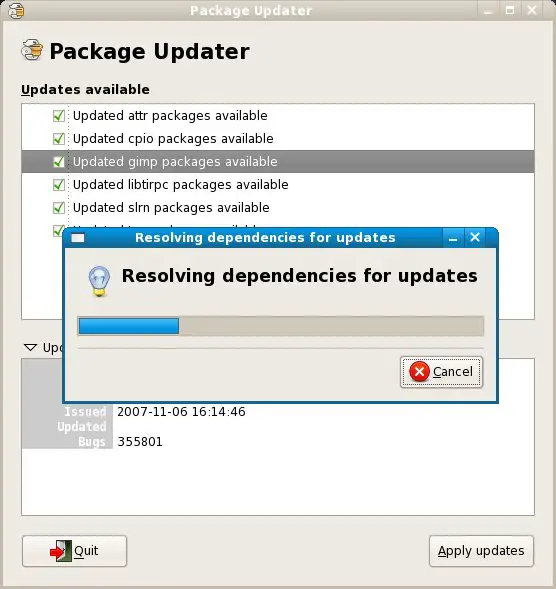
The dependencies are beeing resolved.
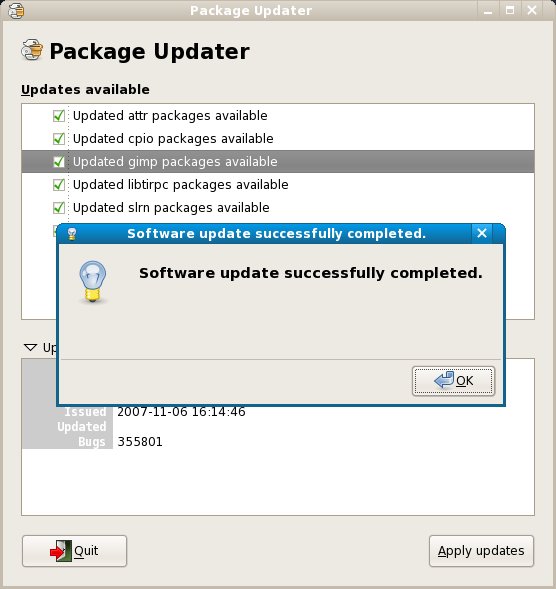
The updates are beeing downloaded and installed.
4.8 Power Consumption
With Powertop, a tool from Intel for Intel Platforms, you are able to find what software is using the most power on your system. Especial notebook users will benefit from reduced power consumption - there will be more time left on battery power.
If you want to use powertop, install the following package:
- powertop
It's recommended to run it as the root-user, otherwise you can't use all the features of this tool. Run powertop:
powertop
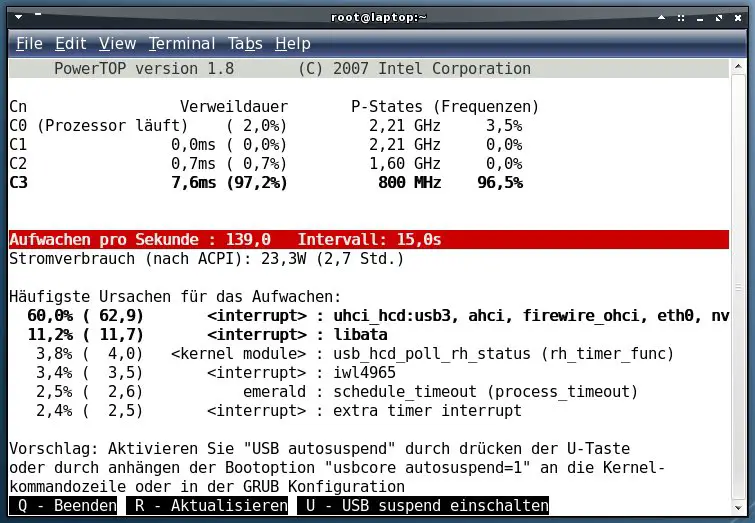
Powertop will permanent collect data from the system. In intervals it shows you what is using the most power and at the same time how you can optimize your system. In certain cases powertop is able to optimize the system itself if you hit the key that is shown. It's not improbable to save a few watts.
4.9 Special Mouse Buttons
If you have a mouse (connected via USB) with special buttons, you can enable and configure them in the following steps. I've tested this with a few Logitech mice (MX Revolution, VX Revolution and MX518) - it should work with any other mouse.
Note: Please start with step 4.9.4 and look if all buttons are detected - if yes, proceed - if not, go back and begin with step 4.9.1 .
4.9.1 Preparation
First back up the xorg.conf (root privileges needed):
cp /etc/X11/xorg.conf /etc/X11/xorg.conf.original
4.9.2 Device Name
Now let's find out the exact name of your mouse:
cat /proc/bus/input/devices | less
Search the entry for your mouse. For example the entry for my mouse (Logitech MX Revolution):
I: Bus=0003 Vendor=046d Product=c51a Version=0111
N: Name="Logitech USB Receiver"
P: Phys=usb-0000:00:1d.0-2/input0
S: Sysfs=/class/input/input3
U: Uniq=
H: Handlers=mouse1 event3
B: EV=7
B: KEY=ffff0000 0 0 0 0 0 0 0 0
B: REL=143
Note down the name of your device - you'll need it in a moment.
4.9.3 X-server Configuration
Choose a name as Identifier for your mouse in the xorg.conf, e.g.: "MX Rev". Now edit the x-server configuration (root privileges needed):
gedit /etc/X11/xorg.conf
Add a new line to the section "ServerLayout" that it looks like this. Replace the placeholder %identifier% with the identifier you chose.
Section "ServerLayout"
Identifier     "Default Layout"
Screen      0  "Screen0" 0 0
InputDevice    "Keyboard0" "CoreKeyboard"
InputDevice    "%identifier%" "CorePointer"
EndSection
E.g.:
Section "ServerLayout"
Identifier     "Default Layout"
Screen      0  "Screen0" 0 0
InputDevice    "Keyboard0" "CoreKeyboard"
InputDevice    "MX Rev" "CorePointer"
EndSection
Add the following section. Replace the placeholder %identifier% with the identifier you chose and the placeholder %devicename% with the name for your mouse that you found out at step 4.9.2 .
Section "InputDevice"
Identifier  "%identifier%"
Driver      "evdev"
Option      "Phys" "usb-*/input0"
Option      "Name" "%devicename%"
Option      "CorePointer"
EndSection
E.g.:
Section "InputDevice"
Identifier  "MX Rev"
Driver      "evdev"
Option      "Phys" "usb-*/input0"
Option      "Name" "Logitech USB Receiver"
Option      "CorePointer"
EndSection
4.9.4 The Special Buttons
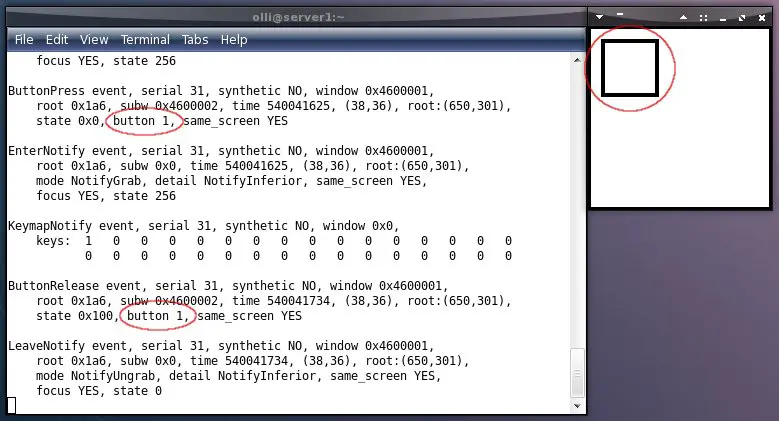
Now it's time to find out which number is assigned to each button. Open a terminal and start "xev". A new window will pop up with a little square in it. Move the cursor into the square and use all special buttons one after the other. Don't move your mouse during this time - else you'll see lots of events caused by the movement of your mouse and not the button-events. You'll see the assigned number for each button in the terminal window - note it down.
xev
4.9.5 Xvkbd
Xvkbd is a virtual keyboard for the X window system. It will send the commands/events to the x-server that we assing to the special buttons in the next step. Download and install xvkbd (root privileges needed):
wget http://dag.wieers.com/rpm/packages/xvkbd/xvkbd-2.8-1.el4.rf.i386.rpm
yum localinstall xvkbd-2.8-1.el4.rf.i386.rpm --nogpgcheck
rm xvkbd-2.8-1.el4.rf.i386.rpm
4.9.6 Xbindkeys
Xbindkeys joins the special buttons with xvkbd. Install the following package (have a look at step 5 if you don't know how to install a package):
- xbindkeys
Next create a standard configuration file for your account and edit it (without root privileges!):
xbindkeys --defaults > $HOME/.xbindkeysrc
gedit .xbindkeysrc
Here you can assign commands/events to your mouse-buttons. My configuration for example:
# Action back
"/usr/bin/xvkbd -text "\[Alt_L]\[Left]""
m:0x0 + b:8

# Action forward
"/usr/bin/xvkbd -text "\[Alt_L]\[Right]""
m:0x0 + b:9

# Zoom in
"/usr/bin/xvkbd -text "\C+""
m:0x0 + b:13

# Zoom out
"/usr/bin/xvkbd -text "\C-""
m:0x0 + b:15

# Close window
"/usr/bin/xvkbd -text "\Cw""
m:0x0 + b:17

# Open Firefox
"firefox"
m:0x0 + c:229
As you can see, each entry consists of a xvkbd-event and a mouse-button. m:0x0 + b:1 for button 1, m:0x0 + b:2 for button 2 and so on. For Keycodes insert m:0x0 + c:%keycode%, e.g.: m:0x0 + c:229 .
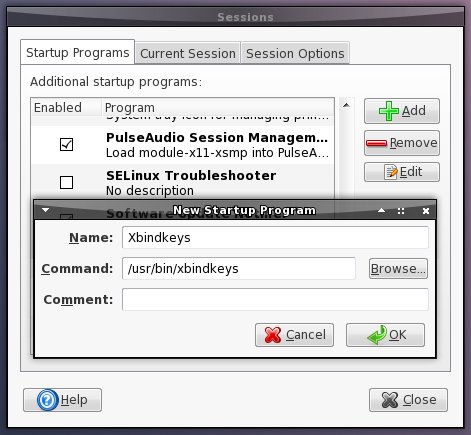
4.9.7 Autostart
You have to add xbindkeys to the startup programs.
4.10 Gnome Keyring
All your passwords that are used by other programs, like the password(s) for your email-accounts or the password(s) for your wlan-connection(s) will be stored in the gnome keyring. You'll be asked to enter a master-password for the gnome keyring when the first password is beeing added. I recommend to use your system-password for the gnome-keyring. Everytime you start an application for the first time in a session that needs one or more passwords that are stored in the gnome-keyring, you'll be asked to enter the master-password - this is annoying (my opinion).
It can be eased by using the pam_keyring, that will automatically unlock your gnome keyring when you log in to your system - this requires that your master-password for the gnome keyring and your system-password are the same. If you want to use pam_keyring, install the following package (have a look at step 5 if you don't know how to install a package):
- pam_keyring
Now you have to integrate pam_keyring into the pam-configuration for the gdm (root privileges needed):
gedit /etc/pam.d/gdm
You have to insert the following two lines into the configuration file:
auth optional pam_keyring.so try_first_pass
session optional pam_keyring.so
It's important to insert the lines in the right order - otherwise pam_keyring won't work. The configuration file has to look like this:
#%PAM-1.0
auth     [success=done ignore=ignore default=bad] pam_selinux_permit.so
auth       required    pam_env.so
auth       optional    pam_keyring.so try_first_pass
auth       include     system-auth
auth       optional    pam_gnome_keyring.so
account    required    pam_nologin.so
account    include     system-auth
password   include     system-auth
session    required    pam_selinux.so close
session    include     system-auth
session    required    pam_loginuid.so
session    optional    pam_console.so
session    optional    pam_keyring.so
session    required    pam_selinux.so open
session    optional    pam_keyinit.so force revoke
session    required    pam_namespace.so
session    optional    pam_gnome_keyring.so auto_start

