This tutorial exists for these OS versions
On this page
Installing Zabbix (Server And Agent) On Debian Etch
Version 1.0
Author: Falko Timme
Zabbix is a solution for monitoring applications, networks, and servers. With Zabbix, you can monitor multiple servers at a time, using a Zabbix server that comes with a web interface (that is used to configure Zabbix and holds the graphs of your systems) and Zabbix agents that are installed on the systems to be monitored. The Zabbix agents deliver the desired data to the Zabbix server. This tutorial shows how you can install the Zabbix server and agent on a Debian Etch system.
I do not issue any guarantee that this will work for you!
1 Preliminary Note
I will use the system server1.example.com with the IP address 192.168.0.100 as the Zabbix server, and I'll install a Zabbix agent on the same system (so that it can monitor itself) as well as on a second Debian Etch system with the hostname server2.example.com and the IP address 192.168.0.101.
2 Install The Zabbix Server And Zabbix Agent On server1.example.com
The Zabbix server can store its information in a MySQL or PostgreSQL database. We use MySQL here, so we install the MySQL server and client first:
apt-get install mysql-server mysql-client
Create a password for the MySQL user root (replace yourrootsqlpassword with the password you want to use):
mysqladmin -u root password yourrootsqlpassword
Then check with
netstat -tap | grep mysql
on which addresses MySQL is listening. If the output looks like this:
tcp 0 0 localhost.localdo:mysql *:* LISTEN 2713/mysqld
which means MySQL is listening on localhost.localdomain only, then you're safe with the password you set before. But if the output looks like this:
tcp 0 0 *:mysql *:* LISTEN 2713/mysqld
you should set a MySQL password for your hostname, too, because otherwise anybody can access your database and modify data:
mysqladmin -h server1.example.com -u root password yourrootsqlpassword
Afterwards, we can install the Zabbix server, Zabbix agent, and the Zabbix web interface with a single command:
apt-get install zabbix-server-mysql zabbix-frontend-php zabbix-agent
You will be asked a few questions:
Configure database for zabbix-server-mysql with dbconfig-common? <-- Yes
Password of your database's administrative user: <-- yourrootsqlpassword (password of the MySQL root user)
MySQL application password for zabbix-server-mysql: <-- zabbixsqlpassword (password of the MySQL user zabbix)
Password confirmation: <-- zabbixsqlpassword
This should create a MySQL database called zabbix as well as the MySQL user zabbix (with the password you provided).
Next we must edit the Zabbix agent configuration in /etc/zabbix/zabbix_agentd.conf. Replace Server=localhost with Server=127.0.0.1 (to avoid lookup problems of localhost) and specify the hostname of the current system in the Hostname line:
vi /etc/zabbix/zabbix_agentd.conf
[...] Server=127.0.0.1 [...] Hostname=server1.example.com [...] |
Then we restart the Zabbix agent:
/etc/init.d/zabbix-agent restart
Finally, we must specify the password of our zabbix MySQL user in the Zabbix web interface configuration:
vi /etc/zabbix/dbconfig.php
<? $DB_TYPE='MYSQL'; $DB_SERVER='localhost'; $DB_DATABASE='zabbix'; $DB_USER='zabbix'; $DB_PASSWORD='zabbixsqlpassword'; ?> |
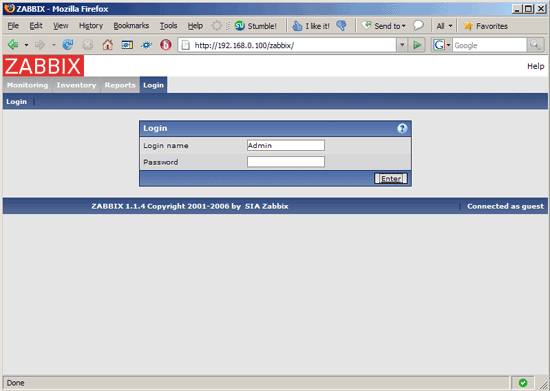
That's it. you can now open http://server1.example.com/zabbix or http://192.168.0.100/zabbix in a browser. Log in with the username Admin and no password:
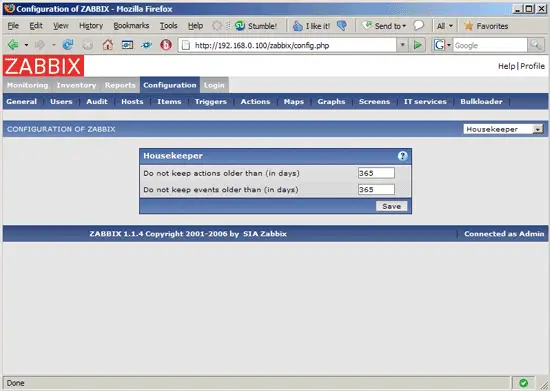
Afterwards, go to Configuration and configure Zabbix. The Zabbix configuration is beyond the scope of this document. You can learn more about this subject in the Zabbix documentation.
If you have problems with Zabbix, please check the Zabbix logs:
- /var/log/zabbix-agent/zabbix_agentd.log
- /var/log/zabbix-server/zabbix_server.log
The Zabbix configuration files for the server, agent, and web interface are as follows:
- /etc/zabbix/apache.conf
- /etc/zabbix/dbconfig.php
- /etc/zabbix/zabbix_agentd.conf
- /etc/zabbix/zabbix_server.conf
3 Install The Zabbix Agent On server2.example.com
Let's assume we have a second server (server2.example.com, 192.168.0.101) that we want to monitor. Of course, we don't have to install the Zabbix server or a MySQL database on server2.example.com, because this is already installed on server1.example.com. All we have to do is install the Zabbix agent:
apt-get install zabbix-agent
Then we must edit the Zabbix agent configuration file /etc/zabbix/zabbix_agentd.conf and put the IP address of our Zabbix server in the Server line and specify the hostname of the current system in the Hostname line:
vi /etc/zabbix/zabbix_agentd.conf
[...] Server=192.168.0.100 [...] Hostname=server2.example.com [...] |
Afterwards, we restart the Zabbix agent:
/etc/init.d/zabbix-agent restart
That's it. You can now use the Zabbix web interface on the Zabbix server (server1.example.com) to monitor server2.example.com.
If you have problems, you should check out the Zabbix agent log file /var/log/zabbix-agent/zabbix_agentd.log.
4 Links
- Zabbix: http://www.zabbix.org
- Debian: http://www.debian.org

