StrongSwan based IPsec VPN using certificates and pre shared key on Ubuntu 16.04
This tutorial exists for these OS versions
- Ubuntu 18.04 (Bionic Beaver)
- Ubuntu 16.04 (Xenial Xerus)
On this page
Introduction
In this article, our focus is on the open source implementation of the IPsec protocol. The security of the network layer is ensured by using the IPsec protocol which consists of following two components.
- Authentication Header (AH)
- Encapsulating Security Payload (ESP)
Packet integrity and authentication is ensured by using AH, the ESP component provides confidentiality and security features. The open source implementation of IPsec, StrongSwan (Strong Secure WAN), is a well-known tool which supports both versions of internet key exchange (IKE v1/2)/. Key sharing or internet key exchange is part of the IPSec VPN (virtual private network). The IKE mechanism is used to share the key between two parties for encryption of data in the ESP protocol. Encryption & integrity algorithms (such as AES,SHA etc) of OpenSSL and crypto libraries are used during IKE step. However, the Linux kernel implementation of security algorithm is used in the main part of IPSec (ESP & AH). Strongswan.
Strongswan Features
- Support for Pre-shared key based authentication.
- Certificates in X.509 format are supported for authentication.
- A single daemon which supports both IKE v1/v2.
- Third parties plugins and libraries can be easily integrated.
- Hardware token are supported by using the openSC project.

Gateway-to-Gateway and Road warrior VPN are supported by strongswan. Network traffic is encrypted or decrypted at gateway devices of an organization in a site-to-site vpn. However, a second secure channel is established from the gateway device to end user/client machine.
In this article, the strongSwan tool will be installed on Ubuntu 16.04 (LTS), I will show the integration of OpenSC for hardware tokens and finally the creation of a gateway-to-gateway tunnel using a pre-shared key and x.509 certificates. Hardware tokens or Hardware Security Modules (HSM) such as USB and smart cards can be used with strongswan to store the cryptographic keys (public & private ) and certificates. Hardware token support in strongswan is provided using OpenSC (set of tools & libraries), an open source project. PKCS#15 based file structure and access of smart card using PKCS#11 API is provided by the OpenSC tool as well. The following smart cards are supported by openSC.
- WestCOS
- SetCOS
- CardOs
- STARCOS
- ASEPCOS
Strongswan installation (binary and source code)
Binary packages (deb/rpm ) of strongswan are available in almost all widely used Linux distributions. The installation of strongswan by using binary and source code (with desired features) will be comprehensively explained in this article.
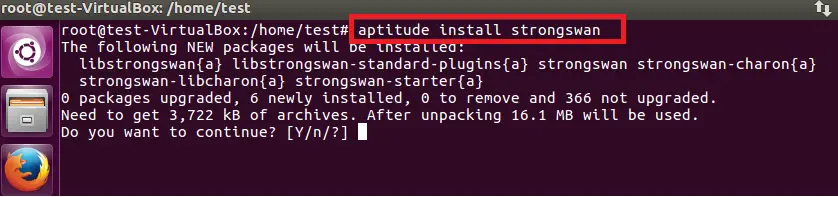
The binary package of strongswan can be installed by using the following command on Ubuntu 16.04 LTS.
aptitude install strongswan
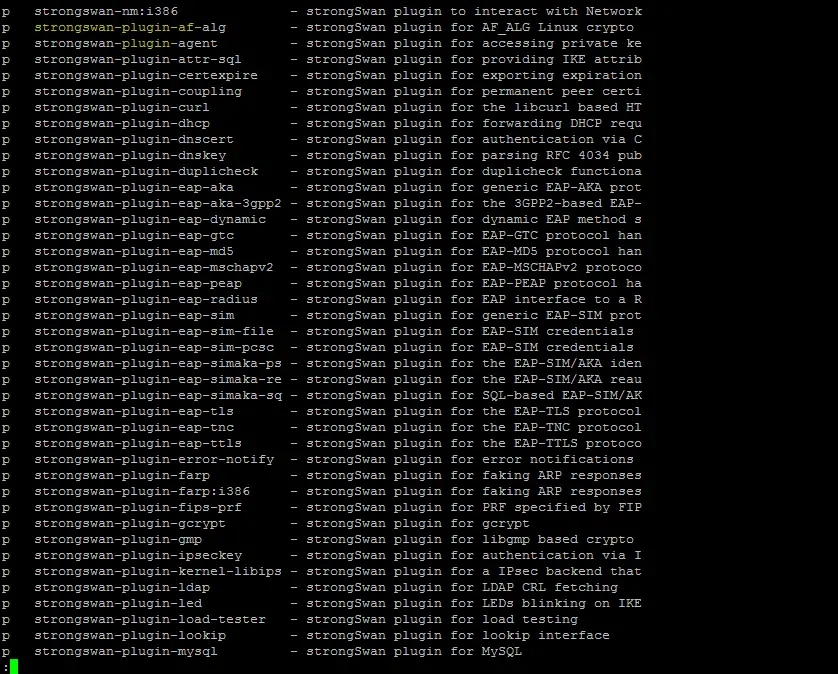
The available strongswan plugins in the Ubuntu repository are shown below.
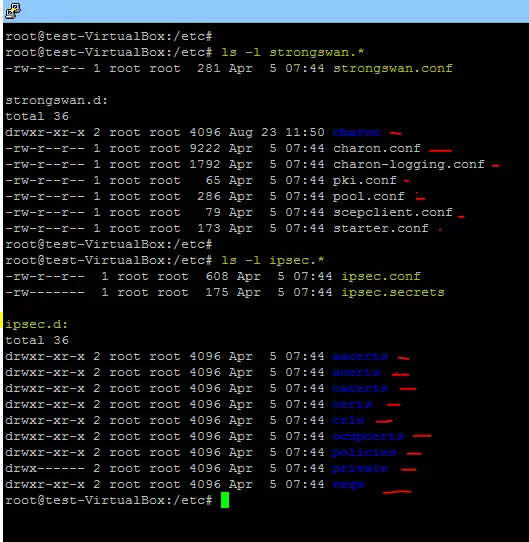
After installation on Ubuntu platform, the configuration files & folders (ipsec.conf, ipsec.secrets, ipsec.d,strongswan.conf, strongswan.d) are stored in the /etc directory.
Strongswan compilation using source
- Opensc (for the support of HSM in the strongswan).
- PC/SC (It is required for smart card reader support on Ubuntu platform).
- GMP Library (required for mathematical operation in strongswan).
- OpenSSL tool (well known implementation of cryptography algorithms such as AES,SHA1).
- PKCS (Public key cryptograph standards) 1,7,8,11,12.
In this article, the PCSC-Lite tool will be installed along opensc on the Ubuntu platform to add support for smart card readers. PCSC-Lite is recommended for CCID readers.
Run following commands to install the pre-requisite software before we start the compilation of strongswan.
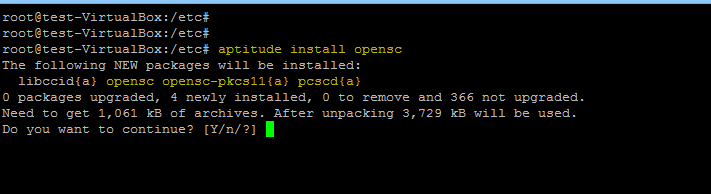
1. Opensc Installation
aptitude install opensc
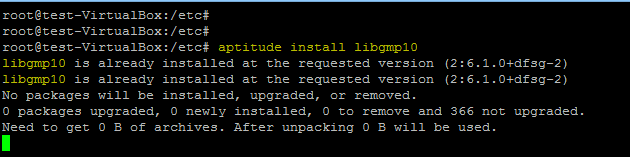
2. GMP library installation
aptitude install libgmp10
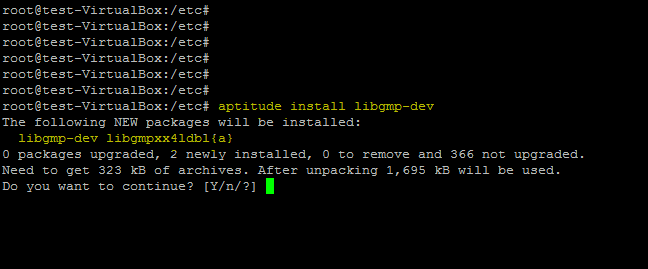
Install development library of GMP.
aptitude install libgmp-dev
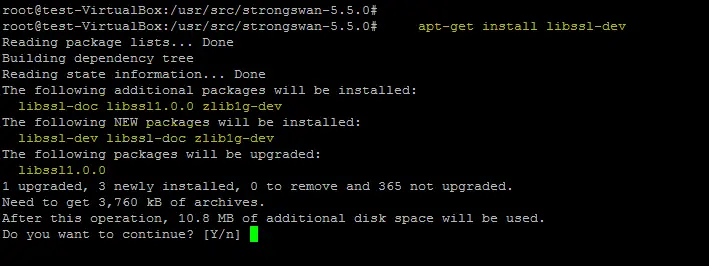
OpenSSL libcrypto is installed by using following command.
apt-get install libssl-dev
Compilation steps
Go to the /usr/src/ folder and download the latest release of strongswan by using the wget command.
cd /usr/src
wget https://download.strongswan.org/strongswan-5.5.0.tar.gz

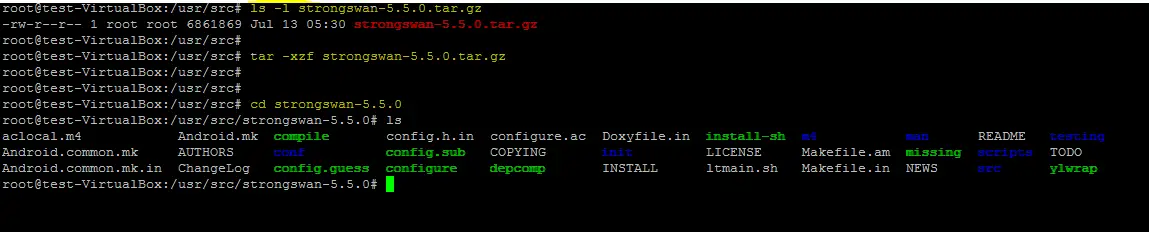
Extract the compressed file and go inside the extracted folder to run configure script.
tar –xzf strongswan-5.5.0.tar.gz
cd strongswan-5.5.0
Run the configure script to check the dependencies of strongswan. HSM support is already enabled in the latest version fo strongswan as shown below.
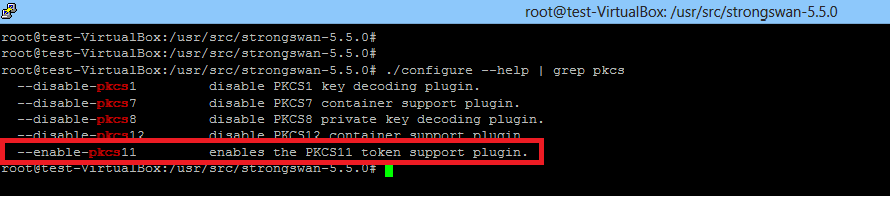
Run the configure script, use prefix /usr/local and enable openssl support.
./configure --prefix=/usr/local --enable-openssl
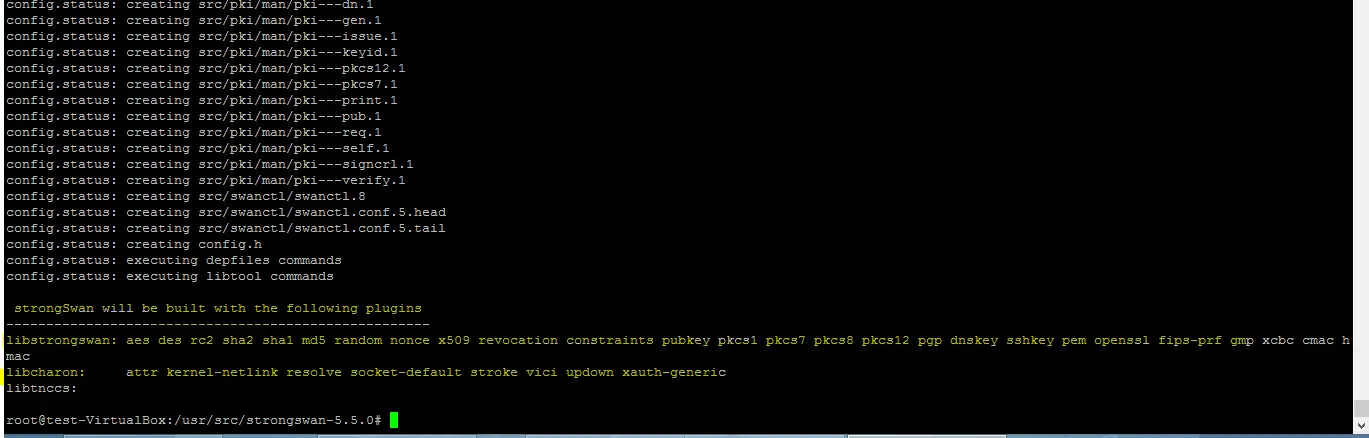
The following snapshot shows that no error has been generated by the configure script as all required dependencies were already installed on the system.
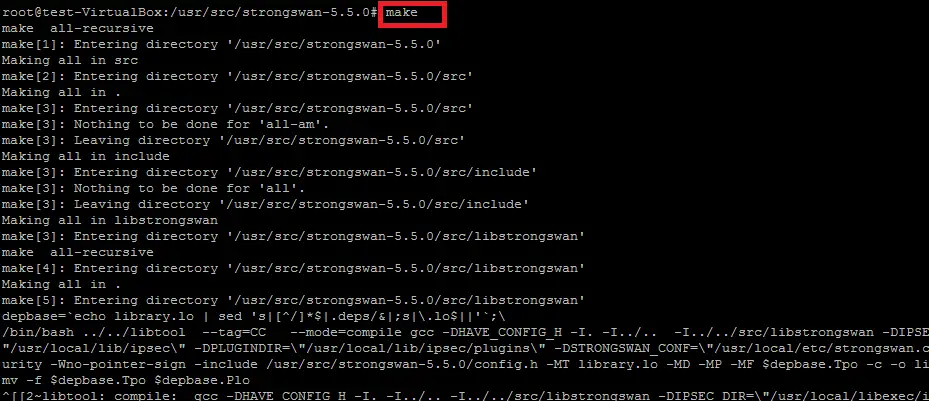
Run the following two commands to compile and install strongswan under /usr/local directory.
make
make install
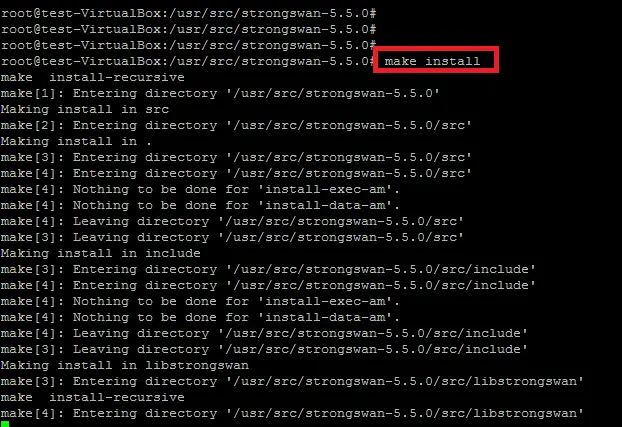
The compilation and installation of strongswan on the Ubuntu platform is complete, several configuration files (strongswan.conf, ipsec.conf and ipsec.secrets) and folders (strongswan.d,ipsec.d) are copied under /usr/local/etc path. The configuration ofthe VPN policy is placed in the ipsec.conf file and confidential secrets are stored in the ipsec.secrets file. Strongswan plugin configuration is stored in the strongswan.d directory.

Both transport and tunnel VPN's are supported by strongswan. In the tunnel mode, site-to-site security of the channel is provided and it works with other vendors such as cisco, huawei, and juniper devices.
Site-to-Site VPN
The following figure shows the placement of a strongswan based VPN gateway device in a network. A secure communication channel will be established between the 192.168.223.0/24 and 192.168.222.0/24 private networks of the organization.
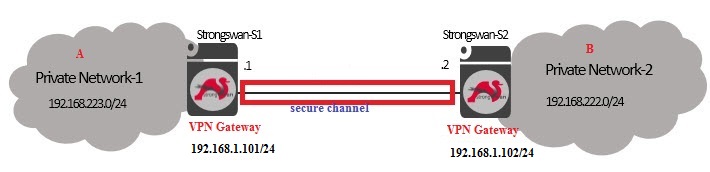
Before using IPsec between the A and B privates network, make sure routing between VPN Gateways of organization is working so that VPN gateway at A side can ping remote side VPN machine (B) which ensures the network connectivity is ok.
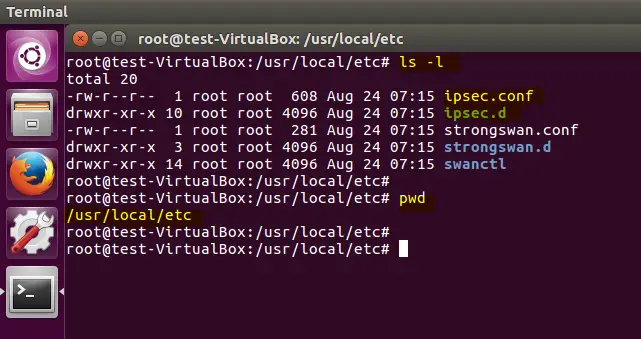
As shown below, the default configuration of the strongswan tool is inside the /usr/local/etc/ directory.
Pre-shared key based tunnel
In the first case, a shared secret based VPN will be created between gateway devices. The well known key sharing algorithm Diffie-Hellman is used by strongswan for mutual authentication. Details on how the IPsec protocol works are available at following link.
http://www.unixwiz.net/techtips/iguide-ipsec.html
Configuration of the VPN:
(A-side)
The main configuration of a strongswan VPN policy is in the ipsec.conf file. Information such as given below is found in this configuration file.
- Version of IKE
- Type of tunnel
- source & destination gateways
- privates networks of VPN
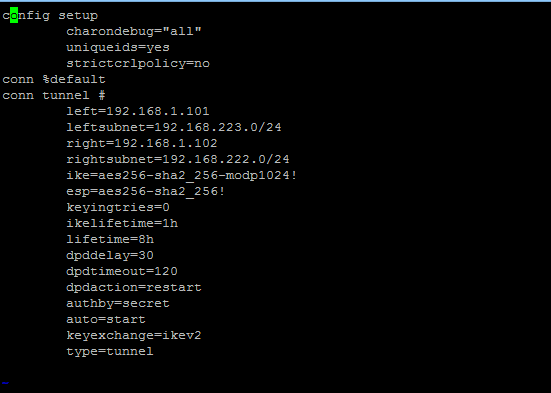
ipsec.conf of A side is given below.
config setup
        charondebug="all"
        uniqueids=yes
        strictcrlpolicy=no
conn %default
conn tunnel #
        left=192.168.1.101
        leftsubnet=192.168.223.0/24
        right=192.168.1.102
        rightsubnet=192.168.222.0/24
        ike=aes256-sha2_256-modp1024!
        esp=aes256-sha2_256!
        keyingtries=0
        ikelifetime=1h
        lifetime=8h
        dpddelay=30
        dpdtimeout=120
        dpdaction=restart
        authby=secret
        auto=start
        keyexchange=ikev2
        type=tunnel
IPsec secrets (shared keys, password of the private key, pin to unlock hsm ) are stored in the ipsec.secrets file . As shown below, shard secrets between both VPN parties is "test12345".
192.168.1.101 192.168.1.102 : PSK 'test12345'

(B-side)
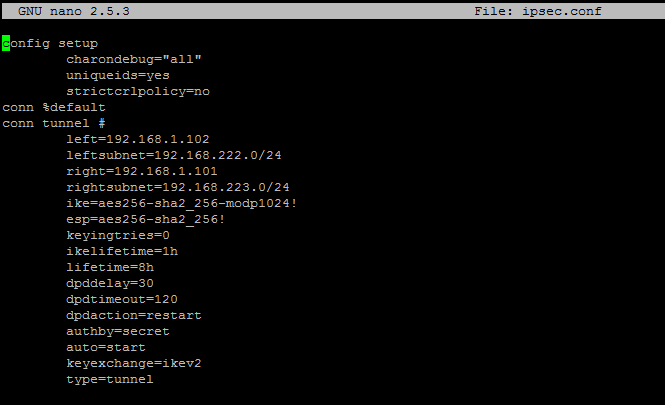
The configuration in the ipsec.conf and ipsec.secrets files at the remote side will be the reverse of the local site as given below.
The content of ipsec.conf file is given below.
config setup
        charondebug="all"
        uniqueids=yes
        strictcrlpolicy=no
conn %default
conn tunnel #
        left=192.168.1.102
        leftsubnet=192.168.222.0/24
        right=192.168.1.101
        rightsubnet=192.168.223.0/24
        ike=aes256-sha2_256-modp1024!
        esp=aes256-sha2_256!
        keyingtries=0
        ikelifetime=1h
        lifetime=8h
        dpddelay=30
        dpdtimeout=120
        dpdaction=restart
        authby=secret
        auto=start
        keyexchange=ikev2
        type=tunnel
The ipsec.secrets file contains the shared secret at remote side.
192.168.1.102 192.168.1.101 : PSK 'test12345'

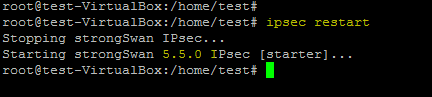
Start the strongswan daemon (charon) using the following command after you setup the config file son both sides.
ipsec restart
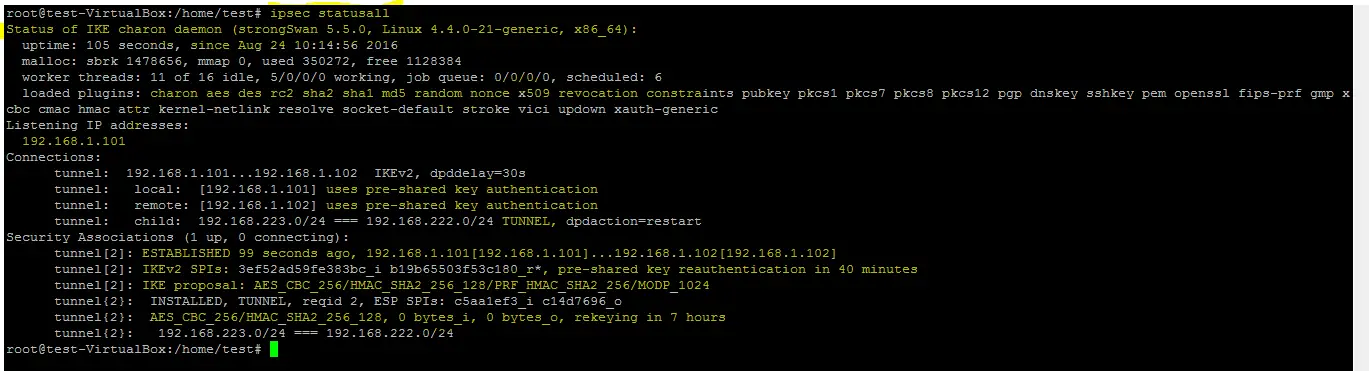
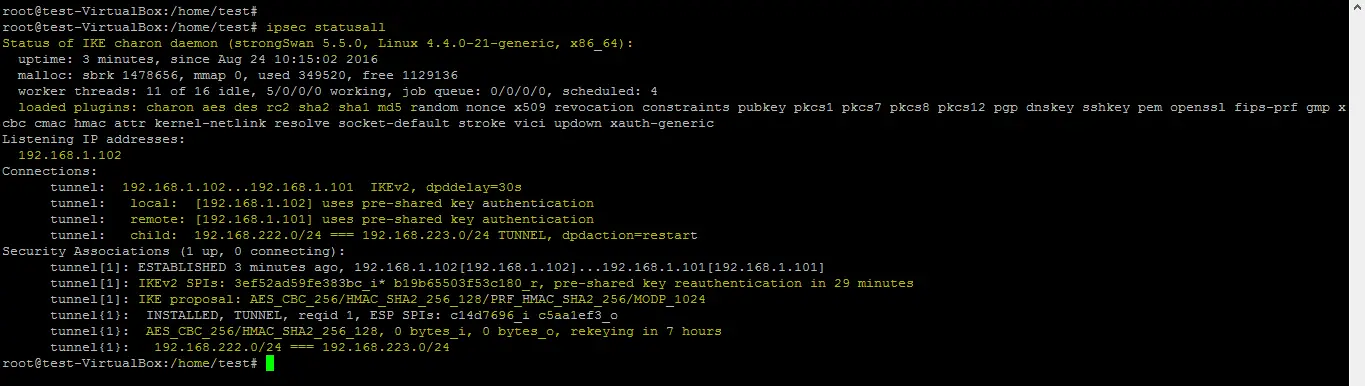
The following command shows the status of the created VPN on the devices.
ipsec statusall
Status of the tunnel on both sides (local and remote) is shown below.
This Linux command shows the policies and states of IPsec tunnel.
ip xfrm state
ip xfrm policy

As shown in the above command output, sensitive information esp/hmac (keys) are also shown by ip xfrm command.
X.509 certificate based tunnel
In the X.509 certificate (Public key Authentication) based tunnel, it is required to generate certificates for the certification authority (CA), client A and B.
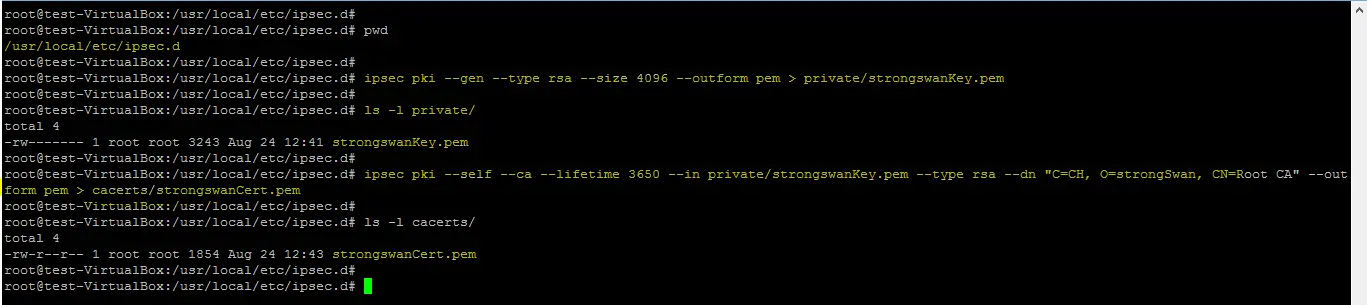
Generating a self-sign CA certificate using the PKI utility of strongswan is shown in following screenshots.
Get inside the /usr/local/etc/ipsec.d path and run the following commands.
cd /usr/local/etc/ipsec.d
ipsec pki --gen --type rsa --size 4096 --outform pem > private/strongswanKey.pem
ipsec pki --self --ca --lifetime 3650 --in private/strongswanKey.pem --type rsa --dn "C=CH, O=strongSwan, CN=Root CA" --outform pem > cacerts/strongswanCert.pem
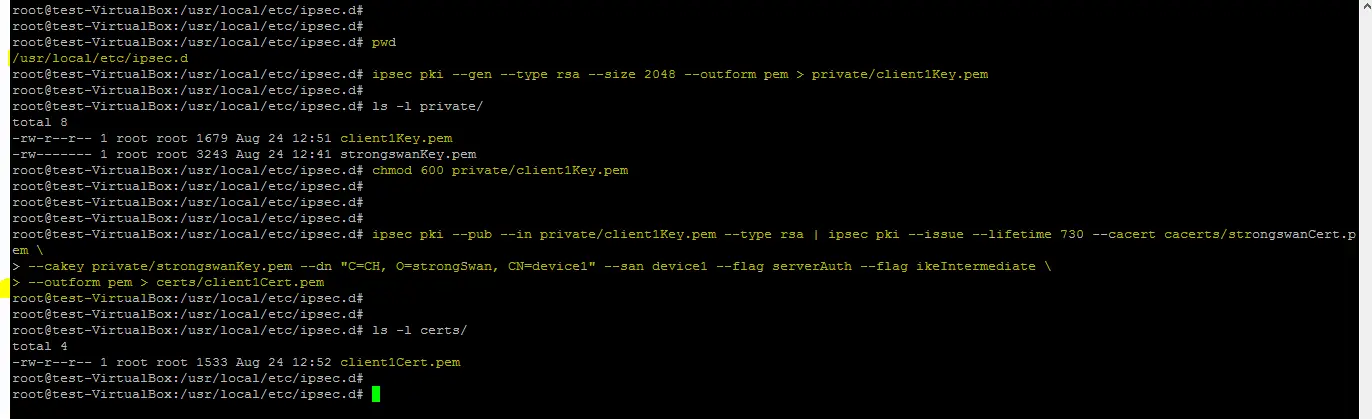
Generation of the certificates for client A is shown below.
ipsec pki --gen --type rsa --size 2048 --outform pem > private/client1Key.pem
chmod 600 private/client1Key.pem
ipsec pki --pub --in private/client1Key.pem --type rsa | ipsec pki --issue --lifetime 730 --cacert cacerts/strongswanCert.pem --cakey private/strongswanKey.pem --dn "C=CH, O=strongSwan, CN=device1" --san device1 --flag serverAuth --flag ikeIntermediate --outform pem > certs/client1Cert.pem
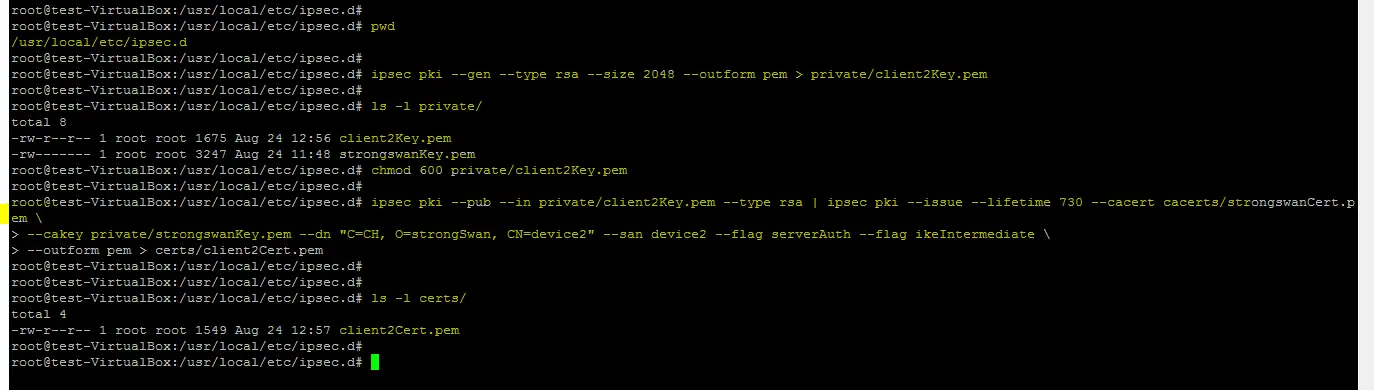
Similary, public/private key pair and certificate generated for the client B.
ipsec pki --gen --type rsa --size 2048 --outform pem > private/client2Key.pem
chmod 600 private/client2Key.pem
ipsec pki --pub --in private/client2Key.pem --type rsa | ipsec pki --issue --lifetime 730 --cacert cacerts/strongswanCert.pem --cakey private/strongswanKey.pem --dn "C=CH, O=strongSwan, CN=device2" --san device2 --flag serverAuth --flag ikeIntermediate --outform pem > certs/client2Cert.pem
After successful generation of CA and client certificates, next step is to change the ipsec.conf and ipsec.secrets configuration. Please consult with strongswan documentation for more detail about the changes in ipsec.conf and the secrets file.
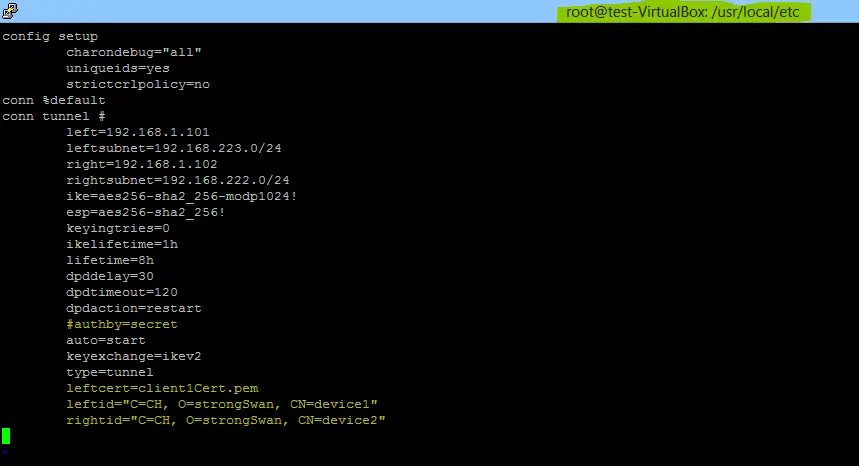
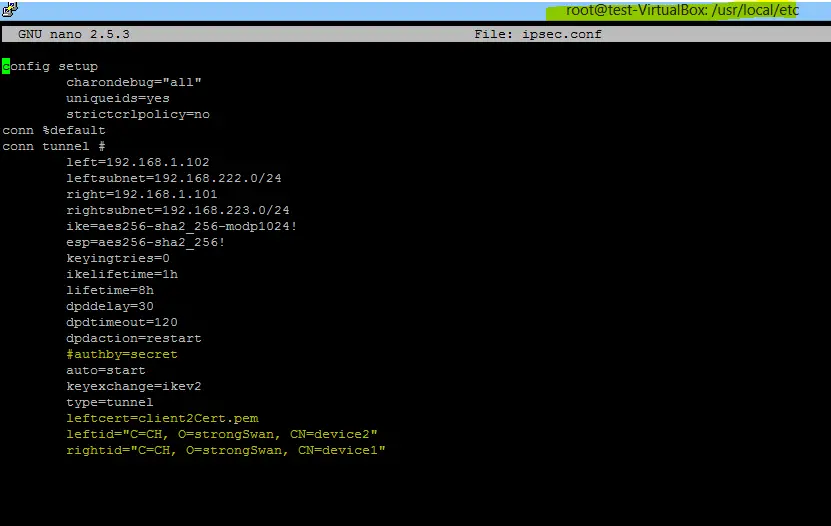
The content of ipsec.conf & ipsec.secrets for A side is given below.
config setup
        charondebug="all"
        uniqueids=yes
        strictcrlpolicy=no
conn %default
conn tunnel #
        left=192.168.1.101
        leftsubnet=192.168.223.0/24
        right=192.168.1.102
        rightsubnet=192.168.222.0/24
        ike=aes256-sha2_256-modp1024!
        esp=aes256-sha2_256!
        keyingtries=0
        ikelifetime=1h
        lifetime=8h
        dpddelay=30
        dpdtimeout=120
        dpdaction=restart
        #authby=secret
        auto=start
        keyexchange=ikev2
        type=tunnel
        leftcert=client1Cert.pem
        leftid="C=CH, O=strongSwan, CN=device1"
        rightid="C=CH, O=strongSwan, CN=device2"
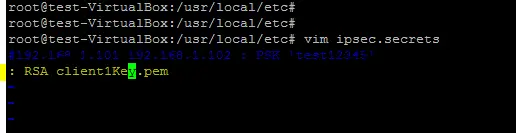
#192.168.1.101 192.168.1.102 : PSK 'test12345'
: RSA client1Key.pem
The configuration of the B side is also given below.
config setup
        charondebug="all"
        uniqueids=yes
        strictcrlpolicy=no
conn %default
conn tunnel #
        left=192.168.1.102
        leftsubnet=192.168.222.0/24
        right=192.168.1.101
        rightsubnet=192.168.223.0/24
        ike=aes256-sha2_256-modp1024!
        esp=aes256-sha2_256!
        keyingtries=0
        ikelifetime=1h
        lifetime=8h
        dpddelay=30
        dpdtimeout=120
        dpdaction=restart
        #authby=secret
        auto=start
        keyexchange=ikev2
        type=tunnel
        leftcert=client2Cert.pem
        leftid="C=CH, O=strongSwan, CN=device2"
        rightid="C=CH, O=strongSwan, CN=device1"
#192.168.1.102 192.168.1.101 : PSK 'test12345'
: RSA client2Key.pem

Run ipsec restart command to apply above changes and check the status of tunnel created using certificates.
ipsec statusall # at side A
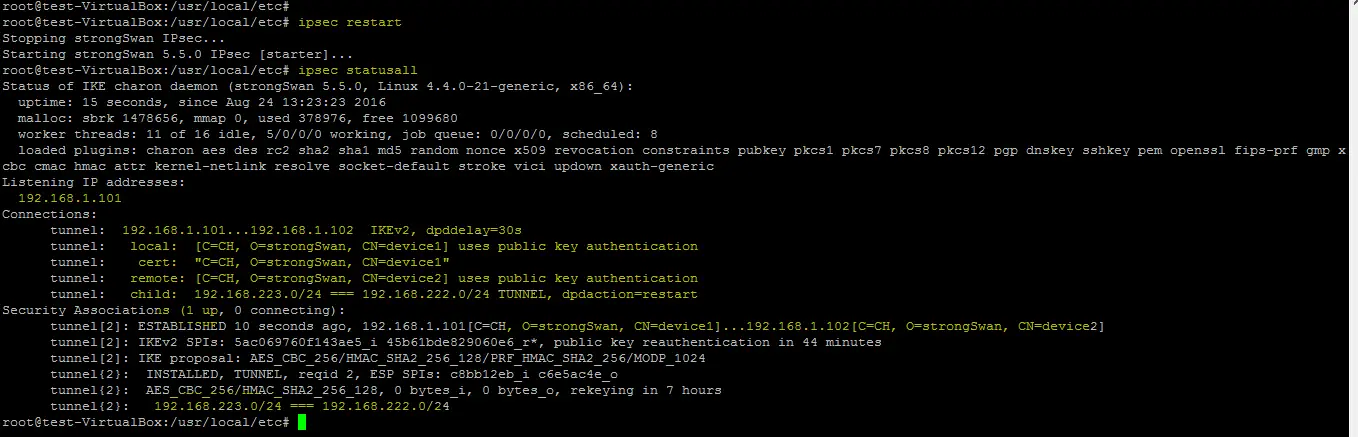
ipsec statusall # at side B
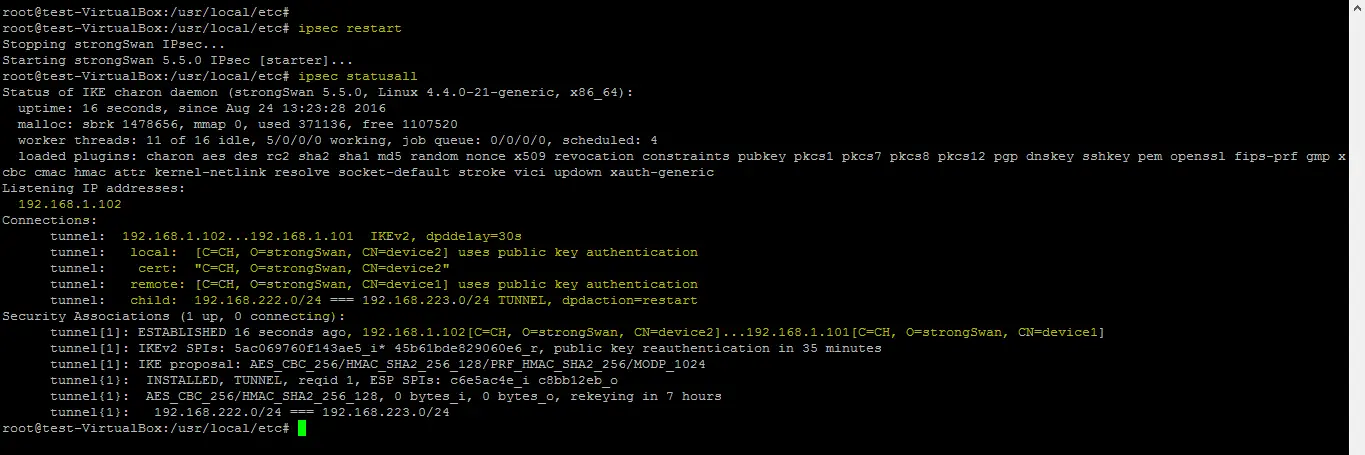
Finally, the certificate based VPN has been successfully created by using the strongswan tool.

