How to Install and Secure MongoDB on Ubuntu 24.04
This tutorial exists for these OS versions
- Ubuntu 24.04 (Noble Numbat)
- Ubuntu 22.04 (Jammy Jellyfish)
- Ubuntu 20.04 (Focal Fossa)
- Ubuntu 18.04 (Bionic Beaver)
- Ubuntu 16.04 (Xenial Xerus)
- Ubuntu 14.04 LTS (Trusty Tahr)
On this page
MongoDB is an open-source, cross-platform, and distributed NoSQL (non-SQL or Non-Relational) database system. Instead of storing data in tables like traditional SQL databases, MongoDB uses flexible documents to store various data forms. MongoDB uses the binary JSON format, BSON, for storing data.
MongoDB is a distributed NoSQL database with built-in high availability, automatic failover and data redundancy, and horizontal scaling via sharding across distributed clusters. It supports multi-region geographic deployment and provides a query API that supports CRUD operations (read and write), data aggregation pipeline, text search, and geospatial queries.
In this guide, we'll show you how to install MongoDB on an Ubuntu 24.04 server. You'll be preparing your Ubuntu server, adding the MongoDB repository, installing the MongoDB server, creating an administrator for MongoDB, and then enabling MongoDB authentication. Lastly, you'll learn how to make a user and database in MongoDB using the 'mongosh' shell.
Prerequisites
Before you begin, make sure you have the following:
- An Ubuntu 24.04 server
- A non-root user with administrator privileges
Preparing System
Before installing MongoDB on your Ubuntu system, make sure you've configured your system. In this case, you'll be configuring the Ubuntu server with the following:
- Disable Transparent Huge Pages via systemd
- Increasing limits for default MongoDB 'mongod' user
- Setting up max fs.file-max and enable swappiness through the '/etc/systctl.conf' file
Disable Transparent Huge Pages (THP)
To disable THP on your system, you'll be creating a new systemd service file that will be executed automatically at every boot or startup.
Create a new service file '/etc/systemd/system/disable-thp.service' with the 'nano' editor.
sudo nano /etc/systemd/system/disable-thp.service
Insert the following configuration to disable THP via service.
[Unit]
Description=Disable Transparent Huge Pages (THP)

[Service]
Type=simple
ExecStart=/bin/sh -c "echo 'never' > /sys/kernel/mm/transparent_hugepage/enabled && echo 'never' > /sys/kernel/mm/transparent_hugepage/defrag"

[Install]
WantedBy=multi-user.target
Save the file and exit the editor.
Now run the 'systemctl' command below to reload the systemd manager, start and enable the 'disable-thp' service. With this, THP will be disabled at system startup.
sudo systemctl daemon-reload
sudo systemctl enable --now disable-thp.service
Setting up Ulimits
After you've disabled THP, you need to increase the default max file and processes for user 'mongod' to at least '64000'.
Create a new file '/etc/security/limits.d/mongodb.conf' with the following 'nano' editor command.
sudo nano /etc/security/limits.d/mongodb.conf
Insert the following configuration to increase the max file open and processes to '64000'.
mongod soft nproc 64000
mongod hard nproc 64000
mongod soft nofile 64000
mongod hard nofile 64000
Save the file and exit the editor.
Setup swappiness and fs.file-max
Lastly, you'll need to increase the default 'fs.file-max' and enable swappiness for MongoDB. To do that, you'll be editing the '/etc/sysctl.conf' file.
Open the file '/etc/sysctl.conf' with the 'nano' editor command.
sudo nano /etc/sysctl.conf
Insert the following configuration to set up fs.file-max and enable swappiness.
fs.file-max = 2097152
vm.max_map_count = 262144
vm.swappiness = 1
When finished, save the file and exit the editor.
Now run the 'sysctl' command below to apply your changes without reboot.
sudo sysctl -p

Installing MongoDB with APT package manager
Now that you've configured your Ubuntu system, you're ready to install MongoDB. In this section, you'll be installing the latest version of MongoDB 8.0 from the official MongoDB repository.
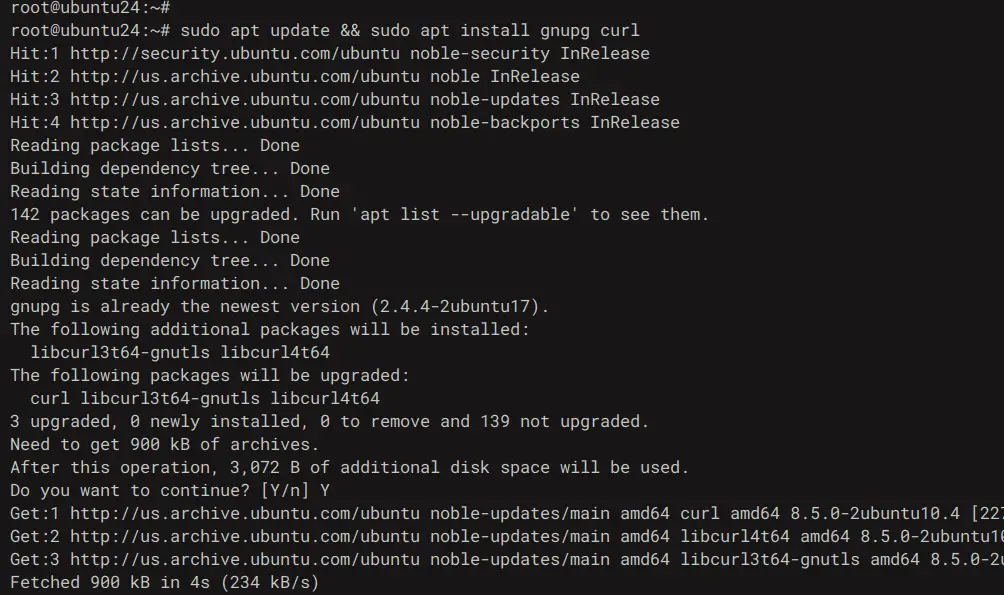
First, run the 'apt' command below to update your Ubuntu package index and install the 'gnupg' and 'curl' packages. Enter 'Y' to confirm the installation.
sudo apt update && sudo apt install gnupg curl
Now run the following command to add the GPG key and repository for MongoDB. In this example, you'll be installing MongoDB 8 on your Ubuntu 24.04 server.
curl -fsSL https://www.mongodb.org/static/pgp/server-8.0.asc | \
sudo gpg -o /usr/share/keyrings/mongodb-server-8.0.gpg \
--dearmor
echo "deb [ arch=amd64,arm64 signed-by=/usr/share/keyrings/mongodb-server-8.0.gpg ] https://repo.mongodb.org/apt/ubuntu noble/mongodb-org/8.0 multiverse" | sudo tee /etc/apt/sources.list.d/mongodb-org-8.0.list

Next, run the 'apt' command below to update your package index and install the 'mongodb-org' package to your system. Input 'Y' to proceed with the installation.
sudo apt update && sudo apt install mongodb-org

After the installation is complete, execute the 'systemctl' command below to reload the systemd manager. The 'mongod' service is added to your Ubuntu system.
sudo systemctl daemon-reload
Lastly, run the command below to start, enable, and verify the MongoDB 'mongod' service. You'll see that MongoDB is running on your system.
sudo systemctl enable --now mongod
sudo systemctl status mongod

Securing MongoDB Server
After installing MongoDB, you'll be secure the MongoDB server installation with the following:
- Creating a new admin user for MongoDB using the 'mongosh' shell
- Enable MongoDB authentication by editing the configuration '/etc/mongod.conf' file
Creating MongoDB admin user
In this section, you'll be creating a new MongoDB administrator user via the 'mongosh' shell. The 'mongosh' shell is a client command line for interacting with the MongoDB server, it's like 'mysql' for MySQL/MariaDB and 'psql' for PostgreSQL.
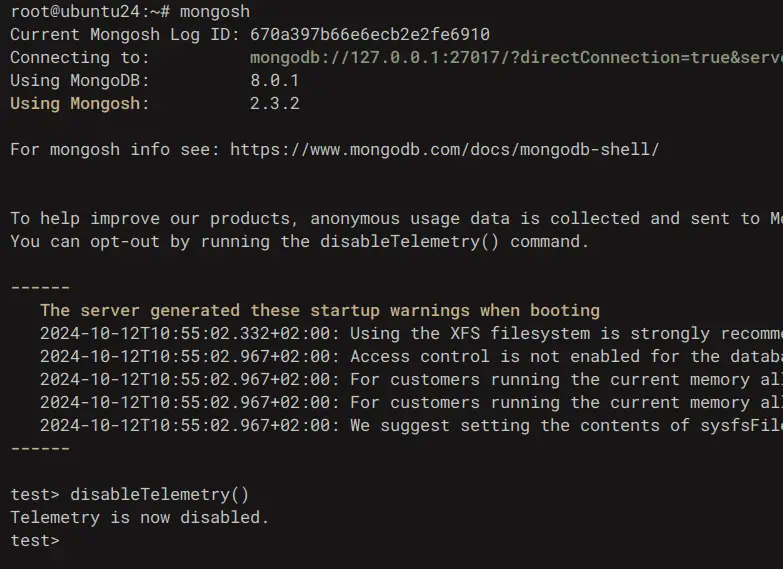
To create an admin user, log in to the MongoDB server with the 'mongosh' shell command below.
mongosh
Now run the following query to disable MongoDB telemetry.
disableTelemetry()
Next, go to the database 'admin' and run the following queries to create a new admin user for MongoDB. In this example, you'll be creating a new user 'myAdmin', then enter your new password when prompted.
use admin
db.createUser(
{
user: "myAdmin",
pwd: passwordPrompt(),
roles: [
{ role: "userAdminAnyDatabase", db: "admin" },
{ role: "readWriteAnyDatabase", db: "admin" }
]
}
)
Now type 'quit()' to exit from the MongoDB shell.

Enable MongoDB authentication
Now that you've created a MongoDB admin user, you're ready to enable MongoDB authentication through the '/etc/mongod.conf' file.
Open the default MongoDB server configuration '/etc/mongod.conf' with the following 'nano' editor command.
sudo nano /etc/mongod.conf
Add the following lines to enable authentication in MongoDB.
security:
 authorization: enabled
When finished, save the file and exit the editor.
Now run the 'systemctl' command below to restart the MongoDB server and apply your changes. With this, the MongoDB authentication will be enabled.
sudo systemctl restart mongod
Test MongoDB authentication
Now that you've secured the MongoDB server installation, let's verify your configuration by logging in to MongoDB with the 'mongosh' shell and new admin user and password.
Log in to the MongoDB server as user 'myAdmin' with the 'mongosh' command below. Enter your password when prompted.
mongosh --port 27017 --authenticationDatabase \
"admin" -u "myAdmin" -p

Once logged in, run the query below to check your connection status. You should've logged in to the MongoDB server with the 'myAdmin' user.
db.runCommand({connectionStatus : 1})
Now type 'quit()' to exit from the MongoDB server.

Creating a database and user in MongoDB
In this section, you'll learn how to create a new database and user in MongoDB using the 'mongosh' shell. So make sure you've logged in to the MongoDB as an administrator user.
First, run the query below to move to the database 'mydb'.
use mydb
Now run the following query to create a new user 'myUser' and allow read and write access to the database 'mydb'. Enter your password when asked.
db.createUser(
{
user: "myUser",
pwd: passwordPrompt(), // or cleartext password
roles: [ { role: "readWrite", db: "mydb" },
{ role: "read", db: "reporting" } ]
}
)
Type 'quit()' to exit from the MongoDB server.

Now run the 'mongosh' command below to log in as the 'myUser' to the database 'mydb'. Enter your password when prompted.
mongosh --port 27017 --authenticationDatabase \
"mydb" -u "myUser" -p

Once logged in, check your connection status using the following query.
db.runCommand({connectionStatus : 1})
You can see below that you've connected to the MongoDB server with the user 'myUser' and privileges to the database 'mydb'.

Conclusion
Congratulations! You've completed the installation of the MongoDB server on the Ubuntu 24.04 server. You've also created an administrator user and secured MongoDB installation. Then, you've learned how to use 'mongosh' to connect to the MongoDB server and basic queries for managing users and databases in MongoDB.

