Linux ss Command Tutorial for Beginners (8 Examples)
On this page
- Linux ss command
- Q1. How to use the ss command?
- Q2. How to make ss suppress header line?
- Q3. How to make ss display both listening and non-listening sockets?
- Q4. How to make ss show processes using sockets?
- Q5. How to make ss produce summary info?
- Q6. How to make ss display only IPv4 or IPv6 sockets?
- Q7. How to make ss only display TCP or UDP sockets?
- Conclusion
When it comes to accessing socket related information through the command line in Linux, the first tool that comes to mind is netstat. However, there's another utility that can do this work for you.
It's called ss. In this tutorial, we will discuss the basics of this tool using some easy to understand examples. But before we do that, it's worth mentioning that all cases here have been tested on an Ubuntu 18.04 LTS machine.
Linux ss command
The ss command in Linux allows you to investigate sockets. Following is its syntax:
ss [options] [ FILTER ]
And here's what the tool's man page says about it:
ss is used to dump socket statistics. It allows showing information similar to netstat.
It can display more TCP and state information than other tools.
Following are some Q&A-styled examples that should give you a better idea of how the ss command works.
Q1. How to use the ss command?
In its very basic form, you can use the ss command by executing 'ss' sans any option.
ss
Following is the output the command produced in my case:
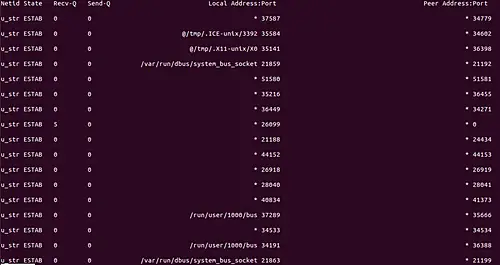
You'll notice that ss displays sockets with established connections in its default output.
Q2. How to make ss suppress header line?
Suppression of headers can be done using the -H command line option.
ss -H
The following screenshot shows this command line option in action:
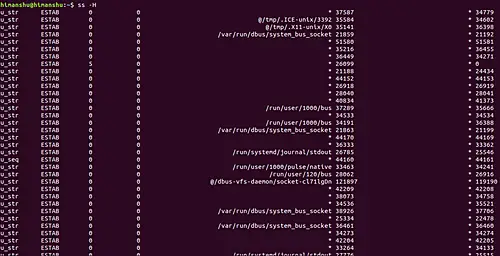
So you can see the header line is missing in this case.
Q3. How to make ss display both listening and non-listening sockets?
This you can do using the -a command line option.
ss -a
Note that listening sockets are omitted by default, so using -a makes ss include them in the output. However, if you want ss to only display listening sockets, use the -l command line option.
ss -l
Q4. How to make ss show processes using sockets?
If you want the ss command to show process information along with the other info it already produces in output, then use the -p command line option.
ss -p
The following screenshot shows the output in my case:
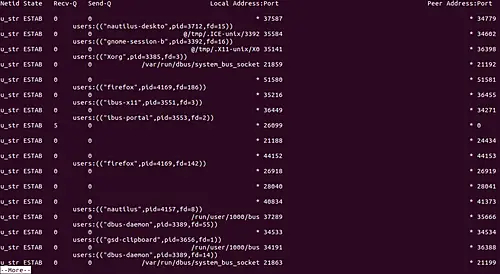
So you can see that process information is being displayed in the output.
Q5. How to make ss produce summary info?
If you don't want to see the output the ss command produces by default. Then there's an option through which you can ask ss to provide a small summary of the information it parses.
This summary can be produced using the -s command line option:
ss -s
For example, the following is the summary provided in my case:
Total: 1334 (kernel 0)
TCP:   41 (estab 35, closed 3, orphaned 0, synrecv 0, timewait 3/0), ports 0

Transport Total     IP        IPv6
*      0         -         -
RAW      1         0         1
UDP      7         5         2
TCP      38        37        1
INET      46        42        4
FRAG      0         0         0
Q6. How to make ss display only IPv4 or IPv6 sockets?
This can be done using the -4 and -6 options.
For example, to make ss only show IPv4 sockets, run the following command:
ss -4
Similarly for IPv6, execute the following command:
ss -6
Q7. How to make ss only display TCP or UDP sockets?
There are different command line options that you can use here: -t for TCP and -u for UDP.
Following is a useful excerpt from the ss command man page.
       -t, --tcp
              Display TCP sockets.

       -u, --udp
              Display UDP sockets.

       -d, --dccp
              Display DCCP sockets.

       -w, --raw
              Display RAW sockets.

       -x, --unix
              Display Unix domain sockets (alias for -f unix).

       -S, --sctp
              Display SCTP sockets.

       --vsock
              Display vsock sockets (alias for -f vsock).
Conclusion
The ss command is a handy tool if your Linux work involves networking. Here, in this tutorial, we have discussed some command line options ss offers. Once you're done practicing these, head to the tool's man page to learn more.

