Linux Locate Command for Beginners (8 Examples)
On this page
- 1. Install the locate command
- 2. How to use locate command in Linux
- 3. How locate command works, or, why is it so fast
- 4. How to make locate print the number or count of matching entries in the output
- 5. How to force locate to print only those entries that correspond to existing files
- 6. How to make locate ignore case distinctions
- 7. How to separate output entries with ASCII NUL
- 8. How to view information about the locate database
- 9. How to search for an exact filename using locate
- Conclusion
The locate command on Linux is a powerful utility used for quickly finding files and directories based on their names. It leverages a pre-built database, which is usually updated periodically by the updatedb command, to perform rapid searches, making it significantly faster than other search tools like find. When a user issues the locate command followed by a search pattern, it scans this database rather than the filesystem itself, providing results almost instantaneously. This makes locate particularly useful for system administrators and users who need to quickly locate files without the overhead of a live filesystem scan. However, the accuracy of locate depends on how frequently the database is updated, as it might not reflect the most recent changes in the filesystem until the next update.
In this tutorial, we will explain the locate command with easy-to-understand examples. Please note that all instructions/examples mentioned here have been tested on Ubuntu 24.04.
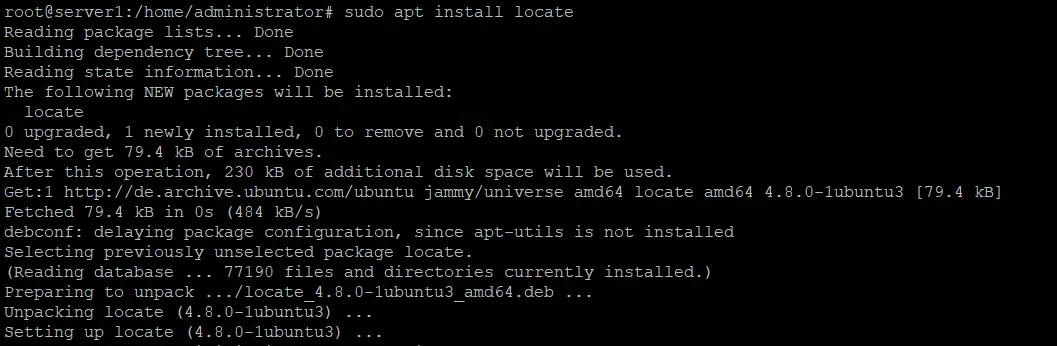
1. Install the locate command
The locate command does not come preinstalled on Ubuntu and Debian Linux. You can install it using this command:
sudo apt install locate
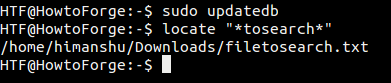
Locate does its file search based on a precompiled filename database, which makes it much faster than e.g. the find command when doing subsequent searches. But before we can use it, we will have to create and update the file database. Run the following command to create the locate database:
sudo updatedb
Now we are ready to start using locate.
2. How to use locate command in Linux
The locate command is very easy to use. You just need to pass the filename you want to search.
locate [filename]
For example, if want to search for all filenames that have the string 'dir2' in them, then I can do that using locate in the following way:

Note: The command 'locate dir2' (no asterisks) will also do as locate implicitly replaces the name you pass (say NAME) with *NAME*.
3. How locate command works, or, why is it so fast
Locating is so fast because it doesn't read the file system for the searched file or directory name. It refers to a database (prepared by the command updatedb) to find what the user is looking for and, based on that search, produces its output.
While this is a good approach, it has its share of drawbacks. The main issue is that after every new file or directory is created on the system, you need to update the tool's database for it to work correctly. Otherwise, the command will not be able to find files/directories that are created after the last database update.
For example, if I try finding files with names containing 'tosearch' string in the 'Downloads' directory of my system, the find command produces one result in the output:

But when I try performing the same search using the locate command, it produces no output.
![]()
This means that the database locate searches in wasn't updated after the file was created on the system. So, let's update the database, which can be done using the updatedb command. Here's how you do that:
sudo updatedb
And now when I run the same locate command again, it shows files in the output:
Similarly, after a file or directory has been removed, you need to make sure that the locate database has been updated, as otherwise, the command will keep showing the file in its output when searched.
4. How to make locate print the number or count of matching entries in the output
As we have seen, the locate command produces the matched files' names and their complete or absolute paths in the output. But if you want, you can use the tool to suppress all this information and just print the number or count of matching entries instead. This can be done using the -c command-line option.

5. How to force locate to print only those entries that correspond to existing files
As we already discussed earlier in this article, if a file is removed from the system, then until you update the locate database again, the command will keep showing that filename in output. For this specific case, however, you can skip updating the database, and still have correct results in output using the -e command line option.
For example, I removed the 'filetosearch.txt' file from my system. This was confirmed by the find command, which was no longer able to search the file:

But when I performed the same operation using locate, it was still showing the file in the output:

And we know why - because locate's database wasn't updated after the file was deleted. However, using the -e option did the trick:
![]()
Here's what the locate man page says about this option: "Print only entries that refer to files existing at the time locate is run."
6. How to make locate ignore case distinctions
By default, the search operation the locate command performs is case sensitive. But you can force the tool to ignore case distinctions using the -i command line option.
For example, I have two files on my system, named 'newfiletosearch.txt' and 'NEWFILETOSEARCH.txt'. So, as you can see, the filenames are the same, just that their cases are different. If you ask locate to search for, let's say, "*tosearch*", then it'll only show the lowercase name in its output:

But using the -i command-line option forces the command to ignore the case, and both filenames are produced in the output:

7. How to separate output entries with ASCII NUL
By default, the output entries that the locate command produces are separated using newline (\n) character. But if you want, you can change the separator, and have the ASCII NUL instead of a newline. This can be done using the -0 command line option.
For example, I've executed the same command we used in the last section above, but added the -0 command-line option:

So you can see that the newline separator is no longer there - it has been replaced with NUL.
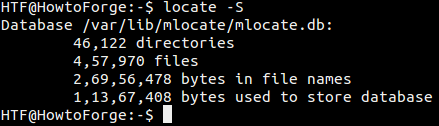
8. How to view information about the locate database
In case you want to know which database locate is using, as well as other statistics about the database, use the -S command-line option.
9. How to search for an exact filename using locate
By default, when you search for a filename using locate, then the name you pass - say NAME - is implicitly replaced by *NAME*. For example, if I search for a filename 'testfile', then all names matching *testfile* are produced in the output:

But what if the requirement is to search files with names exactly matching 'testfile'? Well, in this case, you'll have to use regular expressions, which can be enabled using the -r command-line option. So, here's how you can search for just 'testfile' using regular expressions:
locate -r /testfile$

If you are new to regular expressions, head here. To switch to a different directory, you can use the cd command of the shell.
Conclusion
Locate offers a lot more options, but the ones we discussed here should be enough to give you a basic idea about the command line utility, as well as to get you started. We would advise you to try all the options described here on your Linux machine, and then switch over to others you can find on the tool's man page.

