Linux df Command Tutorial for Beginners (8 Examples)
On this page
- Linux df command
- Q1. How to make df display disk usage of file system containing a specific file?
- Q2. How to make df display disk usage of all file systems?
- Q3. How to make df display usage information in human-readable form?
- Q4. How to make df display inode information instead of block usage?
- Q5. How to make df produce total of all block-related info?
- Q6. How to make df print file system type in output?
- Q7. How to limit df output to file systems of particular type?
- Q8. How make df exclude a particular file system type?
- Conclusion
Sometimes, you might want to know how much space is consumed (and how much is free) on a particular file system on your Linux machine. There a specific command - dubbed df - that does this for you. In this tutorial, we will discuss the basics of this command, as well as some of the major features it offers.
But before we do that, it's worth mentioning that all examples and instructions mentioned in the article have been tested on Ubuntu 16.04 LTS.
Linux df command
Here's the syntax of this tool:
df [OPTION]... [FILE]...
And here's how the man page describes the command:
df displays the amount of disk space available on the file system containing each file name
argument. If no file name is given, the space available on all currently mounted file systems
is shown.
The following Q&A-type examples should give you a better idea on how this command line utility works.
Q1. How to make df display disk usage of file system containing a specific file?
Suppose you have a file (say, file1), and the requirement is to display the available or used space on the file system that contains this file. This is how you can do this:
df <filename>
Here's an example:

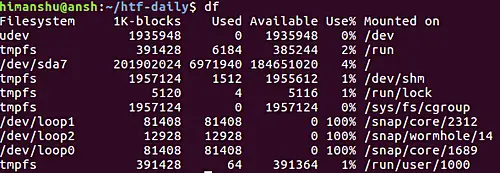
Q2. How to make df display disk usage of all file systems?
In case you want the tool to display disk usage information for all file systems, all you need to do is to run the following command:
df
Here's the output of the command in my case:
Q3. How to make df display usage information in human-readable form?
If the requirement is to make df display disk usage information in human-readable form, then you can use the -h option in that case.
df -h
Here's an example:
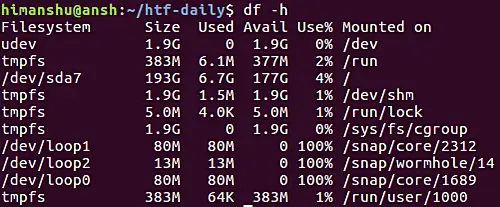
Observe the letters 'G' and 'M' that represent Gigabytes and Megabytes, making it easy for users to read these size figures.
Q4. How to make df display inode information instead of block usage?
If instead of block usage, you want df to display inode information in output, then this can be done using the -i command line option.
df -i
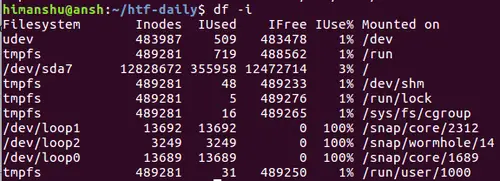
Observe that the second, third, and fourth columns now display inode-related figures.
Q5. How to make df produce total of all block-related info?
To produce total for size, used, and avail columns, use the --total option.
df --total
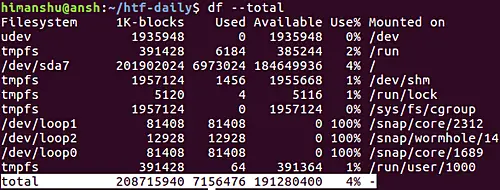
Observe that a new row gets added at the bottom that displays total values.
Q6. How to make df print file system type in output?
While df produces file system name by default, you can force it to display the corresponding type as well, something which can be done through the -T option.
df -T
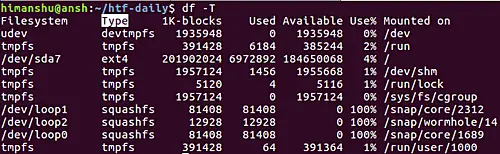
A new, second column (Type) is where the type-related information is displayed
Q7. How to limit df output to file systems of particular type?
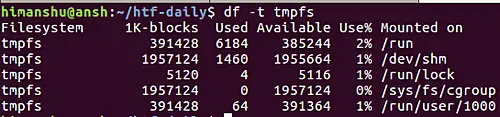
You can also limit the output of the df command to a particular type of filesystems. This can be done using the -t option, which requires you to enter the file system name as its value.
df -t <filesystem-name>
Following is an example:
Q8. How make df exclude a particular file system type?
Similar to the way you include, you can also make df exclude a particular type of file system in its output. The command line option for this is -x.
df -x <filesystem-name>
Following is an example:
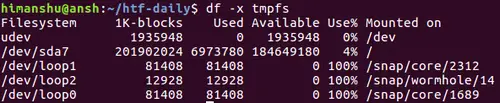
So you can see that no entry for the tmpfs file system was produced in the output.
Conclusion
Clearly, df isn't a difficult tool to understand and use, primarily because majority of its command line options are targeted at customizing the way the tool's output is produced. We've covered many of the important options here. Once you are done practicing them, head to the command's man page to know more about it.

