How to Setup Bareos Backup Solution on Ubuntu 18.04 LTS
Bareos stands for "Backup Archiving Recovery Open Sourced" is a free and open-source backup platform forked from Bacula.org. It is a cross-platform software that can be used for backup, archiving and recovery of data for all operating systems. It is made from three components including, Bareos Director, Storage Daemons and the File Daemons. A brief explanation of each component is shown below:
The director is the central control unit for all daemons and is responsible for managing databases, connected clients and configuration of plugins. The File Daemon is responsible for managing backup and restores processes. The Storage daemon receives data from one or more File Daemons and stores the data on the configured backup medium.
Features
- Support native NDMP.
- Support client-quota.
- Support for hardware encryption with LTO.
- Bandwidth limitation.
- Fileset shadowing deduplication.
- Support VMware plugin to backup VMware disk image.
- Support LDAP Plugin to backup LDAP directories
- Gluster and Ceph plugins to backup cloud storages
If you are looking for a simpler way to manage your enterprise backups than Bareos is the best choice for you.
In this tutorial, we will show you how to install Bareos and Bareos WebUI on Ubuntu 18.04 server.
Prerequisites
- A server running Ubuntu 18.04.
- A root password is configured on your server.
Getting Started
Before starting, it is recommended to update your system's package repository to the latest version. You can do it using the following command:
apt-get update -y
 apt-get upgrade -y
Once you are finished, you can proceed to the next step.
Install Bareos
By default, the Bareos is not available in the Ubuntu 18.04 default repository. So you will need to add the bareos repository to your system.
You can add it with the following command:
echo "deb http://download.bareos.org/bareos/release/latest/xUbuntu_18.04 /" > /etc/apt/sources.list.d/bareos.list
Next, download and add the GPG key with the following command:
wget -q http://download.bareos.org/bareos/release/latest/xUbuntu_18.04/Release.key -O- | apt-key add -
Next, update the repository with the following command:
apt-get update -y
Once the repository is updated, install the Bareos with MariaDB server by running the following command:
apt-get install mariadb-server bareos bareos-database-mysql -y
During the installation, you will be asked to select the mail server configuration type as shown in the following screen:
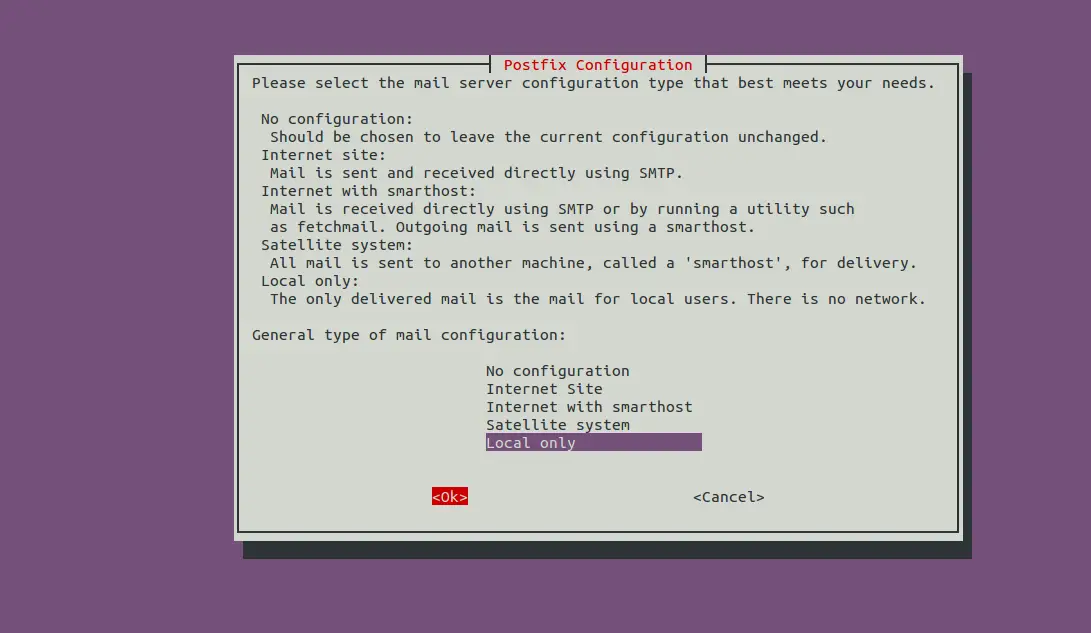
Select Local Only and hit Enter to continue. You will be asked to provide your system mail name as shown in the following screen:

Provide your system mail name and hit Enter to continue. You will be asked to use dbconfig to configure Bareos database as shown in the following screen:
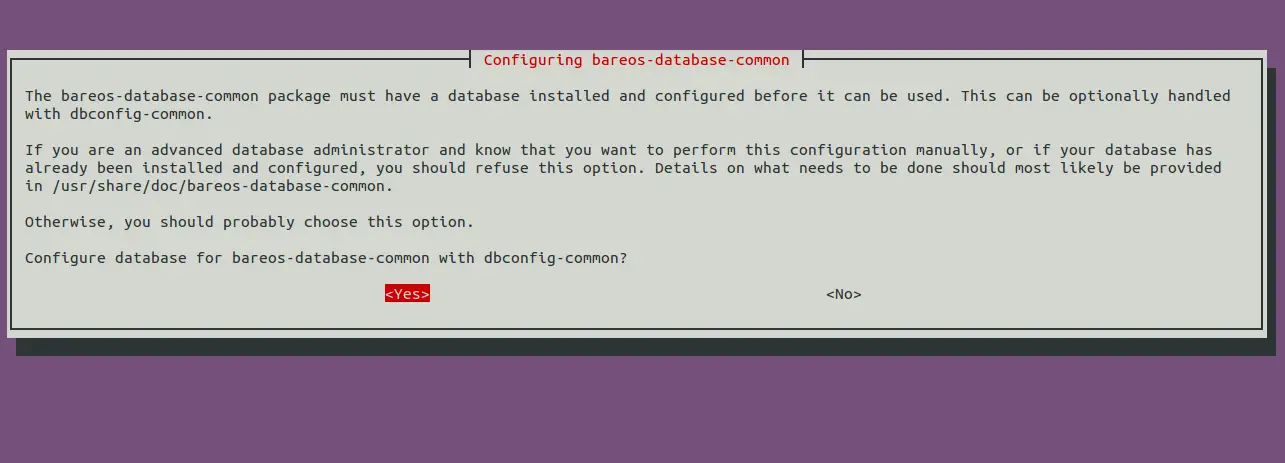
Select Yes and hit Enter to continue. You will be asked to provide MySQL password for Bareos database as shown below:
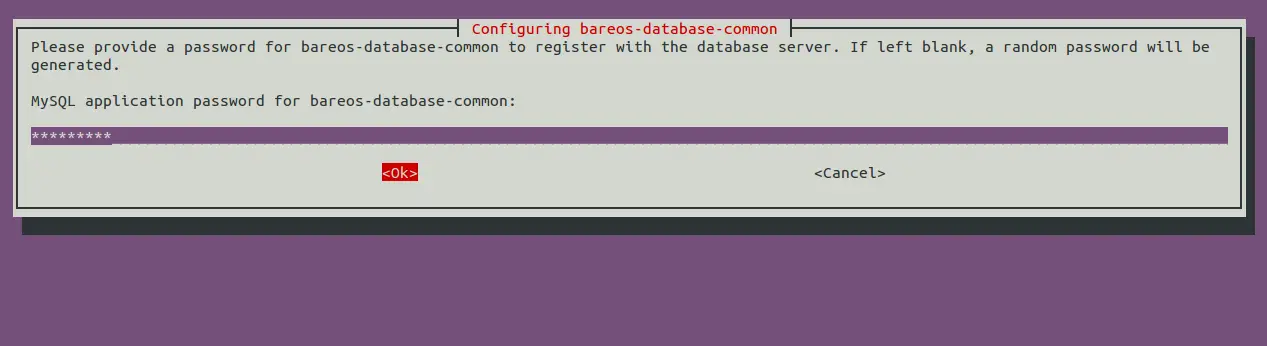
Provide your desired password and hit Enter to continue. You will be asked to confirm the password as shown below:
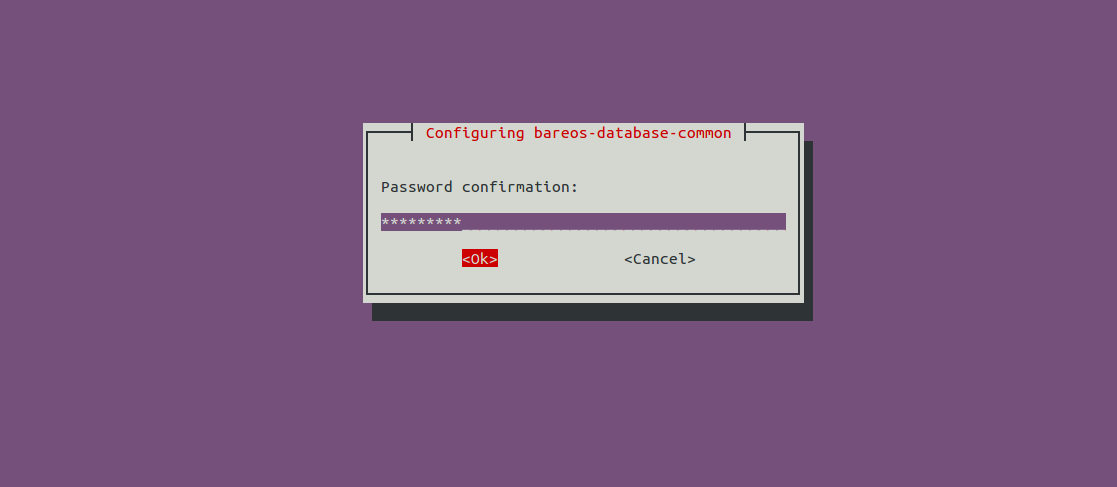
Confirm the password and hit Enter to finish the installation.
By default, all bareos configurations are stored in the /etc/bareos/ directory. You can list them with the following command:
tree /etc/bareos/
You should see all bareos files and directories in the following output:
/etc/bareos/
??? bareos-dir.d
?   ??? catalog
?   ?   ??? MyCatalog.conf
?   ??? client
?   ?   ??? bareos-fd.conf
?   ??? console
?   ?   ??? bareos-mon.conf
?   ??? director
?   ?   ??? bareos-dir.conf
?   ??? fileset
?   ?   ??? Catalog.conf
?   ?   ??? LinuxAll.conf
?   ?   ??? SelfTest.conf
?   ?   ??? Windows All Drives.conf
?   ??? job
?   ?   ??? backup-bareos-fd.conf
?   ?   ??? BackupCatalog.conf
?   ?   ??? RestoreFiles.conf
?   ??? jobdefs
?   ?   ??? DefaultJob.conf
?   ??? messages
?   ?   ??? Daemon.conf
?   ?   ??? Standard.conf
?   ??? pool
?   ?   ??? Differential.conf
?   ?   ??? Full.conf
?   ?   ??? Incremental.conf
?   ?   ??? Scratch.conf
?   ??? profile
?   ?   ??? operator.conf
?   ??? schedule
?   ?   ??? WeeklyCycleAfterBackup.conf
?   ?   ??? WeeklyCycle.conf
?   ??? storage
?   ?   ??? File.conf
?   ??? user
??? bareos-dir-export
?   ??? client
??? bareos-fd.d
?   ??? client
?   ?   ??? myself.conf
?   ??? director
?   ?   ??? bareos-dir.conf
?   ?   ??? bareos-mon.conf
?   ??? messages
?       ??? Standard.conf
??? bareos-sd.d
?   ??? device
?   ?   ??? FileStorage.conf
?   ??? director
?   ?   ??? bareos-dir.conf
?   ?   ??? bareos-mon.conf
?   ??? messages
?   ?   ??? Standard.conf
?   ??? storage
?       ??? bareos-sd.conf
??? bconsole.conf
Once you are finished, you can proceed to the next step.
Install Bareos Web Interface.
Bareos also provides WebUI to monitor and manage Bareos. It is a free software tool written in PHP and based on Zend Framework. It is intended to monitor and manage Bareos over the web. You can easily perform backup and restore operations with the Bareos dashboard. You can install it by running the following command:
apt-get install bareos-webui -y
This will install the Apache webserver, PHP and other PHP extensions in your system. Once the installation has been completed, you will need to reload the Apache service to apply the changes. You can restart it with the following command:
systemctl reload apache2
Next, start all the Bareos services with the following command:
systemctl start bareos-dir
 systemctl start bareos-sd
 systemctl start bareos-fd
You can also see the status of all services with the following command:
systemctl status bareos-dir bareos-sd bareos-fd
You should see the following output:
? bareos-director.service - Bareos Director Daemon service
   Loaded: loaded (/lib/systemd/system/bareos-director.service; enabled; vendor preset: enabled)
   Active: active (running) since Sat 2020-04-04 07:21:03 UTC; 7s ago
     Docs: man:bareos-dir(8)
  Process: 19182 ExecStart=/usr/sbin/bareos-dir (code=exited, status=0/SUCCESS)
  Process: 19171 ExecStartPre=/usr/sbin/bareos-dir -t -f (code=exited, status=0/SUCCESS)
 Main PID: 19189 (bareos-dir)
    Tasks: 4 (limit: 2359)
   CGroup: /system.slice/bareos-director.service
           ??19189 /usr/sbin/bareos-dir

Apr 04 07:21:03 ubuntu1804 systemd[1]: Starting Bareos Director Daemon service...
Apr 04 07:21:03 ubuntu1804 systemd[1]: bareos-director.service: Can't open PID file /var/lib/bareos/bareos-dir.9101.pid (yet?) after start: No
Apr 04 07:21:03 ubuntu1804 systemd[1]: Started Bareos Director Daemon service.

? bareos-storage.service - Bareos Storage Daemon service
   Loaded: loaded (/lib/systemd/system/bareos-storage.service; enabled; vendor preset: enabled)
   Active: active (running) since Sat 2020-04-04 07:21:03 UTC; 7s ago
     Docs: man:bareos-sd(8)
  Process: 19172 ExecStart=/usr/sbin/bareos-sd (code=exited, status=0/SUCCESS)
 Main PID: 19181 (bareos-sd)
    Tasks: 2 (limit: 2359)
   CGroup: /system.slice/bareos-storage.service
           ??19181 /usr/sbin/bareos-sd

Apr 04 07:21:03 ubuntu1804 systemd[1]: Starting Bareos Storage Daemon service...
Apr 04 07:21:03 ubuntu1804 systemd[1]: bareos-storage.service: Can't open PID file /var/lib/bareos/bareos-sd.9103.pid (yet?) after start: No su
Apr 04 07:21:03 ubuntu1804 systemd[1]: Started Bareos Storage Daemon service.

? bareos-filedaemon.service - Bareos File Daemon service
   Loaded: loaded (/lib/systemd/system/bareos-filedaemon.service; enabled; vendor preset: enabled)
   Active: active (running) since Sat 2020-04-04 07:18:11 UTC; 2min 58s ago
     Docs: man:bareos-fd(8)
 Main PID: 3469 (bareos-fd)
    Tasks: 2 (limit: 2359)
   CGroup: /system.slice/bareos-filedaemon.service
           ??3469 /usr/sbin/bareos-fd
Once you are finished, you can proceed to the next step.
Create Bareos Administrative User
Next, you will need to create an admin user to Access the WebUI.
To do so, access the Bareos console with the following command:
bconsole
Once you are connected, you should get the following output:
 Connecting to Director localhost:9101
  Encryption: ECDHE-PSK-CHACHA20-POLY1305
 1000 OK: bareos-dir Version: 18.2.5 (30 January 2019)
 bareos.org build binary
 bareos.org binaries are UNSUPPORTED by bareos.com.
 Get official binaries and vendor support on https://www.bareos.com
 You are connected using the default console
 Enter a period to cancel a command.
Next, run the following command to create an admin user and set a password for it:
configure add console name=admin password=password profile=webui-admin
You should get the following output:
Created resource config file "/etc/bareos/bareos-dir.d/console/admin.conf":
 Console {
   Name = admin
   Password = password
   Profile = webui-admin
 }
Next, exit from the Bareos console with the following command:
exit
Next, you will also need to disable TLS in Bareos. You can do it by editing admin.conf file:
nano /etc/bareos/bareos-dir.d/console/admin.conf
Add the line "TLS Enable = No" as shown below:
Console {
  Name = admin
  Password = password
  Profile = webui-admin
TLS Enable = No
}
Save and close the file when you are finished. Then, restart all the Bareos services to apply the changes:
systemctl restart bareos-dir
 systemctl restart bareos-sd
 systemctl restart bareos-fd
Once you are finished, you can proceed to the next step.
Access the Bareos Web Interface
At this point, the bareos and bareos WebUI is installed and configured. It's time to access their WebUI.
Open your web browser and type the URL http://your-server-ip/bareos-webui. You will be redirected to the Bareos login page as shown below:
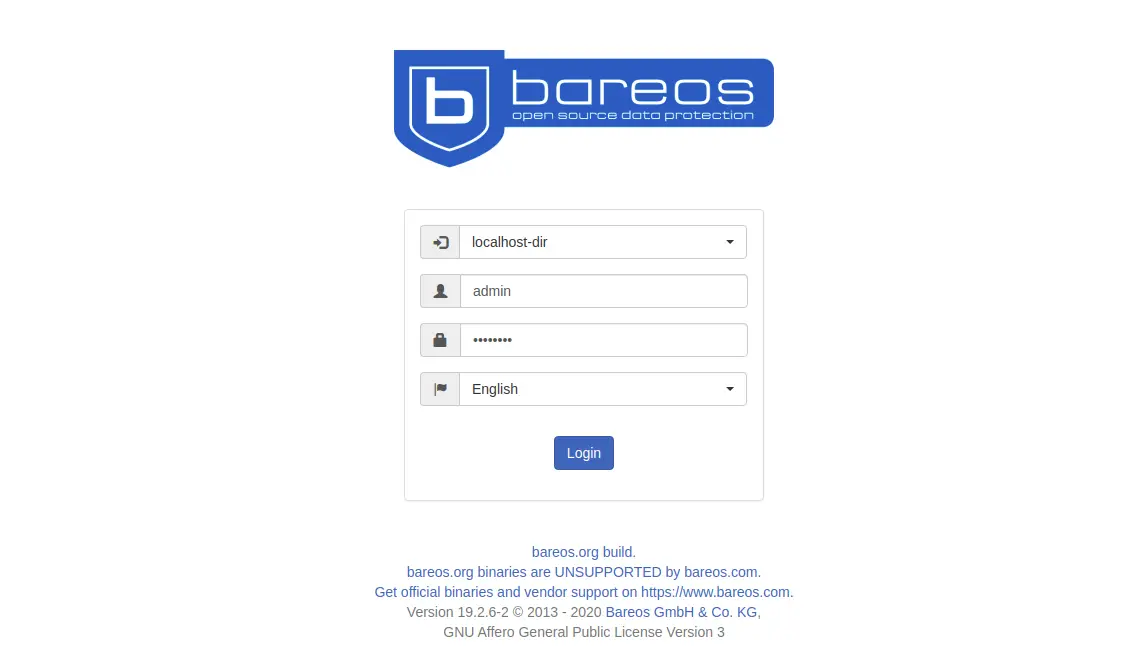
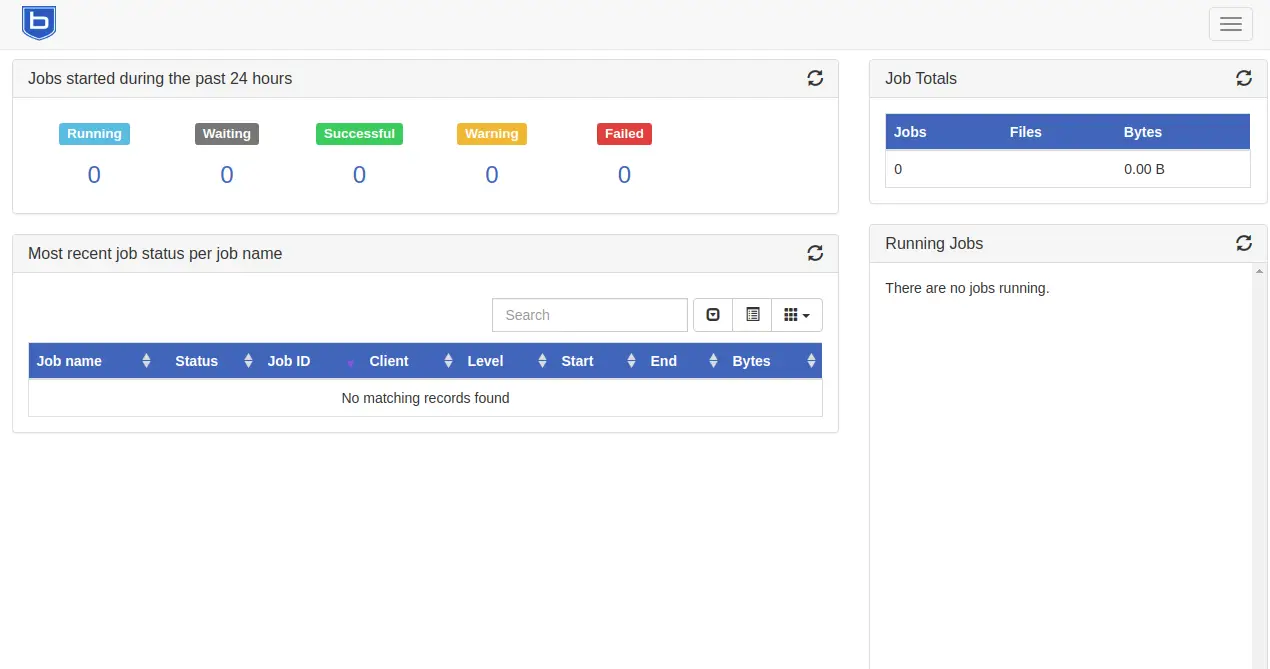
Provide your admin username, password and click on the Login button. You should see the Bareos default dashboard in the following screen:
Conclusion
Congratulations! you have successfully installed Bareos and Bareos WebUI on Ubuntu 18.04 server. You can now start exploring the Bareos WebUI to monitor and manage your enterprise backup. For more information, you can visit the Bareos Documentation page. Feel free to ask me if you have any questions.

