How to Install a Secure FTP Server with vsftpd on Debian 12
This tutorial exists for these OS versions
- Debian 12 (Bookworm)
- Debian 11 (Bullseye)
- Debian 8 (Jessie)
- Debian 6 (Squeeze)
On this page
vSFTPd or Very Secure FTP Daemon is a free and open-source FTP server software. It is an FTP daemon for Unix-like operating systems and is licensed under the GNU General Public License. vSFTPd is one of the most widely used FTP daemons, it is fast and lightweight in terms of system resources, secure due to PAM and SSL integration, and stable. vSFTPd has earned the trust of major companies such as RedHat, SUSE, Debian, Gnome, KDE, etc. due to its sophistication.
vSFTPd can run with IPv6 and supports virtual IP configurations and users. It can be run as a stand-alone daemon or via inetd. For user management, vSFTPd provides a feature that allows users to set their own configuration, such as per-source IP restrictions, reconfigurability and bandwidth throttling. In addition, vSFTPd supports a plug-in authentication module (PAM) for virtual users and also provides security integration with SSL/TLS.
In this tutorial, you will learn how to set up and create a secure FTP server with vsftpd on a Debian 12 server. In this guide you will also learn how to secure your FTP server installation via UFW (Uncomplicated Firewall) and how to connect to the FTP server using the FTP client FileZilla.
Prerequisites
Before proceeding, ensure you have the following:
- A Debian 12 server.
- A non-root user with sudo administrator privileges.
- The openssl package is installed on top of your server.
Installing vsftpd
The vsftpd is an implementation of FTP protocol for UNIX and Linux operating systems. The vsftpd package is available on most Linux distributions, including Debian. Now you will install vsftpd via APT and verify the vsftpd service to ensure that the service is running.
Before installing the vsftpd package, execute the following command to update your Debian repository.
sudo apt update
Now install the vsftpd package using the apt install command below.
sudo apt install vsftpd
Confirm the installation by typing y and press ENTER.
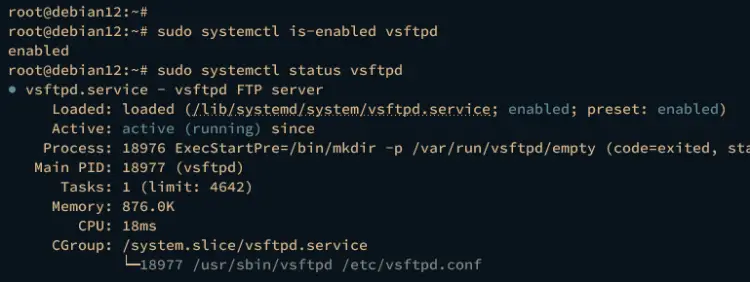
After vsftpd is installed, the vsftpd service will automatically be running and be enabled. Verify the vsftpd service using the following command.
sudo systemctl is-enabled vsftpd
sudo systemctl status vsftpd
The following output confirms that the vsftpd service is running and enabled. Also, the vsftpd service will be run automatically at system boot.
Configuring vsftpd
In the following step, you will configure and create a secure FTP server with vsftpd. You will generate SSL/TLS certificates and modify the default vsftpd configuration /etc/vsftpd.conf.
First, execute the openssl command below to generate new TLS certificates that will be used for your vsftpd server installation.
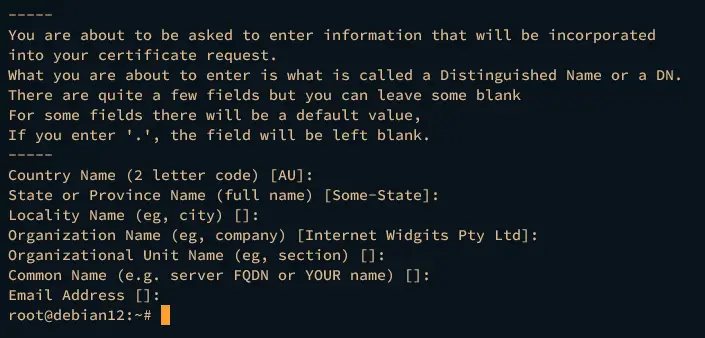
sudo openssl req -x509 -nodes -days 3650 -newkey rsa:2048 -keyout /etc/ssl/private/vsftpd.pem -out /etc/ssl/private/vsftpd.pem
Input your details information when asked. After the process is finished, your TLS certificates will be available at /etc/ssl/private/vsftpd.pem.
Now execute the command below to create a new file /etc/vsftpd.userlist for storing FTP users.
touch /etc/vsftpd.userlist
After that, run the following command to backup the vsftpd configuration. Then, open the vsftpd configuration /etc/vsftpd.conf using the nano editor.
sudo cp /etc/vsftpd.conf /etc/vsftpd.conf.orig
sudo nano /etc/vsftpd.conf
Disable anonymous access to your vsftpd server by changing the anonymous_enable option to NO.
anonymous_enable=NO
Allow local users within /etc/passwd file and PAM users to log in to the vsftpd server by changing the option local_enable to YES.
local_enable=YES
Allow FTP users to upload files to the vsftpd server by changing the write_enable option to YES.
write_enable=YES
Now enable chroot or jail for FTP users by adding the following options. This will lock the FTP user in the /home/$USER/chroot directory. For example, the FTP user bob will be locked within the directory /home/bob/chroot.
chroot_local_user=YES
user_sub_token=$USER
local_root=/home/$USER/chroot
Next, add the following configuration to set up vsftpd virtual users. Any user within the /etc/vsftpd.userlist file will be allowed to log in to the vsftpd server.
userlist_enable=YES
userlist_file=/etc/vsftpd.userlist
userlist_deny=NO
Add the following lines to secure your vsftpd server with SSL/TLS certificates. This will force user login and data transfer connection to use secure connections.
rsa_cert_file=/etc/ssl/private/vsftpd.pem
rsa_private_key_file=/etc/ssl/private/vsftpd.pem
ssl_enable=YES
force_local_data_ssl=YES
force_local_logins_ssl=YES
ssl_tlsv1=YES
ssl_sslv2=NO
ssl_sslv3=NO
require_ssl_reuse=NO
ssl_ciphers=HIGH
Now add the configuration below to set up the passive-mode connections using ports between 20000 and 25000.
pasv_min_port=20000
pasv_max_port=25000
Save and exit the file when you're done.
Now run the following systemctl command to restart the vsftpd service and apply the changes that you've made.
sudo systemctl restart vsftpd
With this, your vsftpd server is now running with new configurations.
Setting Up Firewall
In the following step, you will install UFW (Uncomplicated Firewall) on your Debian server and secure your FTP server installation with it. You will install UFW via APT, open FTP server port 20:21/tcp, and passive-mode data connection port 20000:25000/tcp.
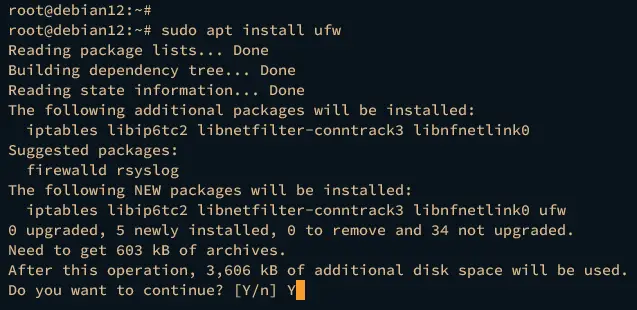
Install UFW using the following apt command. Type y to proceed with the installation.
sudo apt install ufw
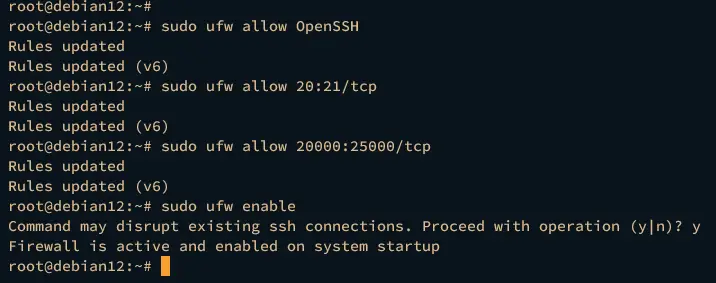
After UFW is installed, run the ufw commands below to open the port for the OpenSSH service, the vsftpd server ports 20:21, and the passive-mode FTP connection in between ports 20000 to 25000.
sudo ufw allow OpenSSH
sudo ufw allow 20:21/tcp
sudo ufw allow 20000:25000/tcp
Next, execute the ufw command below to start and enable UFW.
sudo ufw enable
Type for confirmation and the UFW should be running and enabled on your Debian system.
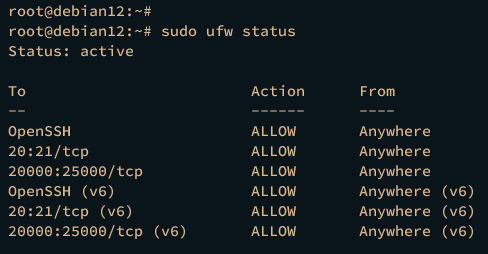
Verify the detailed status of UFW using the command below.
sudo ufw status
The output active confirms that UFW is running and enabled. Also, the OpenSSH service is added, and some ports for the vsftpd server 20:21/tcp and 20000:25000/tcp are added.
Setting up FTP Virtual Users
At this point, you've finished your vsftpd server configuration, now you will create a new FTP user that will be used for logging in to the FTP server and uploading files into it.
Execute the following command to create a new file /bin/ftponly. Then, make it executable via the chmod command below. The file /bin/ftponly will be used as a default shell for FTP users.
echo -e '#!/bin/sh\necho "Shell for FTP users only."' | sudo tee -a  /bin/ftponly
sudo chmod a+x /bin/ftponly
Add the file /bin/ftponly to /etc/shells to ensure it is a valid shell.
sudo echo "/bin/ftponly" >> /etc/shells
Now create a new FTP user bob and set up the password by executing the command below. Input your password and repeat.
sudo useradd -m -s /bin/ftponly bob
sudo passwd bob
After that, run the following command to create a new chroot /home/bob/chroot directory for user bob. Also, you will ensure that the chroot directory /home/bob/chroot has proper ownership.
sudo -u bob mkdir -p /home/bob/chroot
sudo chown -R bob: /home/bob/chroot
Next, run the command below to create another new directories data and upload that will be used for storing FTP user data. Be sure to configure proper the ownership for those directories.
sudo -u bob mkdir -p /home/bob/chroot/{data,upload}
sudo chown -R bob: /home/bob/chroot/{data,upload}
Now run the command below to change the permission of the /home/bob/chroot directory to 550 and both data and upload directories to 750.
sudo chmod 550 /home/bob/chroot
sudo chmod 750 /home/bob/chroot/{data,upload}
Now that you've created a new user, execute the command below to add the user bob to the /etc/vsftpd.userlist file.
echo "bob" >> /etc/vsftpd.userlist
Lastly, run the following command to restart the vsftpd service and apply the changes. After executing the command, your FTP user bob is ready.
sudo systemctl restart vsftpd
Uploading Files to FTP Server
To verify your vsftpd server installation, you will be connecting to the FTP server with the new user that you've created via FTP client software. Then, you will also upload new files to ensure that your installation is successful.
Download and install the FTP client for your local machine. You can use FileZilla, which can be installed on Windows, Linux, and MacOS. Once FileZilla is installed, open it to connect to your secure FTP server.
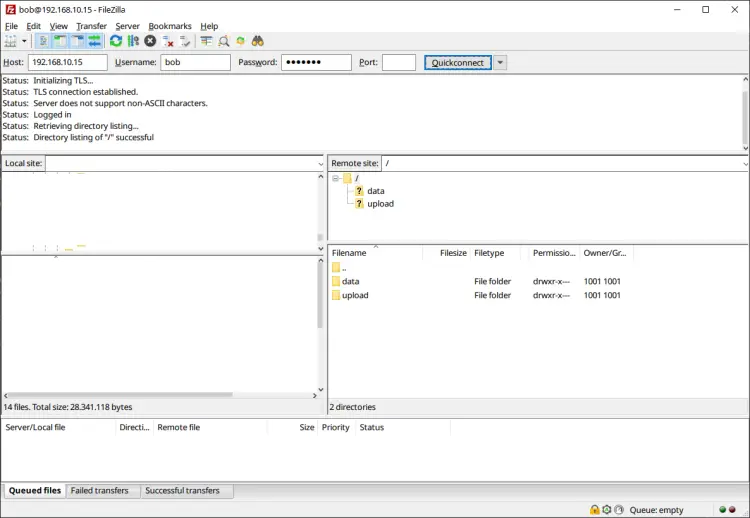
Input your FTP server IP address, and the username and password of your FTP user. Then, click Quickconnect to confirm.
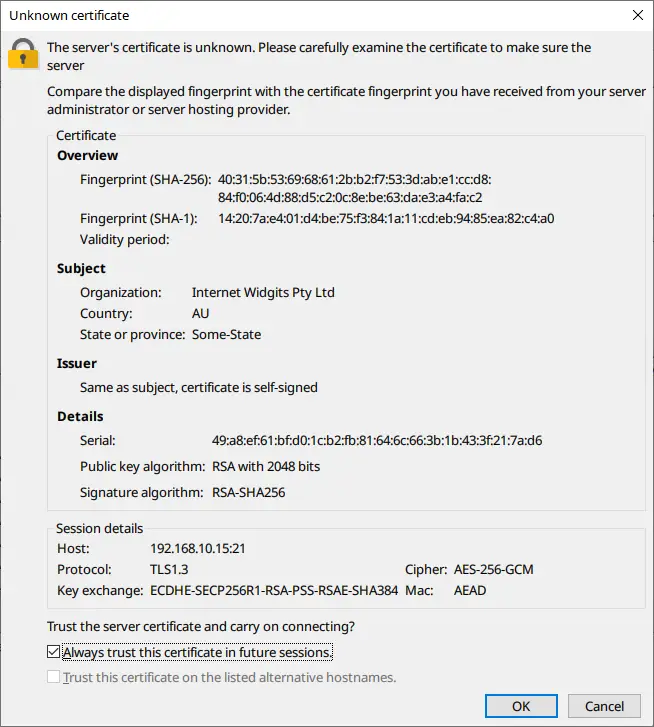
Select the option Always trust this certificate in future sessions and click OK to confirm.
Once connected to your FTP server, you should see two directories of data and upload available on your FTP server. You can upload files to both directories data and upload, but you can't upload files outside those directories protected via chroot.
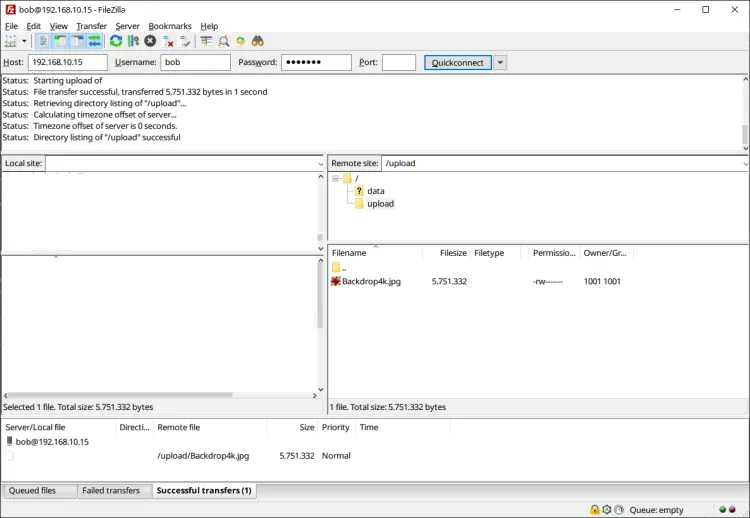
You can drag-drop your files to upload to the FTP server.
Conclusion
To wrap up, you have successfully created a secure FTP server with vsftpd on Debian 12 server. You've also secured your FTP server installation via UFW (Uncomplicated Firewall) and learned how to create FTP users. You can now use the FTP server as the main data transfer between your local machine to your server, You can also find another FTP client software with your preferences.


