How to Set up RabbitMQ Cluster on Ubuntu 20.04
This tutorial exists for these OS versions
- Ubuntu 22.04 (Jammy Jellyfish)
- Ubuntu 20.04 (Focal Fossa)
On this page
RabbitMQ is a free, open-source and multi-protocol messaging broker software written in the Erlang programming language. A message broker is used to store messages for an application. When an application sends data to another application, the app publishes the message onto the message broker. RabbitMQ supports multiple messaging protocols and can be easily deployed in a distributed configurations. The message broker act as a middleman for various web application and used to reduce loads and delivery time of web application.
In this tutorial, we will be going to set up a three-node RabbitMQ Cluster on Ubuntu 20.04 server.
Prerequisites
- Three server running Ubuntu 20.04.
- A root password is configured on each server.
Getting Started
Before starting, you will need to update your system packages to the latest version. You can update them by running the following command on each node:
apt-get update -y
Once all packages are updated, you will need to set up /etc/hosts file on each node. So they can communicate each other by hostname.
Edit the /etc/hosts file on each node with the following command:
nano /etc/hosts
Add the following lines:
192.168.0.10 node1
192.168.0.11 node2
192.168.0.12 node3
Save and close the file when you are finished. Next, you can proceed to the next step.
Install RabbitMQ Server
Next, you will need to install the RabbitMQ Server package on each node. You can install it by just running the following command:
apt-get install rabbitmq-server -y
Once installed, start the RabbitMQ service and enable it to start at system reboot with the following command:
systemctl start rabbitmq-server
systemctl enable rabbitmq-server
You can also verify the status of the RabbitMQ service with the following command:
systemctl status rabbitmq-server
You should get the following output:
? rabbitmq-server.service - RabbitMQ Messaging Server
     Loaded: loaded (/lib/systemd/system/rabbitmq-server.service; enabled; vendor preset: enabled)
     Active: active (running) since Tue 2020-07-21 06:25:07 UTC; 19min ago
   Main PID: 2565 (beam.smp)
     Status: "Initialized"
      Tasks: 87 (limit: 2353)
     Memory: 83.5M
     CGroup: /system.slice/rabbitmq-server.service
             ??2551 /bin/sh /usr/sbin/rabbitmq-server
             ??2565 /usr/lib/erlang/erts-10.6.4/bin/beam.smp -W w -A 64 -MBas ageffcbf -MHas ageffcbf -MBlmbcs 512 -MHlmbcs 512 -MMmcs 30 -P 1>
             ??2828 erl_child_setup 65536
             ??2921 inet_gethost 4
             ??2922 inet_gethost 4

Jul 21 06:24:58 node1 systemd[1]: Starting RabbitMQ Messaging Server...
Jul 21 06:25:07 node1 systemd[1]: rabbitmq-server.service: Supervising process 2565 which is not our child. We'll most likely not notice when >
Jul 21 06:25:07 node1 systemd[1]: Started RabbitMQ Messaging Server.
At this point, the RabbitMQ server is installed and running on each node. You can now proceed to the next step.
Enable RabbitMQ Management Plugins
The RabbitMQ management plugin provides an HTTP-based API that can be used to monitor and manage RabbitMQ nodes and clusters through a web browser. By default, it is running on the TCP port 15672.
You can enable the RabbitMQ management plugin by running the following command on each node:
rabbitmq-plugins enable rabbitmq_management
You should see the following output:
Enabling plugins on node rabbit@node1:
rabbitmq_management
The following plugins have been configured:
  rabbitmq_management
  rabbitmq_management_agent
  rabbitmq_web_dispatch
Applying plugin configuration to rabbit@node3...
The following plugins have been enabled:
  rabbitmq_management
  rabbitmq_management_agent
  rabbitmq_web_dispatch

started 3 plugins.
Next, restart the RabbitMQ service to apply the changes:
systemctl restart rabbitmq-server
You can verify the listening port with the following command:
netstat -tunelp | grep 15672
You should see the following output:
tcp 0 0 0.0.0.0:15672 0.0.0.0:* LISTEN 109 23155 2565/beam.smp
Setup RabbitMQ Cluster
By default, the /var/lib/rabbitmq/.erlang.cookie file is same on each node. In order to setup the RabbitMQ cluster, you will need to copy the /var/lib/rabbitmq/.erlang.cookie file from the node1 to other nodes.
On the node1, run the following command to copy /var/lib/rabbitmq/.erlang.cookie file to the other nodes.
scp /var/lib/rabbitmq/.erlang.cookie [email protected]:/var/lib/rabbitmq/
scp /var/lib/rabbitmq/.erlang.cookie [email protected]:/var/lib/rabbitmq/
Next, you will need to setup node1 and node2 to join the cluster node1.
First, restart the RabbitMQ service and stop the app with the following command on both node2 and node3:
systemctl restart rabbitmq-server
rabbitmqctl stop_app
On the node2, join the cluster on node1 by running the following command:
rabbitmqctl join_cluster rabbit@node1
You should see the following output:
Clustering node rabbit@node2 with rabbit@node1
On the node2, start the app with the following command:
rabbitmqctl start_app
You should see the following output:
Starting node rabbit@node2 ...
 completed with 3 plugins.
On the node3, join the cluster on node1 by running the following command:
rabbitmqctl join_cluster rabbit@node1
You should see the following output:
Clustering node rabbit@node3 with rabbit@node1
On the node3, start the app with the following command:
rabbitmqctl start_app
You should see the following output:
Starting node rabbit@node3 ...
 completed with 3 plugins.
Once you are done successfully, check the status of the cluster by running the following command on node1:
rabbitmqctl cluster_status
You should see the following output:
Cluster status of node rabbit@node1 ...
Basics

Cluster name: rabbit@node3

Disk Nodes

rabbit@node1
rabbit@node2
rabbit@node3

Running Nodes

rabbit@node1
rabbit@node2
rabbit@node3

Versions

rabbit@node1: RabbitMQ 3.8.2 on Erlang 22.2.7
rabbit@node2: RabbitMQ 3.8.2 on Erlang 22.2.7
rabbit@node3: RabbitMQ 3.8.2 on Erlang 22.2.7

Alarms

(none)

Network Partitions

(none)

Listeners

Node: rabbit@node1, interface: [::], port: 25672, protocol: clustering, purpose: inter-node and CLI tool communication
Node: rabbit@node1, interface: [::], port: 5672, protocol: amqp, purpose: AMQP 0-9-1 and AMQP 1.0
Node: rabbit@node1, interface: [::], port: 15672, protocol: http, purpose: HTTP API
Node: rabbit@node2, interface: [::], port: 25672, protocol: clustering, purpose: inter-node and CLI tool communication
Node: rabbit@node2, interface: [::], port: 5672, protocol: amqp, purpose: AMQP 0-9-1 and AMQP 1.0
Node: rabbit@node2, interface: [::], port: 15672, protocol: http, purpose: HTTP API
Node: rabbit@node3, interface: [::], port: 25672, protocol: clustering, purpose: inter-node and CLI tool communication
Node: rabbit@node3, interface: [::], port: 5672, protocol: amqp, purpose: AMQP 0-9-1 and AMQP 1.0
Node: rabbit@node3, interface: [::], port: 15672, protocol: http, purpose: HTTP API

Feature flags

Flag: drop_unroutable_metric, state: disabled
Flag: empty_basic_get_metric, state: disabled
Flag: implicit_default_bindings, state: enabled
Flag: quorum_queue, state: enabled
Flag: virtual_host_metadata, state: enabled
Setup Administrator User
Next, you will need to create a new admin user for the RabbitMQ server and delete the default 'guest' user.
You can create a new user named "hitesh" and password "password" by running the following command on node1:
rabbitmqctl add_user hitesh password
You should see the following output:
Adding user "hitesh" ...
Next, configure the hitesh user as an administrator with the following command:
rabbitmqctl set_user_tags hitesh administrator
You should see the following output:
Setting tags for user "hitesh" to [administrator] ...
Next, grant the hitesh user permission to modify, write, and read all vhosts.
rabbitmqctl set_permissions -p / hitesh ".*" ".*" ".*"
You should see the following output:
Setting permissions for user "hitesh" in vhost "/" ...
Next, delete the guest user with the following command:
rabbitmqctl delete_user guest
You should get the following command:
Deleting user "guest" ...
You can now list all users with the following command:
rabbitmqctl list_users
You should get the following output:
Listing users ...
user	tags
hitesh	[administrator]
Your user which you have created on node1 will be automatically replicated to all nodes on the cluster.
RabbitMQ Setup Queue Mirroring
By default, contents of a queue are located on a single node. So you will need to setup the 'ha policy' cluster for queue mirroring and replication to all cluster nodes.
To do so, create a ha policy named 'ha-all' which all queues on the RabbitMQ cluster will be mirroring to all nodes on the cluster.
rabbitmqctl set_policy ha-all ".*" '{"ha-mode":"all"}'
Output:
Setting policy "ha-all" for pattern ".*" to "{"ha-mode":"all"}" with priority "0" for vhost "/" ...
Next, create a ha policy named 'ha-two' which all queue name start with 'two.' will be mirroring to the two nodes on the cluster.
rabbitmqctl set_policy ha-two "^two\." '{"ha-mode":"exactly","ha-params":2,"ha-sync-mode":"automatic"}'
Output:
Setting policy "ha-two" for pattern "^two\." to "{"ha-mode":"exactly","ha-params":2,"ha-sync-mode":"automatic"}" with priority "0" for vhost "/" ...
Next, create a high availability policy named 'ha-nodes' which will contain all queues where the name starts with 'nodes.' We will be mirroring to two specific nodes 'node2' and 'node3' in the cluster.
rabbitmqctl set_policy ha-nodes "^nodes\." '{"ha-mode":"nodes","ha-params":["rabbit@node2", "rabbit@node3"]}'
Output:
Setting policy "ha-nodes" for pattern "^nodes\." to "{"ha-mode":"nodes","ha-params":["rabbit@node2", "rabbit@node3"]}" with priority "0" for vhost "/" ...
You can now list all configured policy by running the following command:
rabbitmqctl list_policies;
You should see the following output:
Listing policies for vhost "/" ...
vhost	name	pattern	apply-to	definition	priority
/	ha-all	.*	all	{"ha-mode":"all"}	0
/	ha-two	^two\.	all	{"ha-mode":"exactly","ha-params":2,"ha-sync-mode":"automatic"}	0
/	ha-nodes	^nodes\.	all	{"ha-mode":"nodes","ha-params":["rabbit@node2","rabbit@node3"]}	0
Once you are finished, you can proceed to the next step.
Access RabbitMQ Cluster
You can now access the RabbitMQ web interface by typing the IP address of any node in your web browser with port 15672 like http://192.168.0.10:15672/. You should see the RabbitMQ login page:

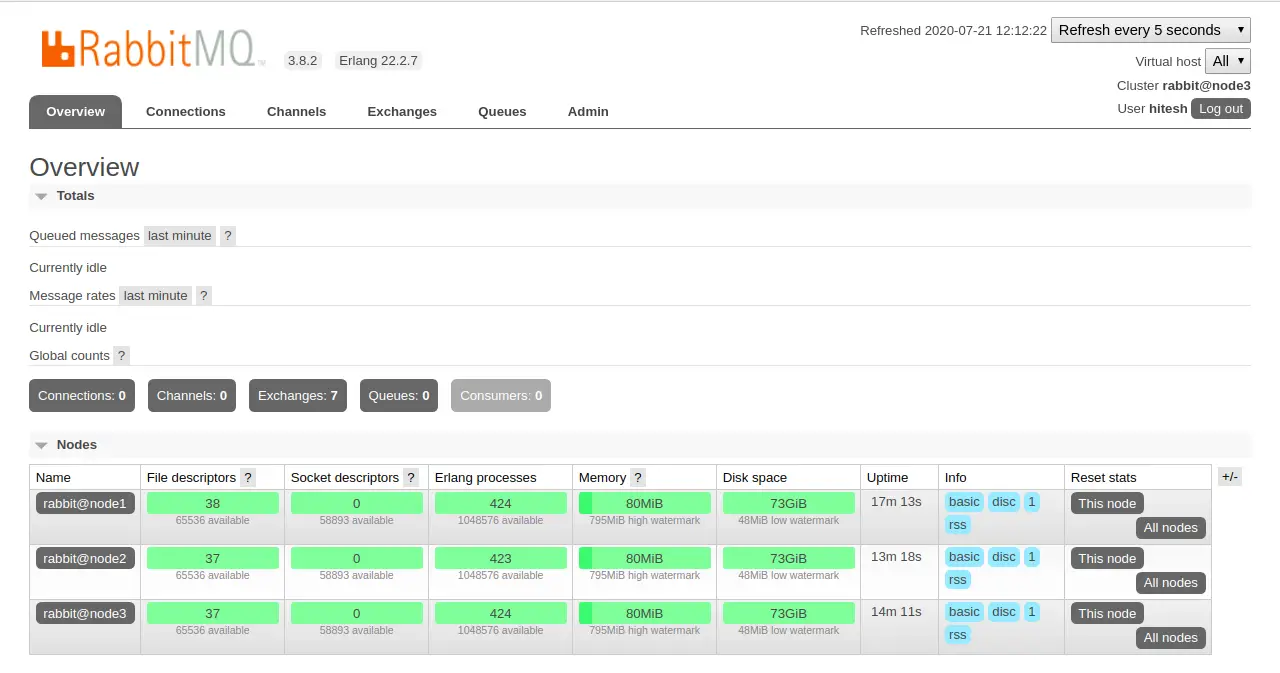
Provide your admin username, password and click on the Login button. You should see the RabbitMQ dashboard in the following screen:
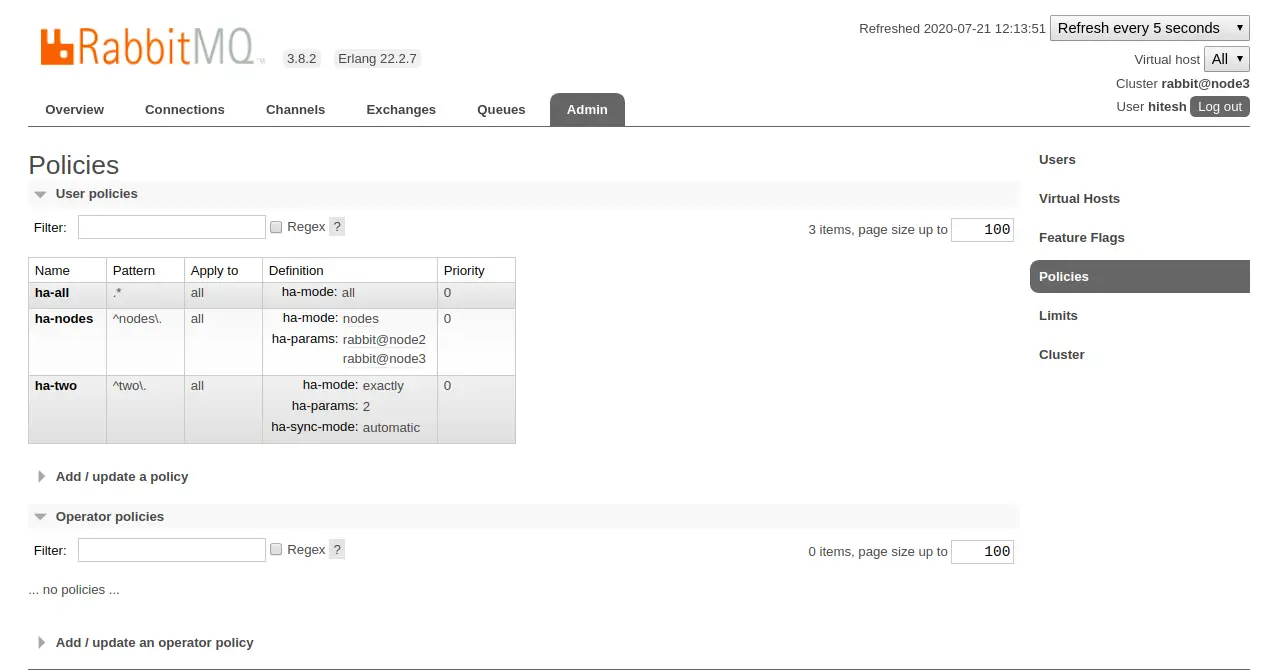
Next, click on the 'Admin' tab menu, and click the 'Policies' menu. You should see all RabbitMQ ha policies we have created in the following screen:
Conclusion
Congratulations! you have successfully setup three-node RabbitMQ cluster on Ubuntu20.04 server. Your cluster is now share configuration information including, topology and security information across all nodes.

