How to send Linux application logs to AWS CloudWatch
AWS CloudWatch is a monitoring service provided by the AWS cloud. AWS provides default monitoring for server parameters like CPU Utilization, Network In, Network Out, etc. AWS CloudWatch can be used for custom monitoring like disk utilization and memory (RAM) utilization. For custom monitoring, we need to follow some steps to get it monitored.
In the same way, AWS CloudWatch can be used to monitor the server or application logs. As this is not a default feature from AWS for obvious reasons, we can configure it as per our requirements. It will depend on the user what logs we need to send to AWS CloudWatch for monitoring.
Not limited to AWS resources
Even if AWS CloudWatch is an AWS service, it does not mean it can only be used for the EC2 instances, it can also be configured to send application or server logs from the VMs from other cloud providers and also from the VMs on the physical drive.
How to send application or server logs to AWS CloudWatch
To send the application or server logs to AWS CloudWatch, we need to install the CloudWatch agent on the respective server. We will be using the AWS EC2 instance to achieve our goal in this blog.
Steps
- Appropriate role to be attached to the instance to communicate with AWS CloudWatch
- AWS CloudWatch agent installation
- Configuration of the AWS CloudWatch agent
- Testing logs in AWS CloudWatch portal
IAM Role
In order to send the application or server logs to AWS CloudWatch, we need to attach a role to the EC2 instance with appropriate permissions. The role will allow making changes in the AWS CloudWatch.
It should contain the below policies.
- CreateLogStream
- DescribeLogStream
- CreateLogGroup
- PutLogEvents
Let's create a role in AWS IAM.
Go to the IAM section from the Services list on the AWS console. If you don't have an AWS account yet, create one from here.

On the IAM dashboard, go to Policy and then Create Policy.

On the "Create Policy" page, select "JSON" from the tab and paste the below JSON policy by removing the default one.
{
  "Version": "2012-10-17",
  "Statement": [
    {
      "Effect": "Allow",
      "Action": [
        "logs:CreateLogGroup",
        "logs:CreateLogStream",
        "logs:PutLogEvents",
        "logs:DescribeLogStreams"
    ],
      "Resource": [
        "arn:aws:logs:*:*:*"
    ]
  }
 ]
}
Your policy should look like below. Once you are done, click on the "Review Policy" button at the bottom of the page.

On the next page, you need to provide the name to the policy.
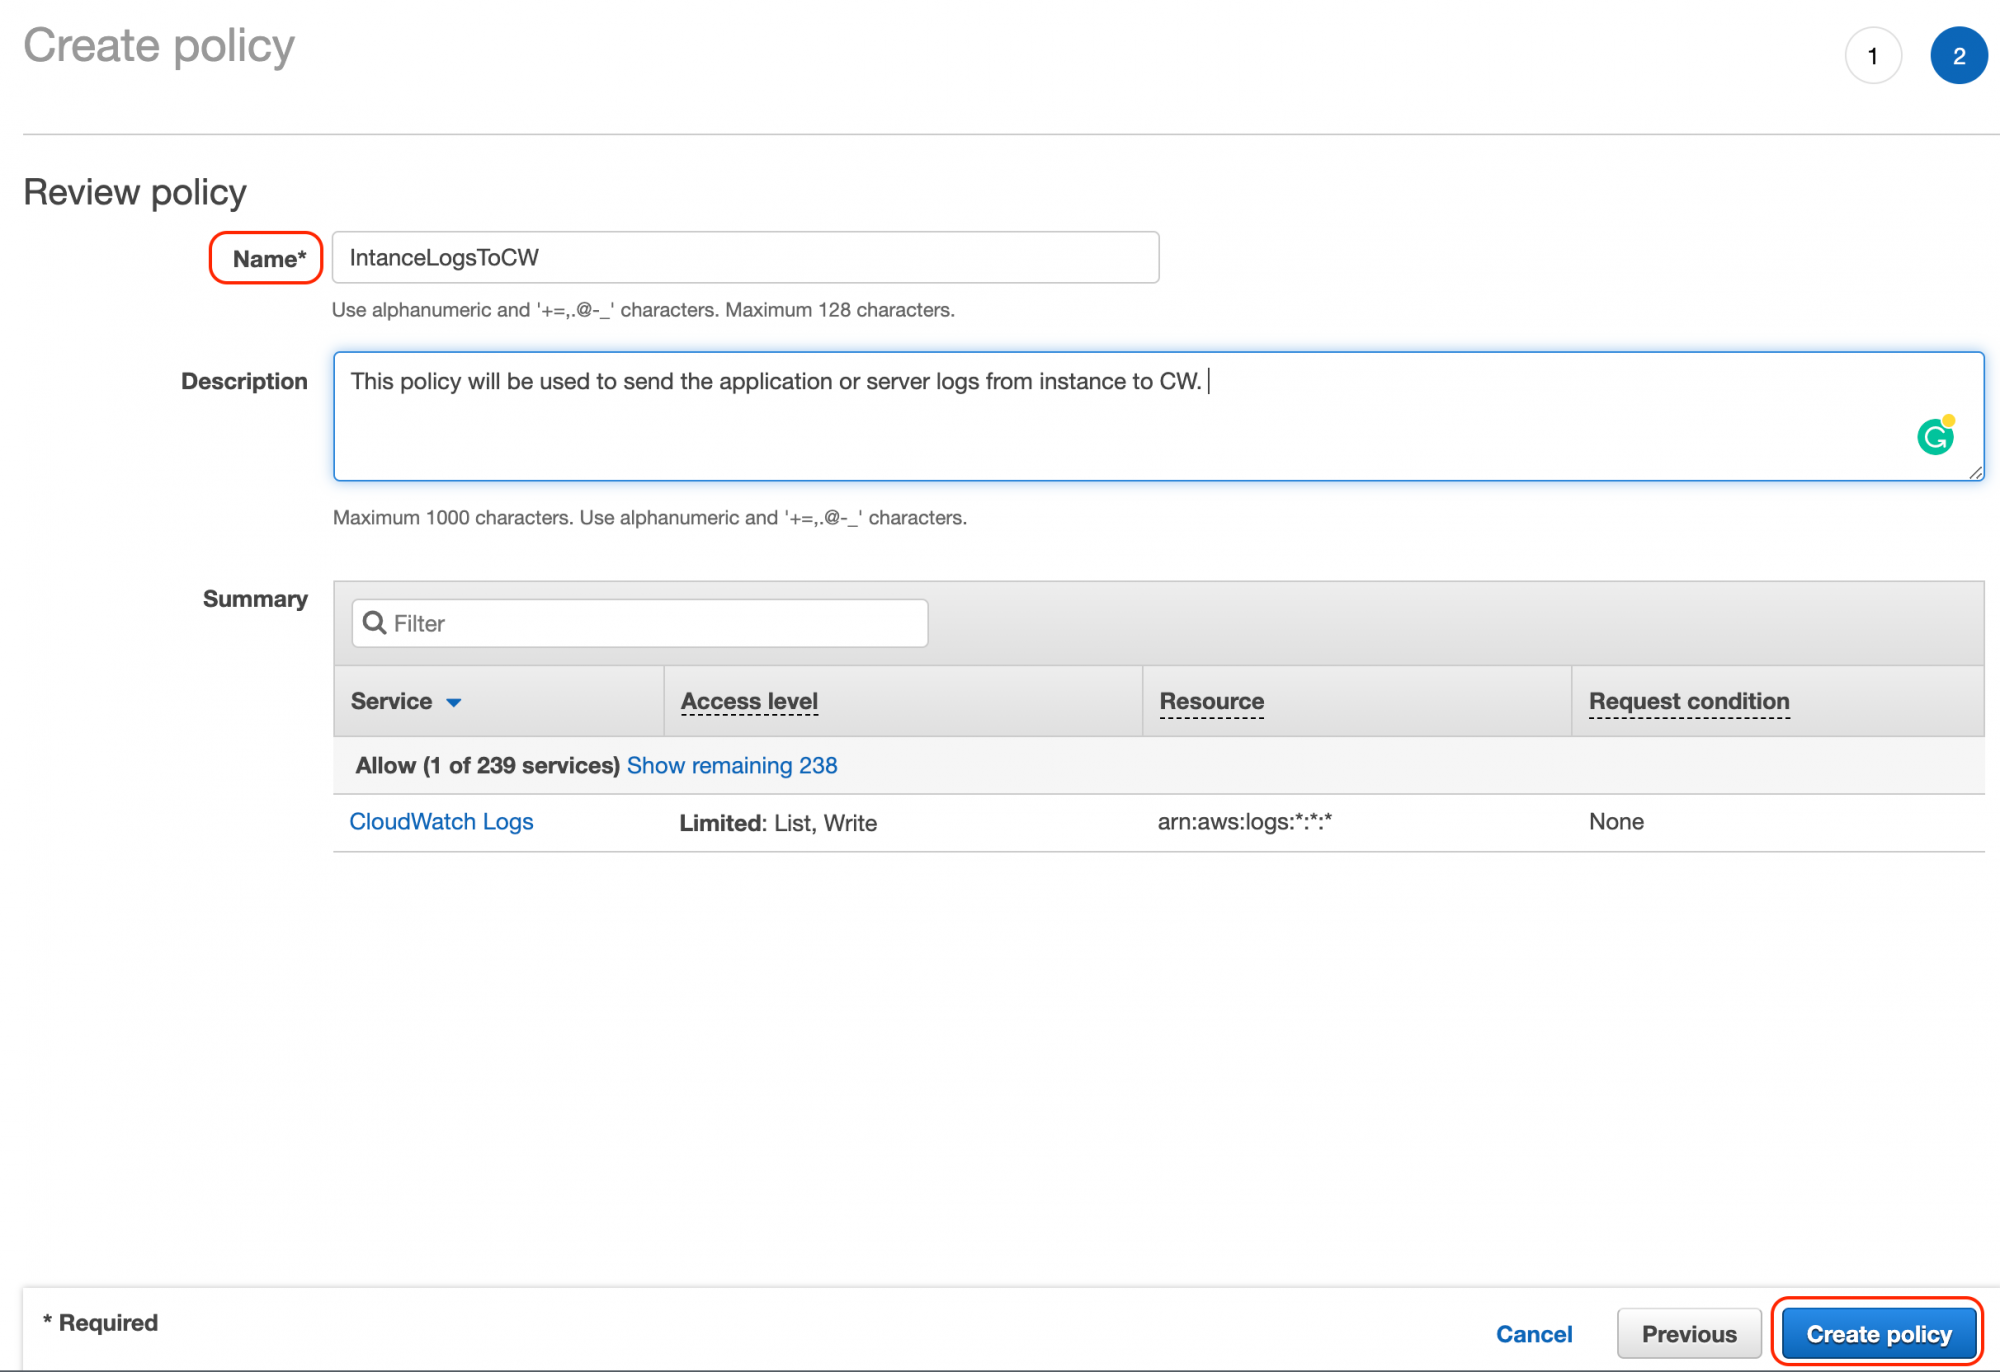
Once done, click on the "Create Policy" button at the bottom of the page.
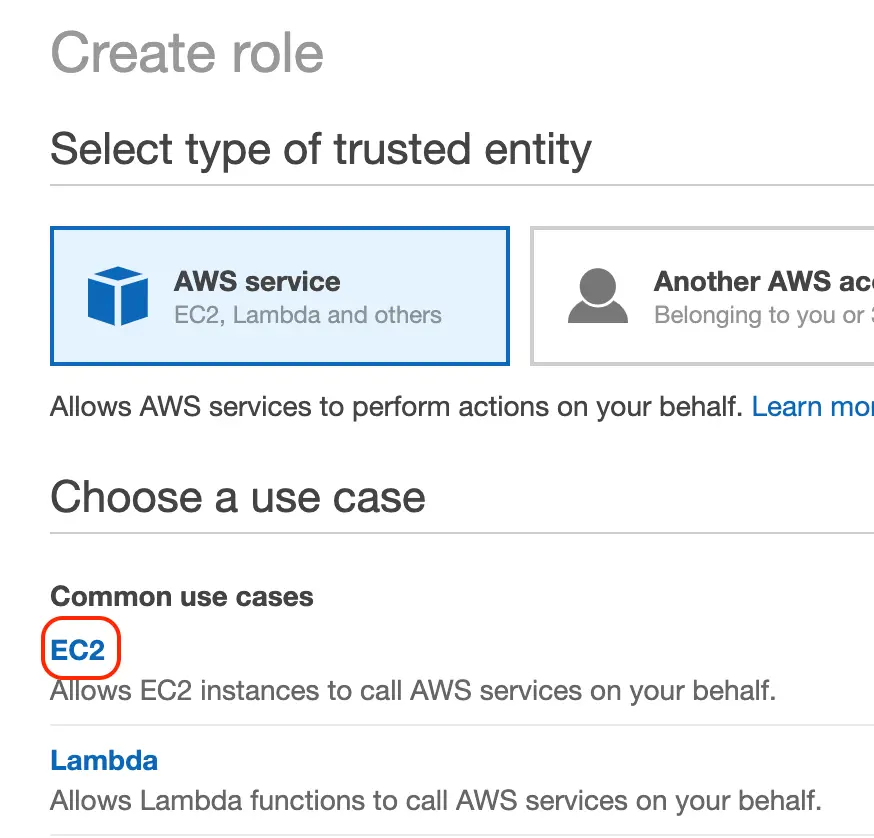
Once you create a policy, you will be redirected to the IAM role page. As we have the required policy created already, we will create a role that will be attached to the instance.

On the "Create Role" page, select "EC2". As we are going to attach the role to the EC2 instance.
Click on the "Next: Permission" button at the left bottom of the page.
On the next page, you will be prompted to attach a policy to the role. Search the name of the policy you provided in the previous step. Once found, select the policy from the list.

Once done, click on the "Next: Tags" button from the bottom of the page.
On the next page, you will be asked to give some tags to the role. As that is an optional step, I am not giving any tag to the role and skipped the step.
Once you click on next, you will be prompted to give a name to the role.

Your role will be created in a few seconds.

Now that we have the required setup completed from the infrastructure side, let's configure the AWS CloudWatch Agent on the EC2 instance.
For this step, you need an EC2 instance in running state. Connect to the instance the way you want. There are multiple ways to connect to the instance. You can check on them here.
If you have an Amazon Linux instance, follow the below mentioned steps.
If you ware login on the instance for the first time, make sure you run the below update command.
Below steps, you can follow for Amazon Linux machines.
sudo yum update -y
Once the update is complete, execute the below command to install the awslogs package.
sudo yum install -y awslogs
Once the package is installed, you can change the region in /etc/awslogs/awscli.conf file.
Now, to configure the logs you would like to send on AWS CloudWatch, open the file /etc/awslogs/awslogs.conf and check for the following lines.
[/var/log/messages]
datetime_format = %b %d %H:%M:%S
file = /var/log/messages
buffer_duration = 5000
log_stream_name = {instance_id}
initial_position = start_of_file
log_group_name = Amazon-Linux-2
The above configuration indicates that the log file path from your system /var/log/messages is going to be uploaded on the AWS CloudWatch. The above configuration will create a log group in AWS CloudWatch with the name mentioned in log_group_name parameter. Also, it will have the hierarchy mentioned in the log_stream_name. For the buffer time, we can change the value of buffer_duration. The default value of the buffer_duration is 5000ms.
Once you do the changes, restart the application by executing the below command. It will restart the awslog application and the agent will start uploading the logs to AWS CloudWatch.
$ sudo service awslogsd start
To install and configure the AWS CloudWatch Agent on RHEL or CentOS, you can follow the below steps.
Execute the below command to download the package.
curl https://s3.amazonaws.com/aws-cloudwatch/downloads/latest/awslogs-agent-setup.py -O
You will find a file with the name awslogs-agent-setup.py in the current location. As the downloaded file is a python script, you need to have python installed on your machine for the next step. Make sure you have a python package installed and then execute the below command. You need to specify the region in the below command. You can also change the same in configuration later if you want.
python ./awslogs-agent-setup.py --region ap-south-1
Once you run the above command, it will ask you for some inputs. Mention the same as per the requirements.

The above script will generate the config file /var/awslogs/etc/awslogs.conf. The details you had provided in the script will get saved in the config file.
you can still modify the config file as per your requirement.
Once you are done with all the changes, restart the agent by executing the below command.
# systemctl start awslogs
Verify the configured setup
1. Login back to your AWS account.
2. Search for CloudWatch in the Services list.
3. Choose the Log Group option from the left side menus.
4. Search for the value you provided in log_stram_name parameter in the configuration.
5. You will see the logs are getting pushed from the server to AWS CloudWatch.
Conclusion
You can set up any logfile from your server to be pushed to AWS CloudWatch. This can be configured for the servers that are not on the AWS cloud. Meaning, you can push the logs from any of your servers hosted on Azure, GCP, or any other cloud provider or even an on-premise server.

