How to Install Seafile Self-Hosted Cloud Storage on Debian 12
Seafile is an open-source file-hosting system written in the Django web framework. It is a cross-platform software that offers a set of cloud storage features and allows users to store, manage, and share files within the Seafile ecosystem.
In Seafile, files are stored in the central server and can be synchronized with clients across multiple devices and mobile phones. Seafile is an alternative to file-hosting services like Google Drive, Dropbox, and Mega.nz. With Seafile, you can build a file-sharing solution for your private cloud applications.
This article will guide you through installing Seafile on a Debian 12 server with MariaDB as the database, Nginx as a reverse proxy, and HTTPS through Letsencrypt and UFW (Uncomplicated Firewall) to secure Seafile.
Prerequisites
To begin with this guide, make sure you have the following requirements:
- A Debian 12 server
- A non-root user with administrator privileges
- A domain name pointed to server IP address
Installing dependencies
Seafile is written in the Django web framework, which is based on Python. To install Seafile, you must ensure Python is installed. Also, you'll need dependencies such as MariaDB/MySQL as the database, Nginx as a reverse proxy, and Memcached or Redis for session and cache management. In this section, you'll install those packages through the APT package manager.
First, run the command below to update your Debian package index.
sudo apt update
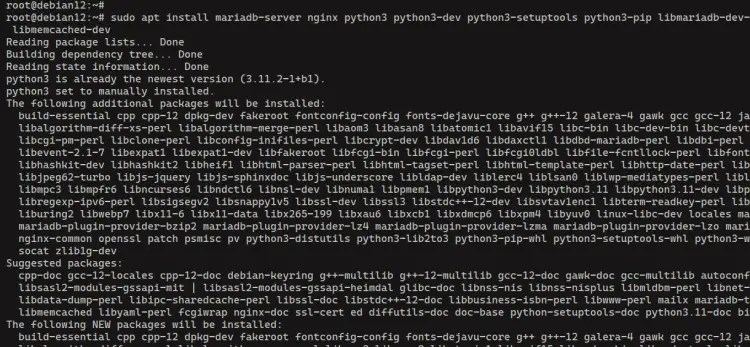
Now run the following command to install dependencies such as Python3, MariaDB server, Nginx web server, Memcached, and some additional libraries to your system.
sudo apt install mariadb-server nginx python3 python3-dev python3-setuptools python3-pip libmariadb-dev-compat ldap-utils libldap2-dev libsasl2-dev python3.11-venv memcached libmemcached-dev
Enter 'Y' to confirm the installation.
After the installation is complete, check the MariaDB server with the command below.
sudo systemctl is-enabled mariadb
sudo systemctl status mariadb
In the following output, you can see the MariaDB server is enabled and running.
Now check the Nginx service using the following command.
sudo systemctl is-enabled nginx
sudo systemctl status nginx
You can see below Nginx web server is running and enabled.
Lastly, check the Memcached service to ensure it is running. The Memcached service should be running and enabled.
sudo systemctl is-enabled memcached
sudo systemctl status memcached
Setting up MariaDB server
Now that you've installed MariaDB, the next step you'll be configuring and securing MariaDB server deployment. And then, you'll create a new MariaDB user with multiple databases that will be used by Seafile. You'll be securing MariaDB with the 'mariadb-secure-installation' command, and using the 'mariadb' client for creating new users and databases.
Execute the 'mariadb-secure-installation' command below to secure your MariaDB server installation.
sudo mariadb-secure-installation
Now you'll be asked about the following configurations:
- For the default MariaDB server installation without a root password, press ENTER when asked about the password.
- The local authentication for MariaDB root users is secured by default, input 'n' when asked to change the authentication method to 'unix_socket'.
- Input 'Y' to create a new MariaDB root password. Then, input the strong password for your MariaDB root user and repeat.
- When asked to disable remote authentication for the MariaDB root user, input 'Y' to agree.
- Input 'Y' to remove the default database 'test' and remove the anonymous privilege.
- Lastly, input 'Y' to confirm reloading table privileges.
Now that you've configured the MariaDB root password and secured MariaDB, you'll be creating new databases and a user for the Seafile installation.
Run the 'mariadb' command below to log in to the MariaDB server. Enter your MariaDB root password when prompted.
sudo mariadb -u root -p
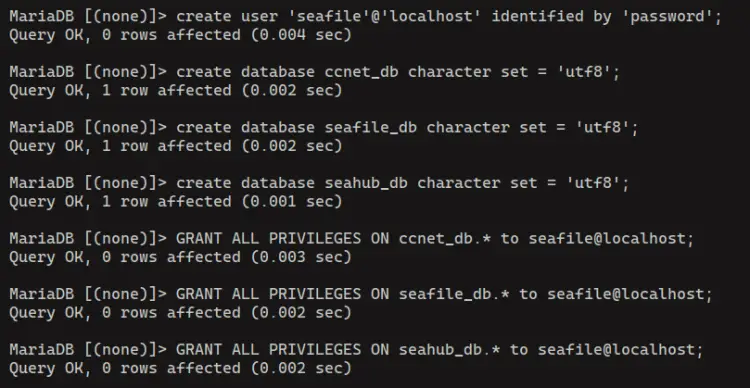
Create a new user 'seafile' with the following query. Make sure to change the following password with a new secure password.
create user 'seafile'@'localhost' identified by 'password';
Run the following queries to create new databases 'ccnet_db', 'seafile_db', and 'seahub_db'.
create database ccnet_db character set = 'utf8';
create database seafile_db character set = 'utf8';
create database seahub_db character set = 'utf8';
Next, run the queries below to allow user 'seafile' to access Seafile databases.
GRANT ALL PRIVILEGES ON ccnet_db.* to seafile@localhost;
GRANT ALL PRIVILEGES ON seafile_db.* to seafile@localhost;
GRANT ALL PRIVILEGES ON seahub_db.* to seafile@localhost;
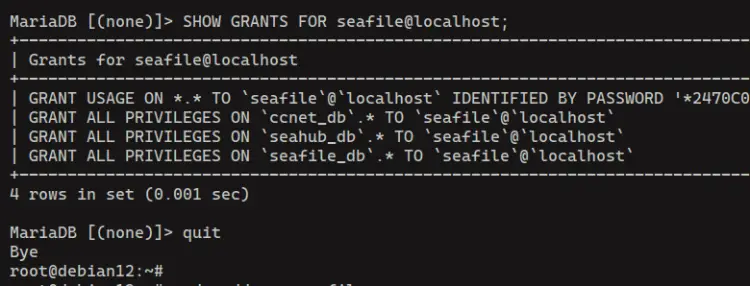
Now check privileges for user 'seafile' to ensure access and privileges to databases 'ccnet_db', 'seafile_db', and 'seahub_db'.
SHOW GRANTS FOR seafile@localhost;
Lastly, type 'quit' to exit from the MariaDB server.
Installing Python dependencies
In this section, you'll be creating a new system user for running Seafile, creating an installation directory and Python virtual environment, and then installing Python dependencies using the 'pip' command.
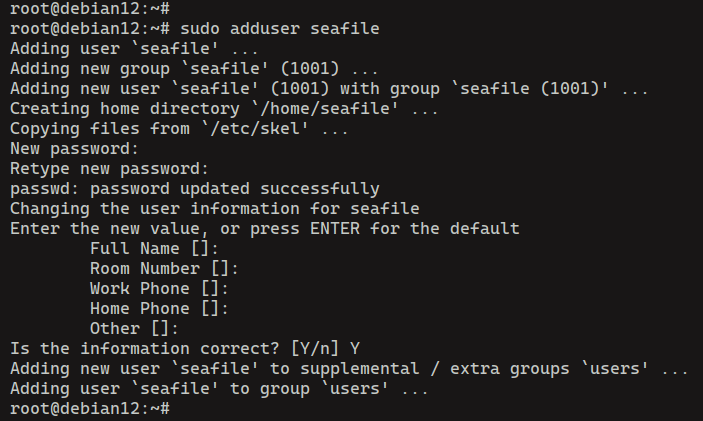
First, add a new user 'seafile' with the following command.
sudo adduser seafile
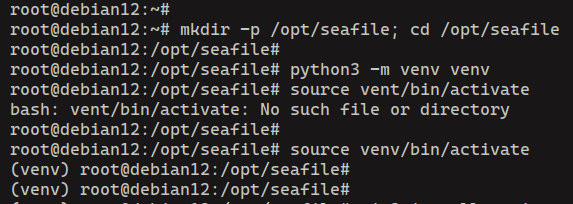
Now create a new installation directory '/opt/seafile' and move into it.
mkdir -p /opt/seafile; cd /opt/seafile
Run the command below to create a 'venv' Python virtual environment and activate it. Once activated, your shell should become like '(venv) user@hostname #'.
python3 -m venv venv
source venv/bin/activate
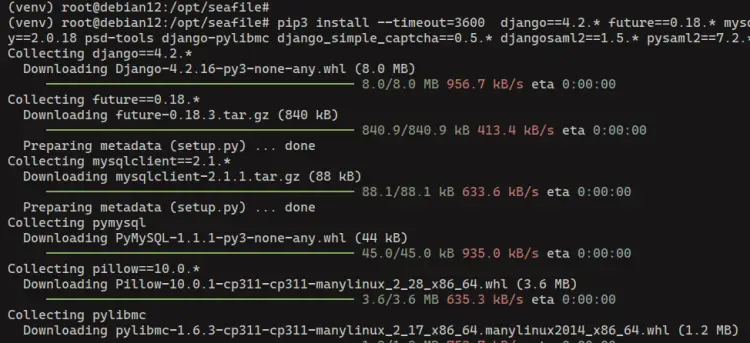
Next, run the 'pip3' command below to install Python dependencies for Seafile. Those packages must be installed inside the 'venv' virtual environment.
pip3 install --timeout=3600 django==4.2.* future==0.18.* mysqlclient==2.1.* pymysql pillow==10.0.* pylibmc captcha==0.4 markupsafe==2.0.1 jinja2 sqlalchemy==2.0.18 psd-tools django-pylibmc django_simple_captcha==0.5.* djangosaml2==1.5.* pysaml2==7.2.* pycryptodome==3.16.* cffi==1.15.1 lxml python-ldap==3.4.3
After the installation is complete, change the ownership of the '/opt/seafile' directory to the user 'seafile' using the command below.
sudo chown -R seafile: /opt/seafile
Downloading and installing Seafile
At this point, you're ready to install Seafile. Now you'll be downloading Seafile source code, installing it with the MariaDB and Memcached, adding Seafile domain name via default configuration, and then starting the Seafile process manually.
Execute the following command to log in as user 'seafile' and go to the '/opt/seafile' directory.
su seafile
cd /opt/seafile
Download the Seafile source code and extract it using the following command. In this example, you'll be installing Seafile 11, make sure to check the Seafile download page to get the latest version.
wget https://s3.eu-central-1.amazonaws.com/download.seadrive.org/seafile-server_11.0.12_x86-64.tar.gz
tar xf seafile-server_11.0.12_x86-64.tar.gz
Now activate the 'venv' virtual environment with the following:
source venv/bin/activate
Go to the 'seafile-server-11.0.12' directory and execute the 'setup-seafile-mysql.sh' script. With this, you'll be installing Seafile on your system with the MariaDB as the database.
cd seafile-server-11.0.12
./setup-seafile-mysql.sh
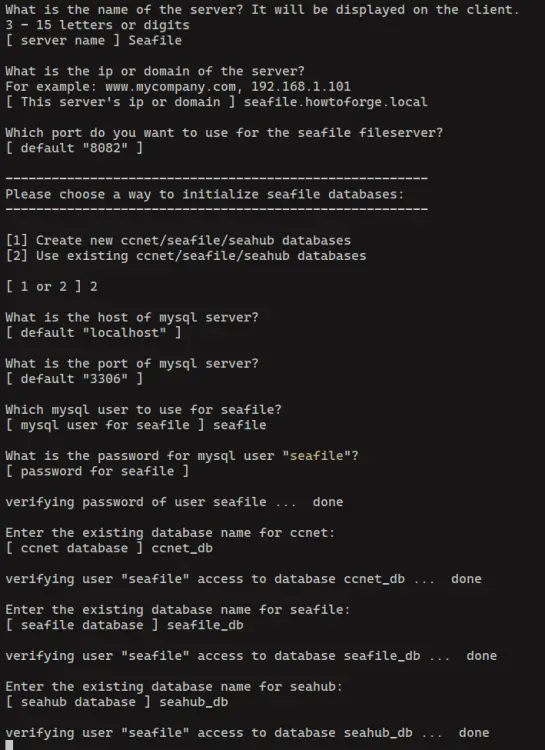
Now you'll be asked with the following Seafile configurations:
- Enter your Seafile server name.
- Enter your domain for Seafile installation.
- Input '2' to integrate Seafile with existing MySQL/MariaDB databases and user
- Enter details of the MariaDB host, port, user, and the password
- Enter database for ccnet as 'ccnet_db', seafile as 'seafile_db', and seahub as 'seahub_db'
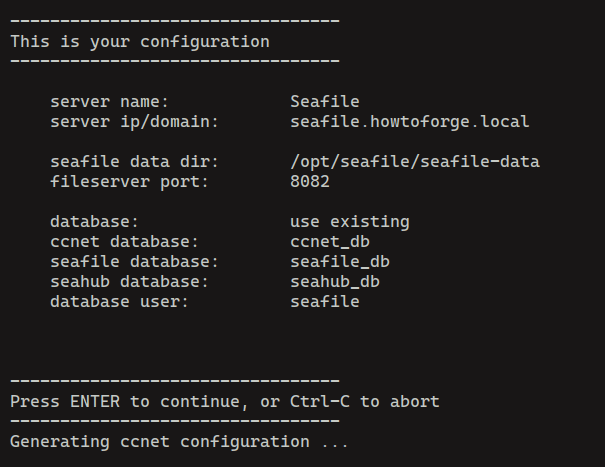
- Press ENTER to confirm the installation and complete the configuration
After the configuration is finished, you'll modify the Seafile configuration to run it under the Nginx reverse proxy.
Go to the '/opt/seafile/conf' directory and open the file 'seahub_settings.py' with the 'nano' editor.
cd /opt/seafile/conf
nano seahub_settings.py
Add your domain name to the 'SERVICE_URL' option and make sure to include the 'https' in the beginning.
SERVICE_URL = 'https://seafile.howtoforge.local'
Add the 'FILE_SERVER_ROOT' option like the following with your domain name.
FILE_SERVER_ROOT = 'https://seafile.howtoforge.local/seafhttp'
Lastly, add the 'CACHES' setting to integrate Seafile with the Memcached cache system.
CACHES = {
'default': {
'BACKEND': 'django_pylibmc.memcached.PyLibMCCache',
'LOCATION': '127.0.0.1:11211',
},
}
When finished, save the file and exit the editor.
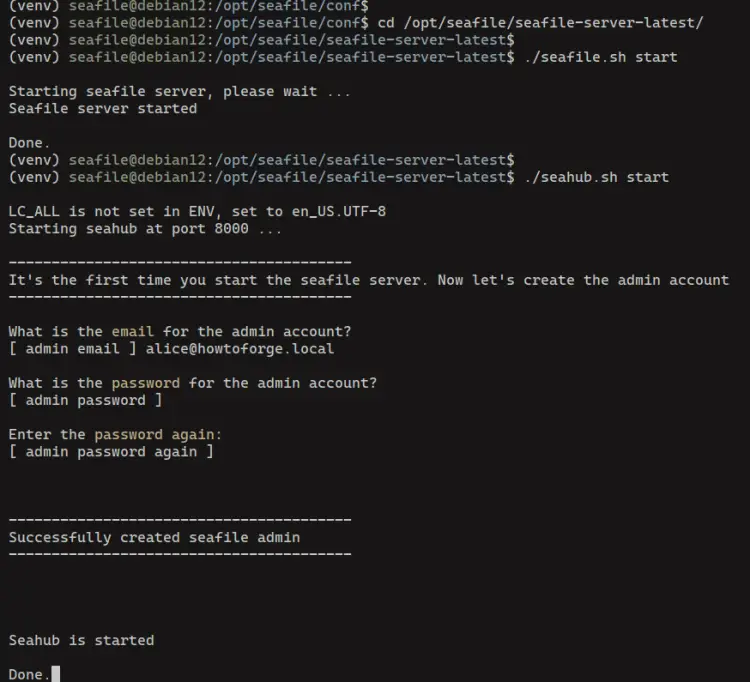
Now back to the '/opt/seafile/seafile-server-latest/' directory and execute the 'seafile.sh' and 'seahub.sh' scripts to run Seafile.
cd /opt/seafile/seafile-server-latest/

./seafile.sh start
./seahub.sh start
When Seafile starts, you'll see an output 'Seafile server started'. You'll also be asked to set up an administrator user for Seafile, so make sure to input your username, email, and password.
Setting up Nginx as a reverse proxy
Now that Seafile is up and running with the MariaDB and Memcached, the next step is to set up Nginx as a reverse proxy for Seafile. So make sure that you have a domain name ready and pointed to your server IP address.
Create a new Nginx server block configuration '/etc/nginx/sites-available/seafile' with the following 'nano' editor.
sudo nano /etc/nginx/sites-available/seafile
Insert the configuration below and make sure to change the 'server_name' option with your domain name.
log_format seafileformat '$http_x_forwarded_for $remote_addr [$time_local] "$request" $status $body_bytes_sent "$http_referer" "$http_user_agent" $upstream_response_time';

server {
listen 80;
server_name seafile.howtoforge.local;

proxy_set_header X-Forwarded-For $remote_addr;

location / {
proxy_pass http://127.0.0.1:8000;
proxy_set_header Host $http_host;
proxy_set_header X-Real-IP $remote_addr;
proxy_set_header X-Forwarded-For $proxy_add_x_forwarded_for;
proxy_set_header X-Forwarded-Host $server_name;
proxy_read_timeout 1200s;

# used for view/edit office files via Office Online Server
client_max_body_size 0;

access_log /var/log/nginx/seahub.access.log seafileformat;
error_log /var/log/nginx/seahub.error.log;
}

location /seafhttp {
rewrite ^/seafhttp(.*)$ $1 break;
proxy_pass http://127.0.0.1:8082;
client_max_body_size 0;
proxy_set_header X-Forwarded-For $proxy_add_x_forwarded_for;

proxy_connect_timeout 36000s;
proxy_read_timeout 36000s;
proxy_send_timeout 36000s;

send_timeout 36000s;

access_log /var/log/nginx/seafhttp.access.log seafileformat;
error_log /var/log/nginx/seafhttp.error.log;
}
location /media {
root /opt/seafile/seafile-server-latest/seahub;
}
}
Save and exit the file when done.
Now run the command below to activate the 'seafile' server block and verify your Nginx syntax. You'll see an output 'syntax is ok - test is successful' when you've proper Nginx configuration.
sudo ln -s /etc/nginx/sites-available/seafile /etc/nginx/sites-enabled/
sudo nginx -t
Lastly, run the command below to restart the Nginx web server and apply your changes.
sudo systemctl restart nginx
Securing Seafile with UFW and HTTPS
After you've configured Nginx as a reverse proxy, you'll be securing Seafile with HTTPS and UFW (Uncomplicated Firewall). You'll be installing UFW and Certbot, opening services such as SSH, HTTP, and HTTPS, and then generating new SSL certificates with Certbot from Letsencrypt.
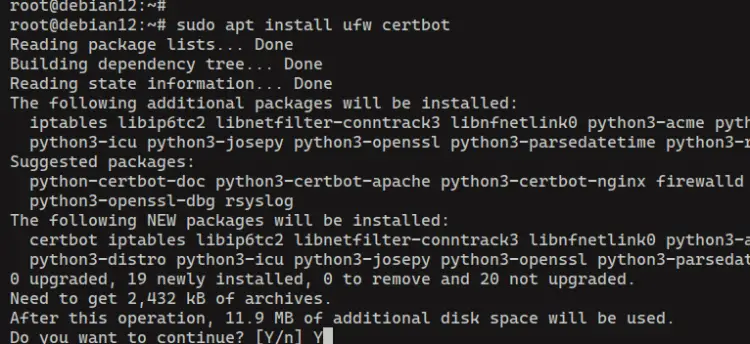
First, run the command below to install the 'ufw' and 'certbot' packages.
sudo apt install ufw certbot -y
Now run the command below to enable the 'OpenSSH' and 'Nginx Full' profiles. The 'OpenSSH' profile will open the default SSH port '22', and the 'Nginx Full' profile will allow both HTTP and HTTPS connections to the server.
sudo ufw allow OpenSSH
sudo ufw allow 'Nginx Full'
Next, run the following command to start and enable UFW. Enter 'y' to confirm, and you'll see an output 'Firewall is active and enabled at system startup'.
sudo ufw enable
Finally, you can now generate SSL certificates and secure your Seafile installation with the 'certbot' command below. Make sure to change the domain name and email address with your information.
sudo certbot --nginx --agree-tos --redirect --hsts --staple-ocsp --email [email protected] -d seafile.howtoforge.local
After the process is complete, your Seafile should be secured with HTTPS and your certificates will be available at the '/etc/letsencrypt/live/domain.com' directory.
Accessing Seafile
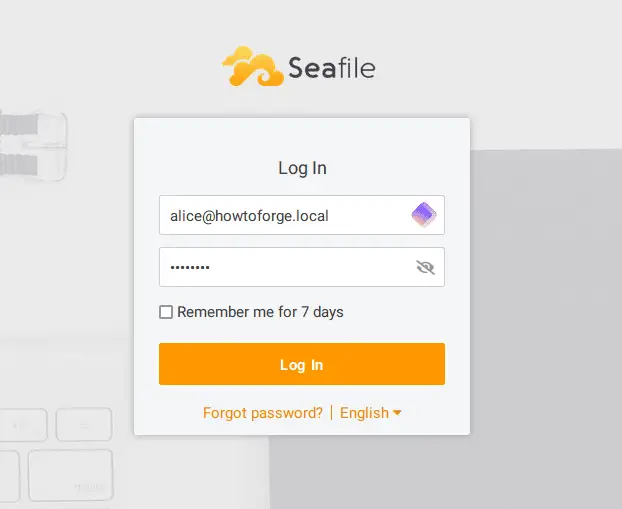
Open your web browser and visit your Seafile domain name such as https://seafile.howtoforge.local. If the installation is successful, you'll be prompted for the Seafile login page.
Enter your admin email address and password, then click 'Log in'.
If you have the correct admin credentials, you can see the following Seafile dashboard.
You can now try uploading files to Seafile to ensure the installation is successful.
Conclusion
Congratulations! You've completed the installation of Seafile Self-Hosted Cloud Storage on the Debian 12 server. You've Seafile up and running with the MariDB database server and Nginx as a reverse proxy. You've also secured Seafile with UFW (Uncomplicated Firewall) and SSL via Certbot and Letsencrypt. Now that Seafile is installed, you can integrate Seafile with other applications such as ONLYOFFICE Document Server or LibreOffice Online (Collabora Online).


