How to Install PowerDNS Server and PowerDNS Admin on Ubuntu 20.04
This tutorial exists for these OS versions
- Ubuntu 22.04 (Jammy Jellyfish)
- Ubuntu 20.04 (Focal Fossa)
On this page
PowerDNS is a free and open-source authoritative nameserver. It is written in C++ and runs on Unix, Linux and macOS operating systems. It uses MySQL, MariaDB, PostgreSQL and Oracle to store zone files and records.
PowerDNS Admin is a web-based tool used for managing PowerDNS. You can create and manage DNS zones using the web browser. It comes with a rich set of features. Some of them are listed below:
- IPv4 and IPv6 Support
- Status page displaying useful information
- Auto create/update reverse PTR records
- Support for bulk domain creation
- Support for domain templates
- DNSSec Support
- Support Local DB, SAML, LDAP, Active Directory user authentication
In this tutorial, we will show you how to install PowerDNS and PowerDNS admin on Ubuntu 20.04 server.
Prerequisites
- A server running Ubuntu 20.04.
- A valid domain name pointed with your server IP.
- A root password is configured the server.
Install and Configure MariaDB Server
Before starting, you will need to install the MariaDB database server in your system. By default, the latest version of MariaDB is not available in the Ubuntu 20.04 default repository. So you will need to add the MariaDB repository to your system.
First, install the required packages with the following command:
apt-get install software-properties-common gnupg2 -y
Once all the packages are installed, add the MariaDB signing key with the following command:
apt-key adv --fetch-keys 'https://mariadb.org/mariadb_release_signing_key.asc'
Next, add the MariaDB repository with the following command:
add-apt-repository 'deb [arch=amd64,arm64,ppc64el] http://mirrors.ukfast.co.uk/sites/mariadb/repo/10.5/ubuntu focal main'
Next, install the MariaDB server by running the following command:
apt-get install mariadb-server -y
Once installed, you will need to create a database and user for PowerDNS.
First, login to MariaDB with the following command:
mysql
Once login, create a database and user with the following command:
MariaDB [(none)]> create database pdns;
MariaDB [(none)]> grant all on pdns.* to pdnsadmin@localhost identified by 'password';
Next, flush the privileges and exit from the MariaDB shell with the following command:
MariaDB [(none)]> flush privileges;
MariaDB [(none)]> exit;
Install PowerDNS
First, you will need to disable the systemd-resolved service from your system. You can disable it with the following command:
systemctl disable --now systemd-resolved
Next, remove the default resolv.conf file and create a new file:
rm -rf /etc/resolv.conf
echo "nameserver 8.8.8.8" > /etc/resolv.conf
Next, install the PowerDNS server with the following command:
apt-get install pdns-server pdns-backend-mysql -y
Once the PowerDNS is installed, you can proceed to the next step.
Configure PowerDNS
First, you will need to import the PowerDNS database schema to the PowerDNS database. You can import it with the following command:
mysql -u pdnsadmin -p pdns < /usr/share/pdns-backend-mysql/schema/schema.mysql.sql
Next, you will need to define the PowerDNS database connection details. You can do it by editing the file pdns.local.gmysql.conf:
nano /etc/powerdns/pdns.d/pdns.local.gmysql.conf
Change the following lines:
# MySQL Configuration
#
# Launch gmysql backend
launch+=gmysql

# gmysql parameters
gmysql-host=127.0.0.1
gmysql-port=3306
gmysql-dbname=pdns
gmysql-user=pdnsadmin
gmysql-password=password
gmysql-dnssec=yes
# gmysql-socket=
Save and close the file then give proper permission to the file pdns.local.gmysql.conf:
chmod 640 /etc/powerdns/pdns.d/pdns.local.gmysql.conf
Next, stop the PowerDNS server and verify the PowerDNS with the following command:
systemctl stop pdns
pdns_server --daemon=no --guardian=no --loglevel=9
If everything is fine, you should get the following output:
Nov 02 10:43:47 gmysql Connection successful. Connected to database 'pdns' on '127.0.0.1'.
Nov 02 10:43:47 gmysql Connection successful. Connected to database 'pdns' on '127.0.0.1'.
Nov 02 10:43:47 gmysql Connection successful. Connected to database 'pdns' on '127.0.0.1'.
Nov 02 10:43:47 Done launching threads, ready to distribute questions
Next, start the PowerDNS server with the following command:
systemctl start pdns
At this point, PowerDNS is started and listening on port 53. You can check it with the following command:
ss -alnp4 | grep pdns
You should get the following output:
udp     UNCONN   0        0                0.0.0.0:53             0.0.0.0:*      users:(("pdns_server",pid=33140,fd=5))
tcp     LISTEN   0        128              0.0.0.0:53             0.0.0.0:*      users:(("pdns_server",pid=33140,fd=7))
Install PowerDNS Admin
In this section, we will show you how to install PowerDNS admin with Nginx.
Install Required Dependencies
First, install all the dependencies required for PowerDNS admin with the following command:
apt-get install nginx python3-dev libsasl2-dev libldap2-dev libssl-dev libxml2-dev libxslt1-dev libxmlsec1-dev libffi-dev pkg-config apt-transport-https virtualenv build-essential libmariadb-dev git python3-flask -y
Once all the dependencies are installed, add the Node.js repository with the following command:
curl -sL https://deb.nodesource.com/setup_14.x | bash -
Next, install the Node.js with the following command:
apt-get install nodejs -y
Next, add the yarn repository with the following command:
curl -sS https://dl.yarnpkg.com/debian/pubkey.gpg | apt-key add -
echo "deb https://dl.yarnpkg.com/debian/ stable main" | tee /etc/apt/sources.list.d/yarn.list
Next, update the repository and install Yarn with the following command:
apt-get update -y
apt-get install yarn -y
At this point, all the required dependencies are installed, you can now proceed to the next step.
Download PowerDNS Admin
Next, download the latest version of PowerDNS admin from the Git repository to the Nginx root directory:
git clone https://github.com/ngoduykhanh/PowerDNS-Admin.git /var/www/html/pdns
Next, change the directory to the downloaded directory and create a Python virtual environment with the following command:
cd /var/www/html/pdns/
virtualenv -p python3 flask
Next, activate the virtual environment and install all Python dependencies with the following command:
source ./flask/bin/activate
pip install -r requirements.txt
Next, deactivate from the Virtual environment with the following command:
deactivate
Define Database Connection
Next, you will need to define the PowerDNS database connection details to the default_config.py file:
nano /var/www/html/pdns/powerdnsadmin/default_config.py
Change the following lines:
SALT = 'yoursecretekey'
SECRET_KEY = 'yoursecretekey'
BIND_ADDRESS = '0.0.0.0'
PORT = 9191
HSTS_ENABLED = False
OFFLINE_MODE = False

SQLA_DB_USER = 'pdnsadmin'
SQLA_DB_PASSWORD = 'password'
SQLA_DB_HOST = '127.0.0.1'
SQLA_DB_NAME = 'pdns'
SQLALCHEMY_TRACK_MODIFICATIONS = True
Save and close the file then change the directory to the pdns and activate the virtual environment:
cd /var/www/html/pdns/
source ./flask/bin/activate
Next, update the database with the following command:
export FLASK_APP=powerdnsadmin/__init__.py
flask db upgrade
yarn install --pure-lockfile
flask assets build
Next, deactivate the virtual environment with the following command:
deactivate
Enable PowerDNS Admin API
PowerDNS admin uses JSON API for reading statistics and modifying zone content, metadata and DNSSEC key material. You can enable it by editing the file pdns.conf:
nano /etc/powerdns/pdns.conf
Change the following lines:
api=yes
api-key=yoursecretekey
Save and close the file then restart the PowerDNS service to apply the changes:
systemctl restart pdns
Configure Nginx for PowerDNS Admin
Next, you will need to configure the Nginx for PowerDNS admin. To do so, create an Nginx virtual host configuration file with the following command:
nano /etc/nginx/conf.d/pdns-admin.conf
Add the following lines:
server {
  listen	*:80;
  server_name               pdnsadmin.example.com;

  index                     index.html index.htm index.php;
  root                      /var/www/html/pdns;
  access_log                /var/log/nginx/pdnsadmin_access.log combined;
  error_log                 /var/log/nginx/pdnsadmin_error.log;

  client_max_body_size              10m;
  client_body_buffer_size           128k;
  proxy_redirect                    off;
  proxy_connect_timeout             90;
  proxy_send_timeout                90;
  proxy_read_timeout                90;
  proxy_buffers                     32 4k;
  proxy_buffer_size                 8k;
  proxy_set_header                  Host $host;
  proxy_set_header                  X-Real-IP $remote_addr;
  proxy_set_header                  X-Forwarded-For $proxy_add_x_forwarded_for;
  proxy_headers_hash_bucket_size    64;

  location ~ ^/static/  {
    include  /etc/nginx/mime.types;
    root /var/www/html/pdns/powerdnsadmin;

    location ~*  \.(jpg|jpeg|png|gif)$ {
      expires 365d;
    }

    location ~* ^.+.(css|js)$ {
      expires 7d;
    }
  }

  location / {
    proxy_pass            http://unix:/run/pdnsadmin/socket;
    proxy_read_timeout    120;
    proxy_connect_timeout 120;
    proxy_redirect        off;
  }

}
Save and close the file then check the Nginx for any syntax error with the following command:
nginx -t
You should get the following output:
nginx: the configuration file /etc/nginx/nginx.conf syntax is ok
nginx: configuration file /etc/nginx/nginx.conf test is successful
Next, change the ownership of the pdns to www-data:
chown -R www-data:www-data /var/www/html/pdns
Finally, restart the Nginx service to apply the changes:
systemctl restart nginx
Create a Systemd Service File for PowerDNS Admin
Next, you will need to create a systemd service file to manage the PowerDNS service.
First, create a pdns service file with the following command:
nano /etc/systemd/system/pdnsadmin.service
Add the following lines:
[Unit]
Description=PowerDNS-Admin
Requires=pdnsadmin.socket
After=network.target

[Service]
PIDFile=/run/pdnsadmin/pid
User=pdns
Group=pdns
WorkingDirectory=/var/www/html/pdns
ExecStart=/var/www/html/pdns/flask/bin/gunicorn --pid /run/pdnsadmin/pid --bind unix:/run/pdnsadmin/socket 'powerdnsadmin:create_app()'
ExecReload=/bin/kill -s HUP $MAINPID
ExecStop=/bin/kill -s TERM $MAINPID
PrivateTmp=true

[Install]
WantedBy=multi-user.target
Save and close the file then create a pdnsadmin sockt file with the following command:
nano /etc/systemd/system/pdnsadmin.socket
Add the following lines:
[Unit]
Description=PowerDNS-Admin socket

[Socket]
ListenStream=/run/pdnsadmin/socket

[Install]
WantedBy=sockets.target
Save and close the file then create required files and directories with the following command:
echo "d /run/pdnsadmin 0755 pdns pdns -" >> /etc/tmpfiles.d/pdnsadmin.conf
mkdir /run/pdnsadmin/
chown -R pdns: /run/pdnsadmin/
chown -R pdns: /var/www/html/pdns/powerdnsadmin/
Next, reload the systemd daemon with the following command:
systemctl daemon-reload
Next, enable the pdnsadmin service to start at system reboot with the following command:
systemctl enable --now pdnsadmin.service pdnsadmin.socket
Next, verify the status of both service using the following command:
systemctl status pdnsadmin.service pdnsadmin.socket
You should get the following output:
? pdnsadmin.service - PowerDNS-Admin
     Loaded: loaded (/etc/systemd/system/pdnsadmin.service; enabled; vendor preset: enabled)
     Active: active (running) since Mon 2020-11-02 10:54:19 UTC; 5s ago
TriggeredBy: ? pdnsadmin.socket
   Main PID: 38881 (gunicorn)
      Tasks: 2 (limit: 2353)
     Memory: 62.5M
     CGroup: /system.slice/pdnsadmin.service
             ??38881 /var/www/html/pdns/flask/bin/python /var/www/html/pdns/flask/bin/gunicorn --pid /run/pdnsadmin/pid --bind unix:/run/pdnsa>
             ??38898 /var/www/html/pdns/flask/bin/python /var/www/html/pdns/flask/bin/gunicorn --pid /run/pdnsadmin/pid --bind unix:/run/pdnsa>

Nov 02 10:54:19 pdnsadmin.example.com systemd[1]: Started PowerDNS-Admin.
Nov 02 10:54:19 pdnsadmin.example.com gunicorn[38881]: [2020-11-02 10:54:19 +0000] [38881] [INFO] Starting gunicorn 20.0.4
Nov 02 10:54:19 pdnsadmin.example.com gunicorn[38881]: [2020-11-02 10:54:19 +0000] [38881] [INFO] Listening at: unix:/run/pdnsadmin/socket (38881)
Nov 02 10:54:19 pdnsadmin.example.com gunicorn[38881]: [2020-11-02 10:54:19 +0000] [38881] [INFO] Using worker: sync
Nov 02 10:54:19 pdnsadmin.example.com gunicorn[38898]: [2020-11-02 10:54:19 +0000] [38898] [INFO] Booting worker with pid: 38898

? pdnsadmin.socket - PowerDNS-Admin socket
     Loaded: loaded (/etc/systemd/system/pdnsadmin.socket; enabled; vendor preset: enabled)
     Active: active (running) since Mon 2020-11-02 10:54:19 UTC; 5s ago
   Triggers: ? pdnsadmin.service
     Listen: /run/pdnsadmin/socket (Stream)
     CGroup: /system.slice/pdnsadmin.socket

Nov 02 10:54:19 pdnsadmin.example.com systemd[1]: Listening on PowerDNS-Admin socket.
Access PowerDNS Admin Web UI
Now, open your web browser and access the PowerDNS admin web interface using the URL http://pdnsadmin.example.com. You will be redirected to the following page:
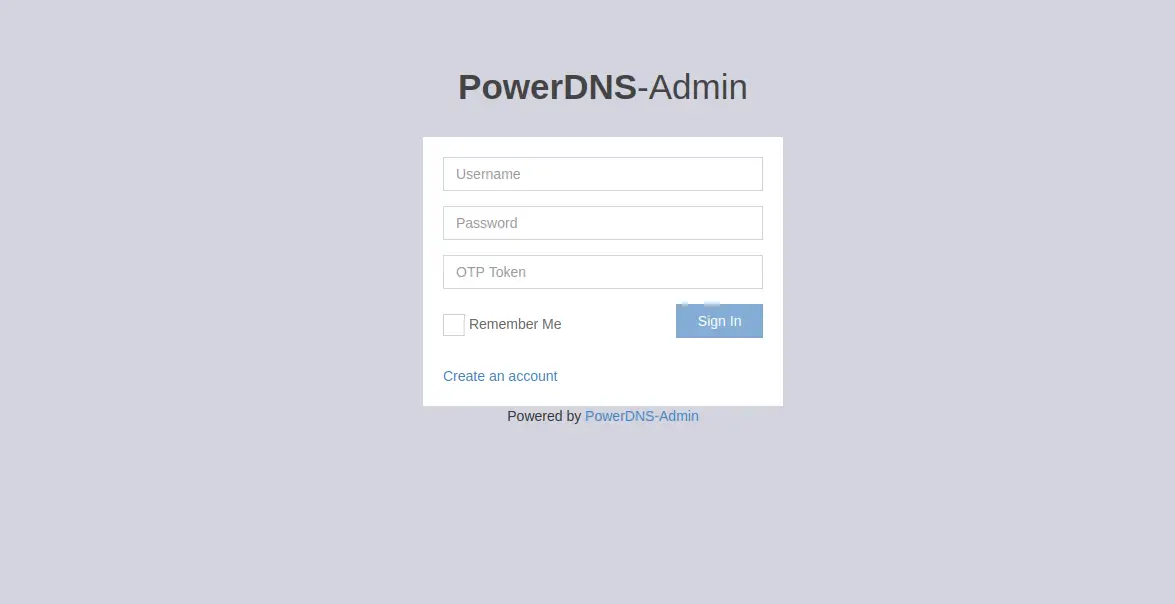
Click on the Create an account button. You should see the following screen:
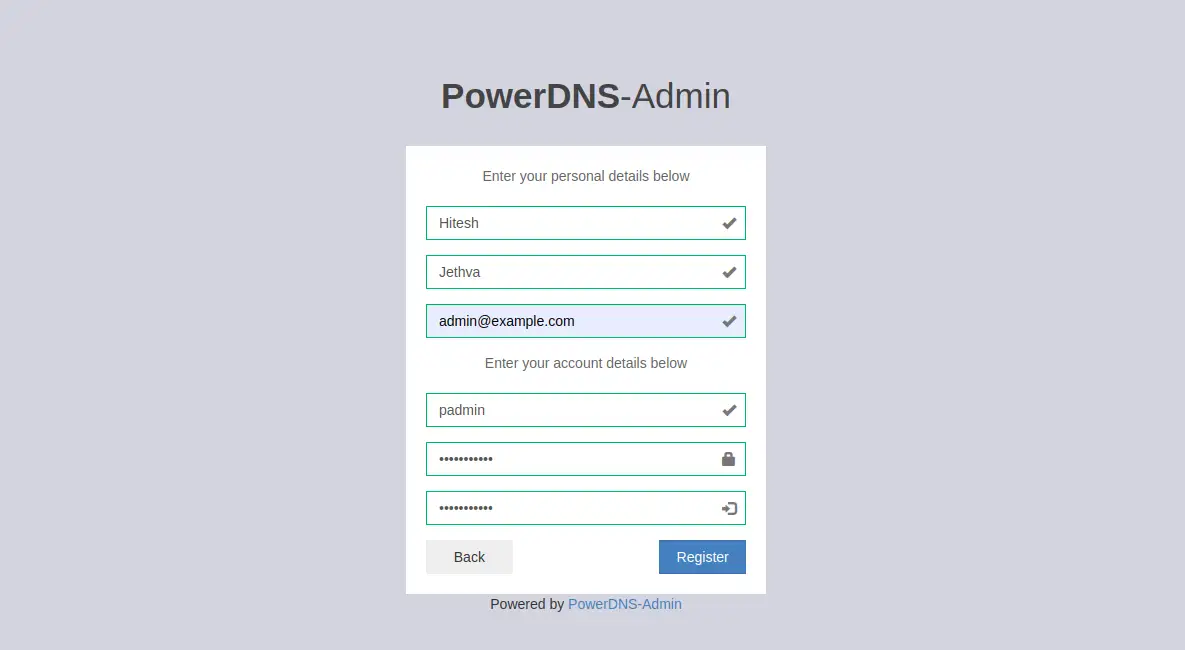
Provide your admin user details and click on the Register button to create an account. You should see the PowerDNS admin login page in the following screen:
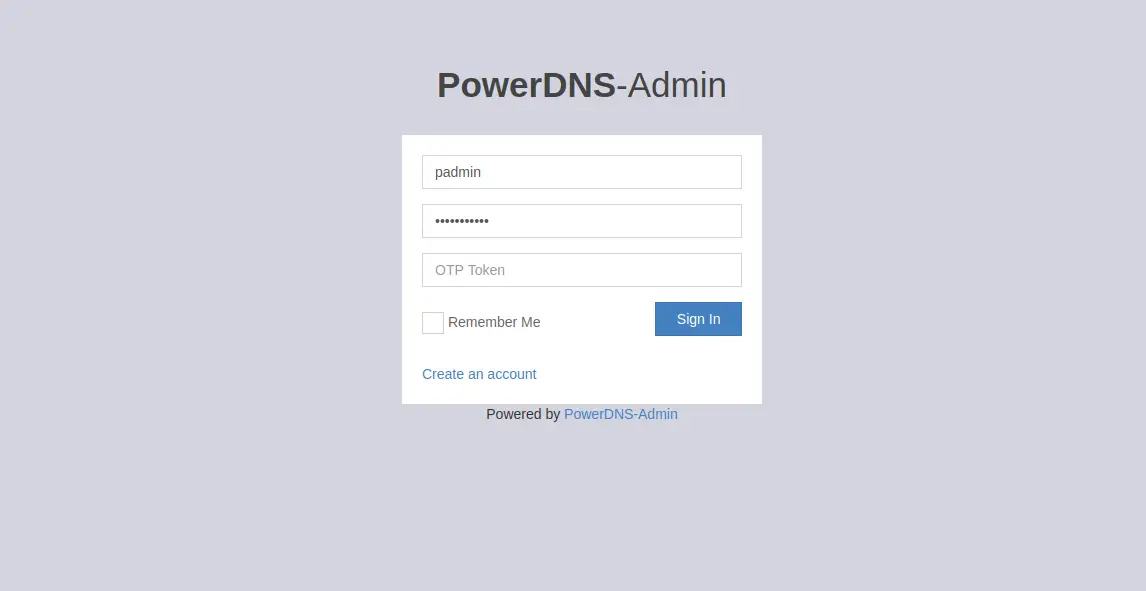
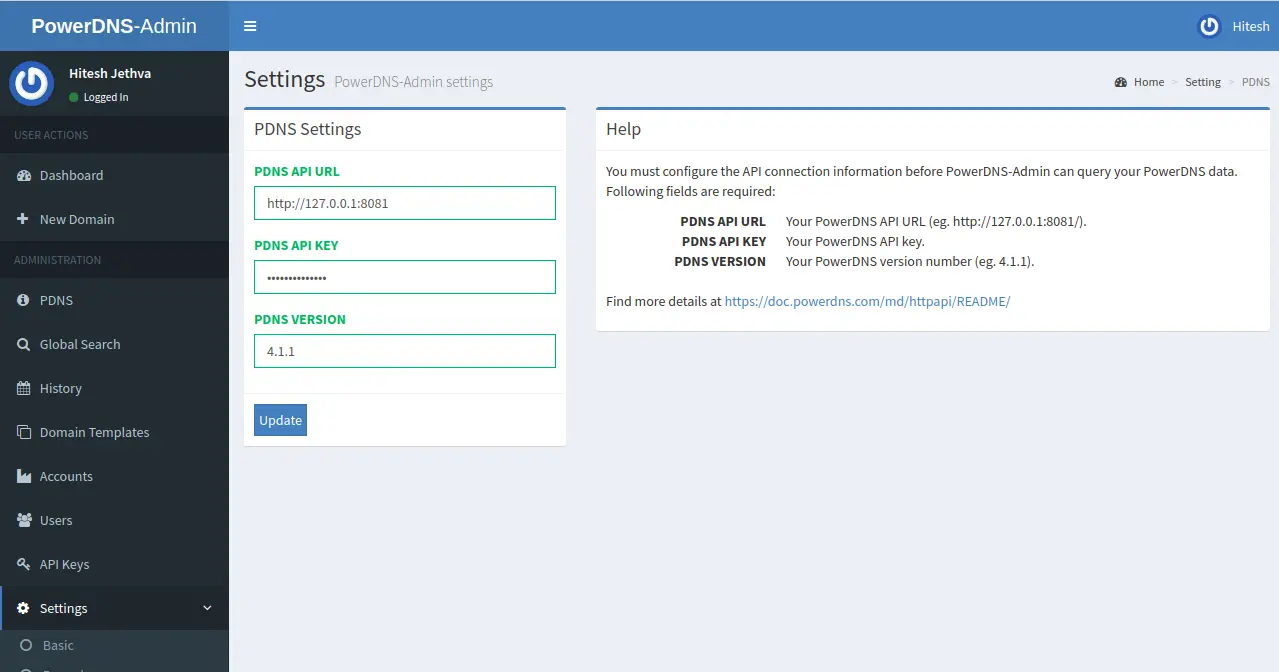
Provide your admin username, password and click on the Sign In button. You should see the PowerDNS admin web interface in the following page:
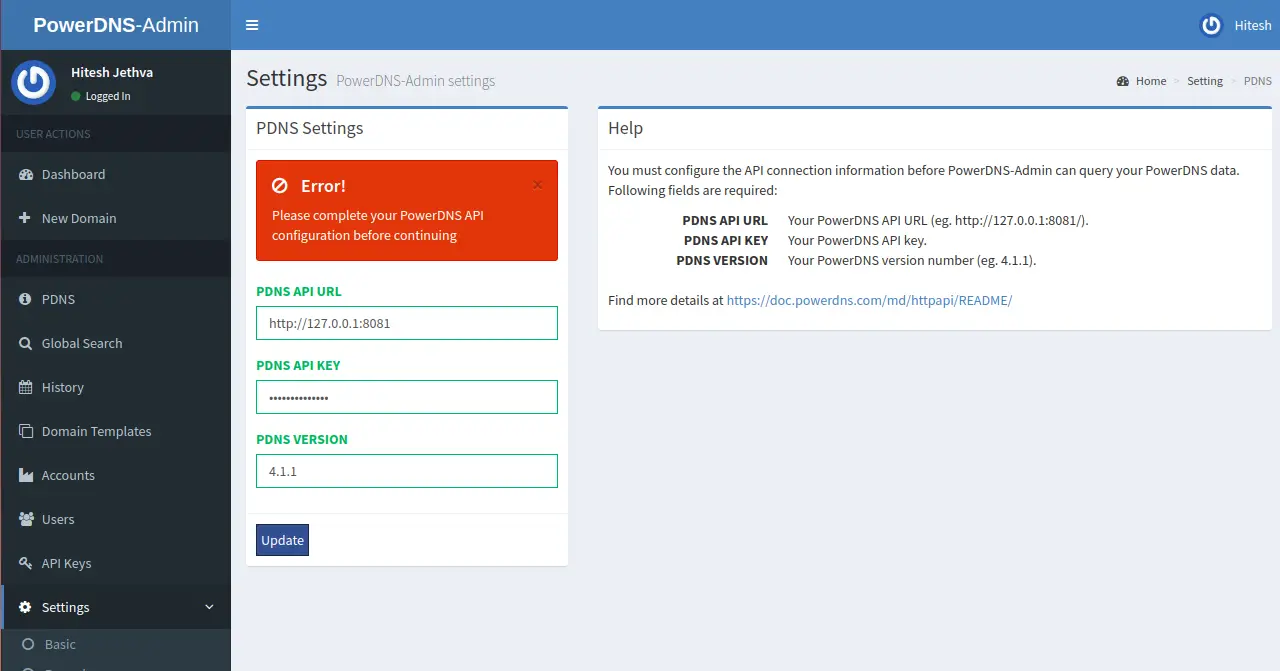
Here, provide the PowerDNS API URL to connect to PowerDNS and manage it. Then, click on the Update button to save the changes. You should see the following page:
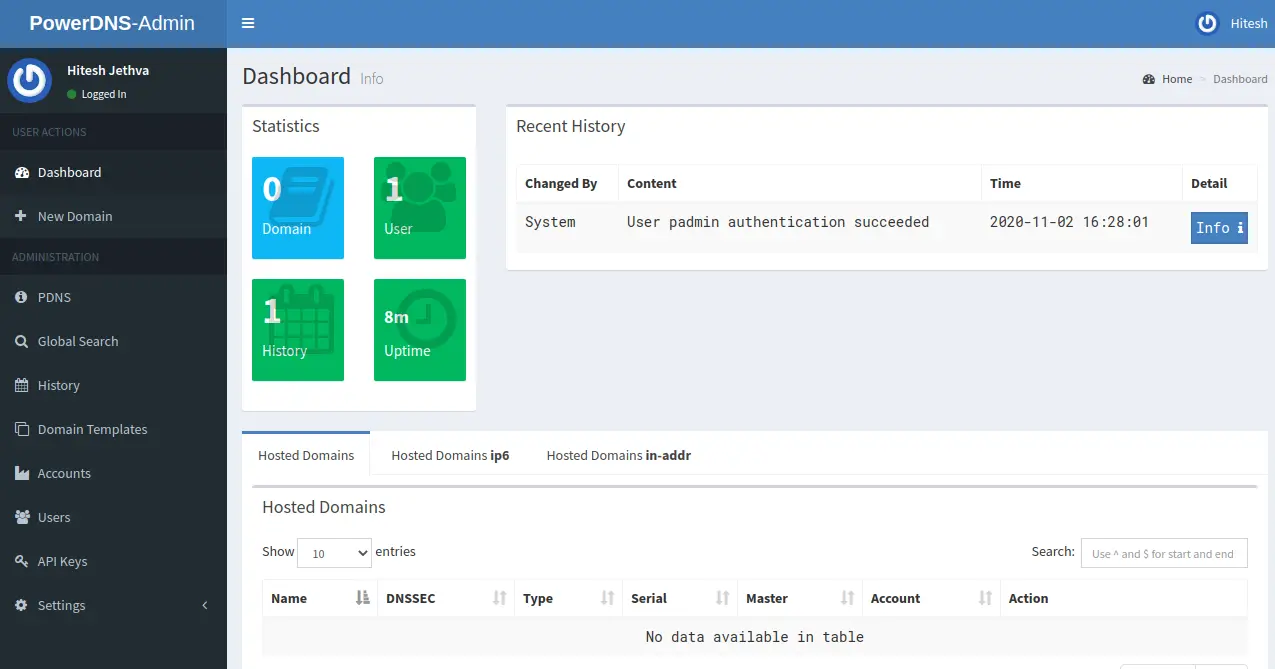
Click on the Dashboard button. You should see the PowerDNS admin dashboard in the following screen:
Conclusion
Congratulations! you have successfully installed and configured PowerDNS and PowerDNS admin on Ubuntu 20.04 server. You can now create zones and add records through the PowerDNS admin web interface.

