How to Install Plex Media Server on Debian 12
Plex Media Server is a DIY streaming solution for your local environment. It allows you to store different types of media files in a centralized location, and then you can stream all your media files from multiple locations and devices, such as TVs, smartphones, and more.
This guide will show you how to install the Plex Media Server on Debian 12 server. You will install Plex with UFW (Uncomplicated Firewall) and Nginx as a reverse proxy.
Prerequisites
To start with this guide, ensure you have the following:
- A Debian 12 server.
- A non-root user with administrator privileges.
- A domain name pointed to the server IP address.
Installing Dependencies
Before installing, let's install the required dependencies to your Debian machine.
Firstly, run the command below to update your Debian repository.
sudo apt update
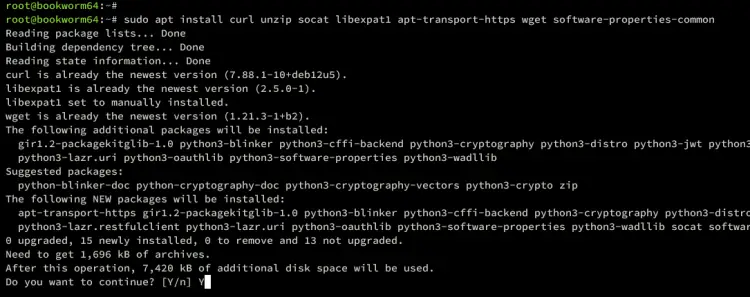
After that, install dependencies to your Debian system using the command below. Type y when asked, then press ENTER to proceed.
sudo apt install curl unzip socat libexpat1 apt-transport-https wget software-properties-common
Installing Plex Media Server on Debian
Once dependencies are installed, you're ready to install the Plex Media Repository. But before, you must add a Plex repository to your Debian system.
Run the command below to add the Plex repository to your Debian machine.
echo deb https://downloads.plex.tv/repo/deb public main | sudo tee /etc/apt/sources.list.d/plexmediaserver.list
Then, add the GPG key for the Plex repository using the following command.
curl https://downloads.plex.tv/plex-keys/PlexSign.key | sudo apt-key add -
Once the repository and GPG key are added, update and refresh your Debian repository using the following command.
sudo apt update
Now that the repository is updated, you can install the plexmediaserver package using the command below.
sudo apt install plexmediaserver
After the installation is finished, run the following systemctl command to start and enable the plexmediaserver service.
sudo systemctl start plexmediaserver
sudo systemctl enable plexmediaserver
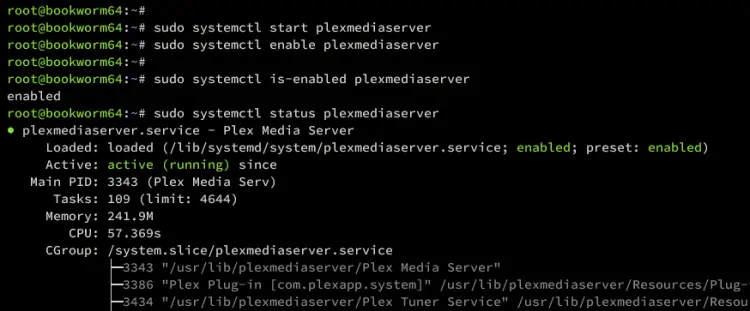
The plexmediaserver should be running on your Debian machine. Now verify it using the command below.
sudo systemctl is-enabled plexmediaserver
sudo systemctl status plexmediaserver
If everything goes well, you will see the plexmediaserver with the status active (running).
Setting Up UFW
In this guide, you will be using UFW to protect the Plex Media Server. So you must install UFW first to your Debian server, then enable the OpenSSH profile and add the main port for Plex Media Server.
Install UFW to your Debian system using the following command.
sudo apt install ufw -y
Once installed, add the OpenSSH profile to allow SSH traffic and open port 32400 for Plex.
sudo ufw allow OpenSSH
sudo ufw allow 32400
Now run the command below to start and enable UFW. When prompted, input y to confirm.
sudo ufw enable
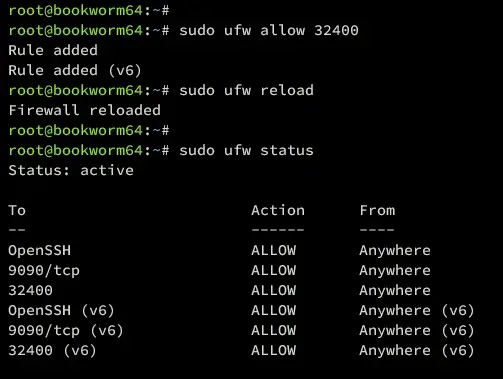
Lastly, verify the UFW status and list of enabled rules using the command below. Ensure that UFW is running with the status Active and that both OpenSSH and port 32400 are enabled.
sudo ufw status
Installing and Configuring Nginx as a Reverse Proxy
At this point, you have installed installed Plex and configured UFW. For now, let's install Nginx and configure it as a reverse proxy for your Plex Media Server installation.
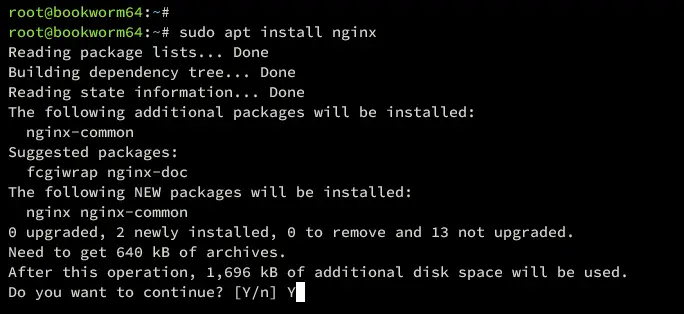
Install the Nginx web server to your Debian machine using the command below. Input y when prompted, then press ENTER to proceed.
sudo apt install nginx
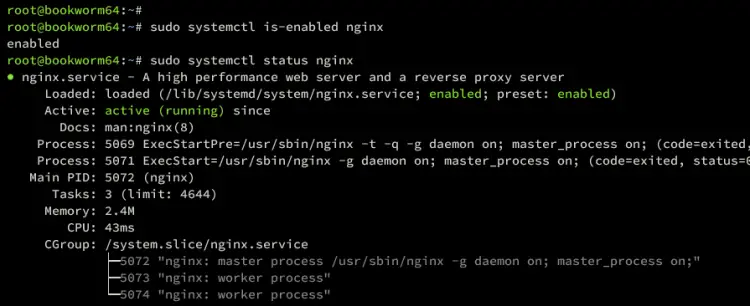
After Nginx is installed, run the following command to verify the Nginx service. Ensure the Nginx service is running and enabled.
sudo systemctl is-enabled nginx
sudo systemctl status nginx
If enabled, you should get an output such as enabled. When running, you will see an output active (running).
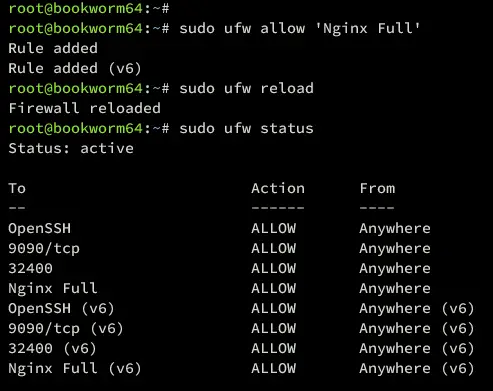
With the Nginx running, run the ufw command below to open both HTTP and HTTPS ports for Plex traffic. By default, UFW provides an application profile 'WWW Full' for opening both HTTP and HTTPS.
Run the command below to enable the 'Nginx Full' profile, then reload UFW to apply.
sudo ufw allow 'Nginx Full'
sudo ufw reload
Next, create a new server block configuration /etc/nginx/sites-available/plex using the nano editor command below. This will be used as a reverse proxy for Plex Media Server installation.
vim /etc/nginx/sites-available/plex
Add the configuration below and be sure to change the domain name with your Plex domain name. Here, you can also use the local domain for the local environment.
upstream plex_backend {
 server 127.0.0.1:32400;
 keepalive 32;
}

server {
 listen 80;
 server_name plex.howtoforge.local;

 send_timeout 100m; #Some players don't reopen a socket and playback stops totally instead of resuming after an extended pause (e.g. Ch$

 #Plex has A LOT of javascript, xml, and html. This helps a lot, but if it causes playback issues with devices turn it off. (Haven't enc$
 gzip on;
 gzip_vary on;
 gzip_min_length 1000;
 gzip_proxied any;
 gzip_types text/plain text/css text/xml application/xml text/javascript application/x-javascript image/svg+xml;
 gzip_disable "MSIE [1-6]\.";

 #Nginx default client_max_body_size is 1MB, which breaks the Camera Upload feature from the phones.
 #Increasing the limit fixes the issue. Anyhow, if 4K videos are expected to be uploaded, the size might need to be increased even more
 client_max_body_size 100M;

 #Forward real ip and host to Plex
 proxy_set_header Host $host;
 proxy_set_header X-Real-IP $remote_addr;
 proxy_set_header X-Forwarded-For $proxy_add_x_forwarded_for;
 proxy_set_header X-Forwarded-Proto $scheme;
 proxy_set_header Sec-WebSocket-Extensions $http_sec_websocket_extensions;
 proxy_set_header Sec-WebSocket-Key $http_sec_websocket_key;
 proxy_set_header Sec-WebSocket-Version $http_sec_websocket_version;
 #Websockets
 proxy_http_version 1.1;
 proxy_set_header Upgrade $http_upgrade;
 proxy_set_header Connection "Upgrade";

 #Buffering off is sent to the client as soon as the data is received from Plex.
 proxy_redirect off;
 proxy_buffering off;

 location / {
 proxy_pass http://plex_backend;
 }
}
Save the file and exit the editor.
Next, run the command below to enable the /etc/nginx/sites-available/plex server block and verify your Nginx syntax.
sudo ln -s /etc/nginx/sites-available/plex /etc/nginx/sites-enabled
sudo nginx -t
Ensure you have no error, and be sure you get an output 'syntax is OK - test is successful'.
Lastly, run the command below to restart the Nginx service and apply your changes to Nginx. With this, your Plex Media Server should be accessible via HTTP and HTTPS ports, which are handled by the Nginx web server.
sudo systemctl restart nginx
Securing Plex Media Server with SSL/TLS Certificates
In this guide, you will secure your Plex installation via SSL/TLS certificates. For local domain users, you can generate self-signed certificates and manually enable HTTPS on the Nginx server block. If you're using the public domain, use Certbot and Letsencrypt to generate SSL/TLS certificates.
Run the command below to install the certbot and certbot Nginx plugin.
sudo apt install certbot python3-certbot-nginx
Once the installation is finished, run the certbot command below to generate SSL/TLS certificates for your Plex domain name. Also, be sure to change the email address and domain name with your info.
sudo certbot --nginx --agree-tos --redirect --hsts --staple-ocsp --email [email protected] -d plex.howtoforge.local
Once the process is finished, your Nginx server block will automatically configured with HTTPS. And your SSL/TLS certificates can be found in the /etc/letsencrypt/live/domain.com directory.
Plex Media Server Configuration
Open your web browser and visit your Plex domain name (i.e: https://plex.howtoforge.local/). You will be redirected to plex.tv website to register a Plex account. You can register via Facebook/Gmail/Apple, or you can register via email address.
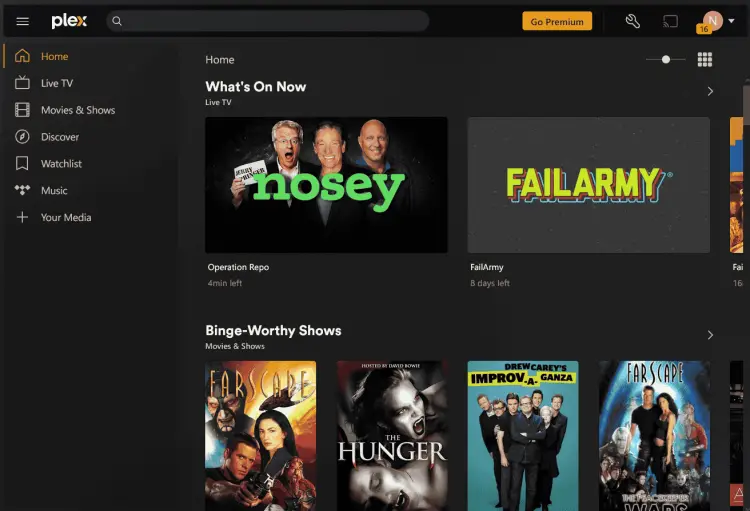
Once registered, open a new tab and visit your Plex domain name. If your installation is successful, you should get the Plex Media Server dashboard like the following:
Conclusion
Congratulations! You have now installed the Plex Media Server on Debian 12 server. You've also configured UFW on Debian for securing Plex installation. In addition to that, you also have configured Nginx as a reverse proxy for Plex Media Server and secured Plex via SSL.TLS certificates from Letsencrypt.


