How to Install OpenEMR on Debian 12
On this page
- Prerequisites
- Step 1 - Configure Firewall
- Step 2 - Install Nginx
- Step 3 - Install MariaDB
- Step 4 - Configure MariaDB
- Step 5 - Install PHP and its extensions
- Step 6 - Install SSL
- Step 7 - Download OpenEMR
- Step 8 - Install phpMyAdmin
- Step 9 - Configure phpMyAdmin
- Step 10 - Configure PHP-FPM
- Step 11 - Configure Nginx
- Step 12 - Install OpenEMR
- Conclusion
OpenEMR is an open-source electronic health record and medical practice management tool. It is Office of the National Coordinator for Health Information Technology (ONC) certified and it features integrated health records, practice management, scheduling, electronic billing, internationalization, free support, and a lot more. It can track patient demographics, schedule patients, maintain extremely detailed health records with lab reports, medications, and procedures, track their prescriptions, help with medical billing, generate detailed reports, and multi-language support.
In this tutorial, you will learn how to install OpenEMR software on a server running Debian 12.
Prerequisites
-
A server running Debian 12.
-
A non-root sudo user.
-
A fully qualified domain name (FQDN) like
openemr.example.com. -
Make sure everything is updated.
$ sudo apt update
$ sudo apt upgrade
-
Few packages that your system needs.
$ sudo apt install wget curl nano ufw software-properties-common dirmngr apt-transport-https gnupg2 ca-certificates lsb-release debian-archive-keyring unzip -y
Some of these packages may already be installed on your system.
Step 1 - Configure Firewall
The first step is to configure the firewall. Debian comes with ufw (Uncomplicated Firewall) by default.
Check if the firewall is running.
$ sudo ufw status
You will get the following output.
Status: inactive
Allow SSH port so that the firewall doesn't break the current connection upon enabling it.
$ sudo ufw allow OpenSSH
Allow HTTP and HTTPS ports as well.
$ sudo ufw allow http
$ sudo ufw allow https
Enable the Firewall
$ sudo ufw enable
Command may disrupt existing ssh connections. Proceed with operation (y|n)? y
Firewall is active and enabled on system startup
Check the status of the firewall again.
$ sudo ufw status
You should see a similar output.
Status: active

To                         Action      From
--                         ------      ----
OpenSSH                    ALLOW       Anywhere
80/tcp                     ALLOW       Anywhere
443                        ALLOW       Anywhere
OpenSSH (v6)               ALLOW       Anywhere (v6)
80/tcp (v6)                ALLOW       Anywhere (v6)
443 (v6)                   ALLOW       Anywhere (v6)
Step 2 - Install Nginx
Debian 12 ships with an older version of Nginx. To install the latest version, you need to download the official Nginx repository.
Import Nginx's signing key.
$ curl https://nginx.org/keys/nginx_signing.key | gpg --dearmor \
    | sudo tee /usr/share/keyrings/nginx-archive-keyring.gpg >/dev/null
Add the repository for Nginx's stable version.
$ echo "deb [signed-by=/usr/share/keyrings/nginx-archive-keyring.gpg] \
http://nginx.org/packages/debian `lsb_release -cs` nginx" \
    | sudo tee /etc/apt/sources.list.d/nginx.list
Update the system repositories.
$ sudo apt update
Install Nginx.
$ sudo apt install nginx
Verify the installation. On Debian systems, the following command will only work with sudo.
$ sudo nginx -v
nginx version: nginx/1.24.0
Start the Nginx server.
$ sudo systemctl start nginx
Check the service status.
? nginx.service - nginx - high performance web server
     Loaded: loaded (/lib/systemd/system/nginx.service; enabled; preset: enabled)
     Active: active (running) since Tue 2023-08-08 02:03:03 UTC; 5s ago
       Docs: https://nginx.org/en/docs/
    Process: 4929 ExecStart=/usr/sbin/nginx -c /etc/nginx/nginx.conf (code=exited, status=0/SUCCESS)
   Main PID: 4930 (nginx)
      Tasks: 2 (limit: 2315)
     Memory: 1.8M
        CPU: 12ms
     CGroup: /system.slice/nginx.service
             ??4930 "nginx: master process /usr/sbin/nginx -c /etc/nginx/nginx.conf"
             ??4931 "nginx: worker process"
Step 3 - Install MariaDB
Debian 12 does not ship with MySQL by default and they haven't released an official package for it yet. Therefore, we will be using MariaDB for it. MariaDB doesn't have an official package for Debian 12 as well but Debian ships with it. Therefore, install it using the following command.
$ sudo apt install mariadb-server
Check the version of MySQL.
$ mysql --version
mysql  Ver 15.1 Distrib 10.11.3-MariaDB, for debian-linux-gnu (x86_64) using  EditLine wrapper
Run the MariaDB secure install script.
$ sudo mysql_secure_installation
You will be asked for the root password. Press Enter because we haven't set any password for it.
NOTE: RUNNING ALL PARTS OF THIS SCRIPT IS RECOMMENDED FOR ALL MariaDB
      SERVERS IN PRODUCTION USE!  PLEASE READ EACH STEP CAREFULLY!

In order to log into MariaDB to secure it, we'll need the current
password for the root user. If you've just installed MariaDB, and
haven't set the root password yet, you should just press enter here.

Enter current password for root (enter for none):
Next, you will be asked if you want to switch to the Unix socket authentication method. The unix_socket plugin allows you to use your operating system credentials to connect to the MariaDB server. Since you already have a protected root account, enter n to proceed.
OK, successfully used password, moving on...

Setting the root password or using the unix_socket ensures that nobody
can log into the MariaDB root user without the proper authorisation.

You already have your root account protected, so you can safely answer 'n'.

Switch to unix_socket authentication [Y/n] n
Next, you will be asked if you want to change your root password. On Debian 12, the root password is tied closely to automated system maintenance, so it should be left alone. Type n to proceed further.
 ... skipping.

You already have your root account protected, so you can safely answer 'n'.

Change the root password? [Y/n] n
Next, you will be asked certain questions to improve MariaDB security. Type Y to remove anonymous users, disallow remote root logins, remove the test database, and reload the privilege tables.
 ... skipping.

By default, a MariaDB installation has an anonymous user, allowing anyone
to log into MariaDB without having to have a user account created for
them.  This is intended only for testing, and to make the installation
go a bit smoother.  You should remove them before moving into a
production environment.

Remove anonymous users? [Y/n] y
 ... Success!

Normally, root should only be allowed to connect from 'localhost'.  This
ensures that someone cannot guess at the root password from the network.

Disallow root login remotely? [Y/n] y
 ... Success!

By default, MariaDB comes with a database named 'test' that anyone can
access.  This is also intended only for testing, and should be removed
before moving into a production environment.

Remove test database and access to it? [Y/n] y
 - Dropping test database...
 ... Success!
 - Removing privileges on test database...
 ... Success!

Reloading the privilege tables will ensure that all changes made so far
will take effect immediately.

Reload privilege tables now? [Y/n] y
 ... Success!

Cleaning up...

All done!  If you've completed all of the above steps, your MariaDB
installation should now be secure.

Thanks for using MariaDB!
You can enter the MariaDB shell by typing sudo mysql or sudo mariadb on the command line.
Step 4 - Configure MariaDB
Log in to the MariaDB shell.
$ sudo mysql
Create the OpenEMR database.
mysql> CREATE DATABASE openemr;
Create the OpenEMR user account.
mysql> CREATE USER 'openemruser'@'localhost' IDENTIFIED BY 'Your_password2!';
Grant all privileges on the database to the user.
mysql> GRANT ALL PRIVILEGES ON openemr.* TO 'openemruser'@'localhost';
Since we are not modifying the root user, you should create another SQL user for performing administrative tasks which employ password authentication. Choose a strong password for this one.
MariaDB> GRANT ALL ON *.* TO 'navjot'@'localhost' IDENTIFIED BY 'Yourpassword32!' WITH GRANT OPTION;
Flush user privileges.
mysql> FLUSH PRIVILEGES;
Exit the shell.
mysql> exit
Step 5 - Install PHP and its extensions
Debian 12 ships with PHP 8.2 by default. You can install it by running the following command.
$ sudo apt install php-fpm php-mysql php-bcmath php-xml php-zip php-curl php-mbstring php-gd php-tidy php-intl php-cli php-soap imagemagick libtiff-tools php-ldap
To always stay on the latest version of PHP or if you want to install multiple versions of PHP, add Ondrej's PHP repository.
First, import Sury's repo PHP GPG key.
$ sudo curl -sSLo /usr/share/keyrings/deb.sury.org-php.gpg https://packages.sury.org/php/apt.gpg
Add Ondrej Sury's PHP repository.
$ sudo sh -c 'echo "deb [signed-by=/usr/share/keyrings/deb.sury.org-php.gpg] https://packages.sury.org/php/ $(lsb_release -sc) main" > /etc/apt/sources.list.d/php.list'
Update the system repository list.
$ sudo apt update
Next, install PHP and its extensions required by OpenEMR.
$ sudo apt install php8.2-fpm php8.2-mysql php8.2-bcmath php8.2-xml php8.2-zip php8.2-curl php8.2-mbstring php8.2-gd php8.2-tidy php8.2-intl php8.2-cli php8.2-soap imagemagick libtiff-tools php8.2-ldap
Verify the installation.
$ php --version
PHP 8.2.8 (cli) (built: Jul 16 2023 11:00:43) (NTS)
Copyright (c) The PHP Group
Zend Engine v4.2.8, Copyright (c) Zend Technologies
    with Zend OPcache v8.2.8, Copyright (c), by Zend Technologies
Step 6 - Install SSL
We need to install Certbot to generate the SSL certificate. You can either install Certbot using Debian's repository or grab the latest version using the Snapd tool. We will be using the Snapd version.
Debian 12 comes doesn't come with Snapd installed. Install Snapd package.
$ sudo apt install snapd
Run the following commands to ensure that your version of Snapd is up to date.
$ sudo snap install core && sudo snap refresh core
Install Certbot.
$ sudo snap install --classic certbot
Use the following command to ensure that the Certbot command can be run by creating a symbolic link to the /usr/bin directory.
$ sudo ln -s /snap/bin/certbot /usr/bin/certbot
Verify if Certbot is functioning properly.
$ certbot --version
certbot 2.6.0
Run the following command to generate an SSL Certificate.
$ sudo certbot certonly --nginx --agree-tos --no-eff-email --staple-ocsp --preferred-challenges http -m [email protected] -d openemr.example.com
The above command will download a certificate to the /etc/letsencrypt/live/openemr.example.com directory on your server.
Generate a Diffie-Hellman group certificate.
$ sudo openssl dhparam -dsaparam -out /etc/ssl/certs/dhparam.pem 4096
Check the Certbot renewal scheduler service.
$ sudo systemctl list-timers
You will find snap.certbot.renew.service as one of the services scheduled to run.
NEXT                        LEFT          LAST                        PASSED    UNIT                      ACTIVATES
.....
Tue 2023-08-08 03:09:00 UTC 23min left    Tue 2023-08-08 02:39:00 UTC 6min ago  phpsessionclean.timer        phpsessionclean.service
Tue 2023-08-08 04:21:00 UTC 1h 35min left -                           -         snap.certbot.renew.timer     snap.certbot.renew.service
Tue 2023-08-08 06:25:00 UTC 3h 39min left Mon 2023-08-07 13:54:08 UTC 12h ago   ntpsec-rotate-stats.timer    ntpsec-rotate-stats.service
Do a dry run of the process to check whether the SSL renewal is working fine.
$ sudo certbot renew --dry-run
If you see no errors, you are all set. Your certificate will renew automatically.
Step 7 - Download OpenEMR
Visit the OpenEMR download page and grab the link for the latest version of OpenEMR. Download OpenEMR to the server.
$ wget https://sourceforge.net/projects/openemr/files/OpenEMR%20Current/7.0.1/openemr-7.0.1.tar.gz
Extract the files.
$ tar -pxzf openemr-7.0.1.tar.gz
Create the /var/www/html directory.
$ sudo mkdir /var/www/html -p
Move the extracted files to the web directory.
$ sudo mv openemr-7.0.1 /var/www/html/openemr
Give permissions to the Nginx user over the web root directory.
$ sudo chown -R nginx:nginx /var/www/html/openemr
Step 8 - Install phpMyAdmin
Before we configure PHP-FPM, we will install phpMyAdmin which you can use to browse and edit the database.
Download phpMyAdmin's archive file for the English language. Grab the link for the latest version from the phpMyAdmin Download page.
$ wget https://files.phpmyadmin.net/phpMyAdmin/5.2.1/phpMyAdmin-5.2.1-english.tar.gz
Extract the archive to the public directory.
$ sudo tar -xzf phpMyAdmin-5.2.1-english.tar.gz -C /var/www/html/openemr
Switch to the public directory.
$ cd /var/www/html/openemr
Rename the extracted directory to something obscure to improve security.
$ sudo mv phpMyAdmin-5.2.1-english sm175
Step 9 - Configure phpMyAdmin
Copy the sample configuration file.
$ sudo cp sm175/config.sample.inc.php sm175/config.inc.php
Open the configuration file for editing.
$ sudo nano sm175/config.inc.php
Find the line $cfg['blowfish_secret'] = ''; and enter a 32-character random string for cookie-based authentication.
You can use phpSolved's online blowfish generator or do it via the command line.
Copy the value and paste it as shown.
$cfg['blowfish_secret'] = 'Tc/HfLPBOAPxJ-rhQP}HJoZEK69c3j:m';
Save the file by pressing Ctrl + X and entering Y when prompted.
Change the ownership of the phpMyAdmin directory to the Nginx server.
$ sudo chown -R nginx:nginx /var/www/html/openemr/sm175
Delete the phpMyAdmin setup directory.
$ sudo rm -rf /var/www/html/openemr/sm175/setup
Step 10 - Configure PHP-FPM
Open the file /etc/php/8.2/fpm/pool.d/www.conf.
$ sudo nano /etc/php/8.2/fpm/pool.d/www.conf
We need to set the Unix user/group of PHP processes to nginx. Find the user=www-data and group=www-data lines in the file and change them to nginx.
; Unix user/group of the child processes. This can be used only if the master
; process running user is root. It is set after the child process is created.
; The user and group can be specified either by their name or by their numeric
; IDs.
; Note: If the user is root, the executable needs to be started with
;       --allow-to-run-as-root option to work.
; Default Values: The user is set to master process running user by default.
;                 If the group is not set, the user's group is used.
user = nginx
group = nginx
...
Find the listen.owner = www-data and listen.group = www-data lines in the file and change them to nginx.
; Set permissions for unix socket, if one is used. In Linux, read/write
; permissions must be set in order to allow connections from a web server. Many
; BSD-derived systems allow connections regardless of permissions. The owner
; and group can be specified either by name or by their numeric IDs.
; Default Values: Owner is set to the master process running user. If the group
;                 is not set, the owner's group is used. Mode is set to 0660.
listen.owner = nginx
listen.group = nginx
Save the file by pressing Ctrl + X and entering Y when prompted.
Increase the execution time for PHP-FPM and PHP-CLI to 60 seconds.
$ sudo sed -i 's/max_execution_time = 30/max_execution_time = 60/' /etc/php/8.2/fpm/php.ini
Set the value of the variable max_input_time to 1.
$ sudo sed -i 's/max_input_time = 60/max_input_time = -1/' /etc/php/8.2/fpm/php.ini
Increase the memory limit for PHP-FPM from 128MB to 512MB.
$ sudo sed -i 's/memory_limit = 128M/memory_limit = 512M/' /etc/php/8.2/fpm/php.ini
Increase the file upload size to 30MB.
$ sudo sed -i 's/post_max_size = 8M/post_max_size = 30M/' /etc/php/8.2/fpm/php.ini
$ sudo sed -i 's/upload_max_filesize = 2M/upload_max_filesize = 30M/' /etc/php/8.2/fpm/php.ini
Increase the number of maximum input variables to 3000.
$ sudo sed -i 's/;max_input_vars = 1000/max_input_vars = 3000/g' /etc/php/8.2/fpm/php.ini
Allow accessing, from PHP's perspective, local files with LOAD DATA statements.
$ sudo sed -i 's/;mysqli.allow_local_infile = On/mysqli.allow_local_infile = On/g' /etc/php/8.2/fpm/php.ini
Restart the PHP-FPM service.
$ sudo systemctl restart php8.2-fpm
Change the group of the PHP sessions directory to Nginx.
$ sudo chgrp -R nginx /var/lib/php/sessions
Step 11 - Configure Nginx
Create and open the file /etc/nginx/conf.d/openemr.conf for editing.
$ sudo nano /etc/nginx/conf.d/openemr.conf
Paste the following code in it.
server {
    listen       443 ssl http2;
    listen       [::]:443 ssl http2;
    server_name  openemr.example.com;

    access_log  /var/log/nginx/openemr.access.log;
    error_log   /var/log/nginx/openemr.error.log;

    # SSL
    ssl_certificate         /etc/letsencrypt/live/openemr.example.com/fullchain.pem;
    ssl_certificate_key     /etc/letsencrypt/live/openemr.example.com/privkey.pem;
    ssl_trusted_certificate /etc/letsencrypt/live/openemr.example.com/chain.pem;
    ssl_session_timeout  1d;
    ssl_session_cache shared:SSL:50m;
    ssl_session_tickets off;
    ssl_protocols TLSv1.2 TLSv1.3;
    ssl_prefer_server_ciphers on;
    ssl_ciphers ECDHE-ECDSA-AES128-GCM-SHA256:ECDHE-RSA-AES128-GCM-SHA256:ECDHE-ECDSA-AES256-GCM-SHA384:ECDHE-RSA-AES256-GCM-SHA384:ECDHE-ECDSA-CHACHA20-POLY1305:ECDHE-RSA-CHACHA20-POLY1305:DHE-RSA-AES128-GCM-SHA256:DHE-RSA-AES256-GCM-SHA384;
    ssl_ecdh_curve X25519:prime256v1:secp384r1:secp521r1;
    ssl_stapling on;
    ssl_stapling_verify on;
    ssl_dhparam /etc/ssl/certs/dhparam.pem;
    # use https://blog.cloudflare.com/announcing-1111 Cloudfare+Apnic labs, It is free and secure
    resolver 1.1.1.1 1.0.0.1 [2606:4700:4700::1111] [2606:4700:4700::1001] valid=300s;

    root /var/www/html/openemr;

    index index.php;

    location / {
        try_files $uri $uri/ /index.php;
    }

    # Pass PHP Scripts To FastCGI Server
    location ~* \.php$ {
        try_files $uri =404;
        fastcgi_index  index.php;
        fastcgi_pass unix:/run/php-fpm/www.sock; # Depends On The PHP Version
        fastcgi_param SCRIPT_FILENAME  $realpath_root$fastcgi_script_name;
        fastcgi_param DOCUMENT_ROOT $realpath_root;
        include fastcgi_params;
    }

    # deny access to writable files/directories
    location ~* ^/sites/*/(documents|edi|era) {
        deny all;
        return 404;
    }

    # deny access to certain directories
    location ~* ^/(contrib|tests) {
	    deny all;
        return 404;
    }

    # Alternatively all access to these files can be denied
    location ~* ^/(admin|setup|acl_setup|acl_upgrade|sl_convert|sql_upgrade|gacl/setup|ippf_upgrade|sql_patch)\.php {
        deny all;
        return 404;
    }

    location = /favicon.ico {
        log_not_found off;
        access_log off;
    }

    location = /robots.txt  {
        log_not_found off;
        access_log off;
    }

    location ~ /\. {
        deny all;
    }
}

# enforce HTTPS
server {
    listen       80;
    listen       [::]:80;
    server_name  openemr.example.com;
    return 301   https://$host$request_uri;
}
Notice the root directory to be used in the Nginx configuration is /var/www/html/wallabag/public/.
Save the file by pressing Ctrl + X and entering Y when prompted once finished.
Open the file /etc/nginx/nginx.conf for editing.
$ sudo nano /etc/nginx/nginx.conf
Add the following line before the line include /etc/nginx/conf.d/*.conf;.
server_names_hash_bucket_size 64;
Save the file by pressing Ctrl + X and entering Y when prompted.
Verify the Nginx configuration file syntax.
$ sudo nginx -t
nginx: the configuration file /etc/nginx/nginx.conf syntax is ok
nginx: configuration file /etc/nginx/nginx.conf test is successful
Restart the Nginx service.
$ sudo systemctl restart nginx
Step 12 - Install OpenEMR
Open the URL https://openemr.example.com in your browser and you will see the following setup screen.
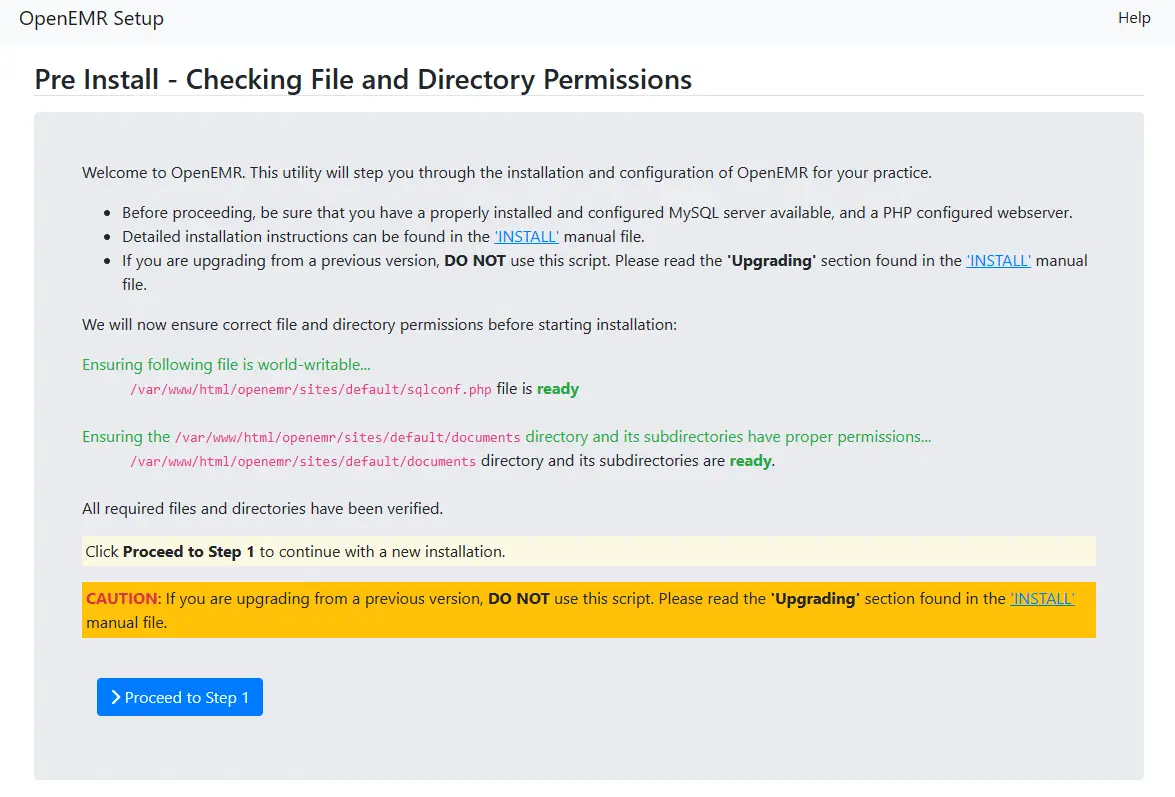
Here it checks for file permissions and confirms whether you can proceed to step 1 or not. If you see the word ready in green, it means you can proceed. Click the blue button to proceed to step 1.
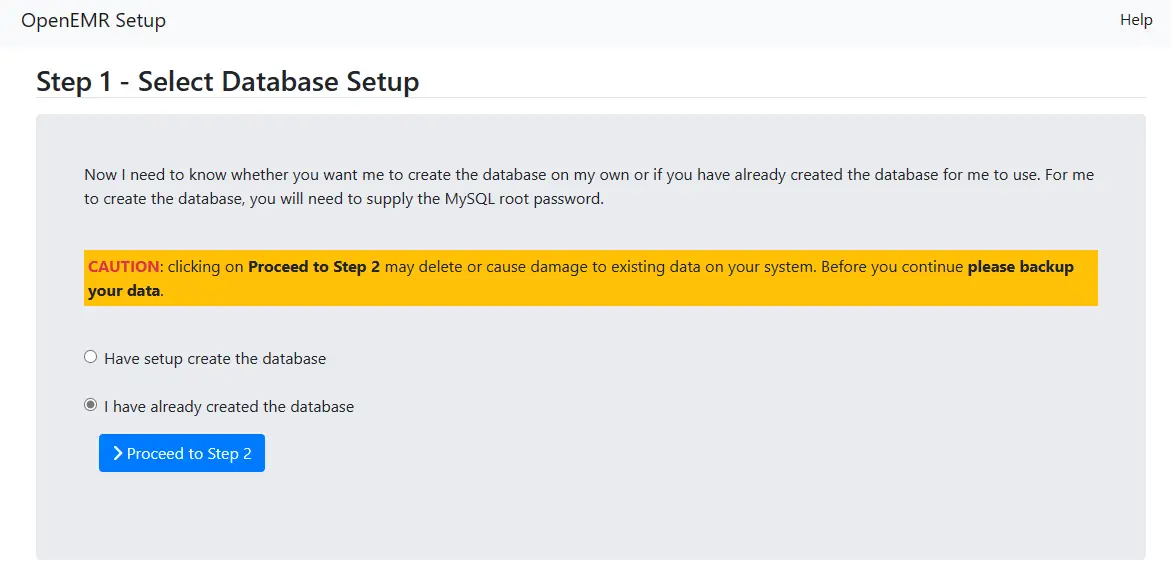
On the next page, you will be asked if you want the installer to create the database or use a pre-made one. Select the option I have already created the database and click the button to proceed to step 2.
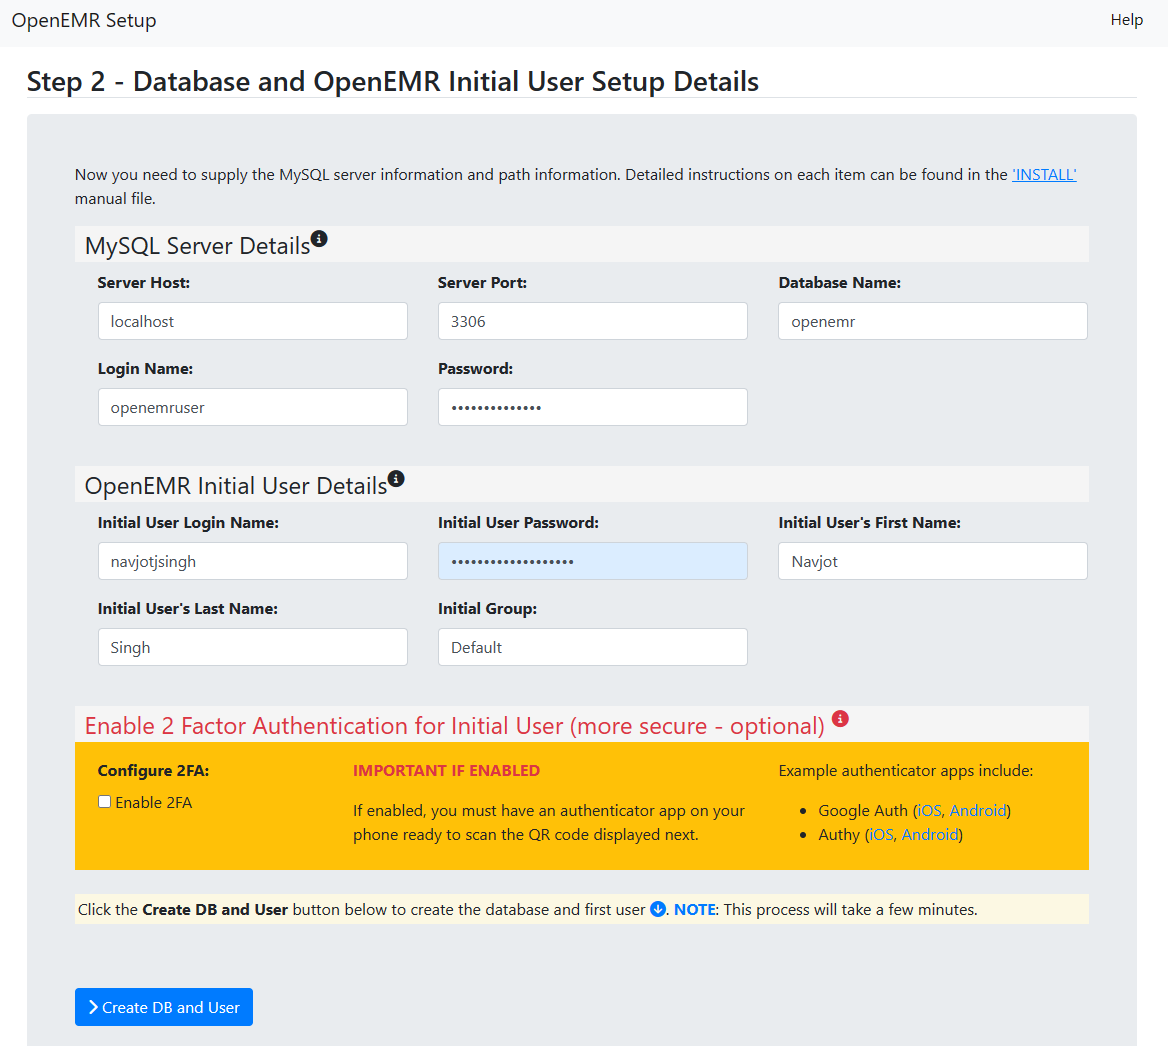
On the next page, fill in the database credentials you configured in step 4 before. Also, enter your administrator account credentials. Make sure your username is 12 or more characters long otherwise, you will get an error. You can enable two-factor authentication (2FA) here but it is recommended to configure it later after installation. Click the button to create the database and the user account.
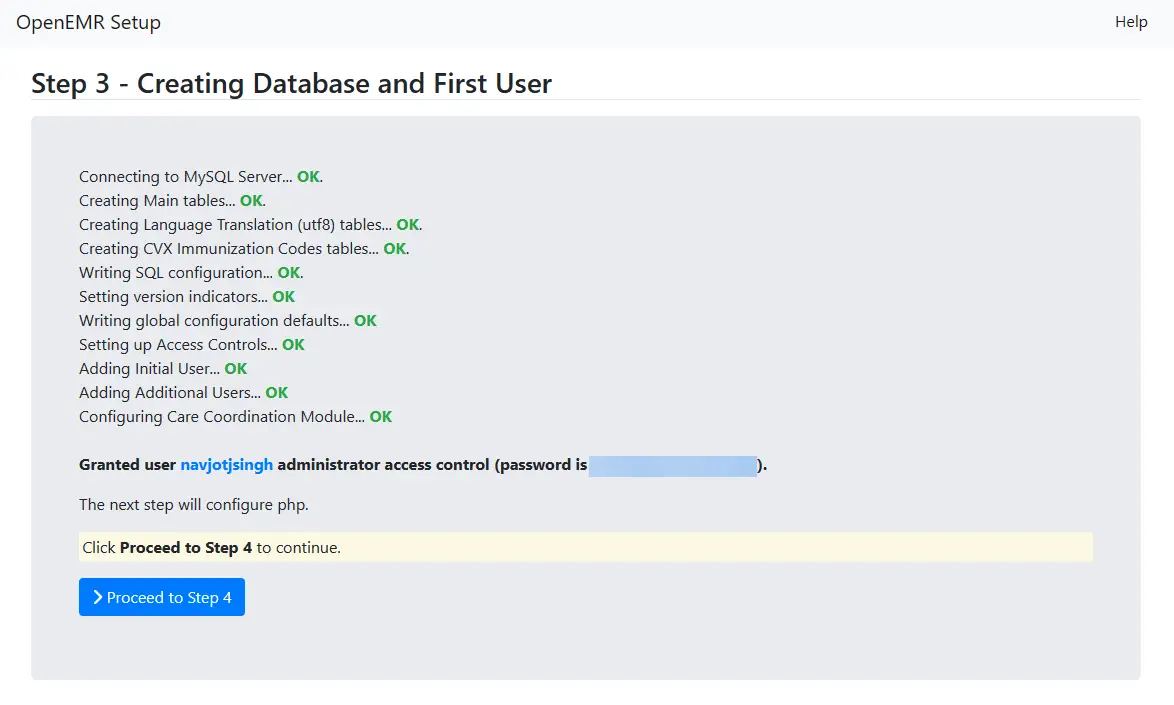
The next page will show the installation status and will show you the username and password. Click the button to proceed to step 4.
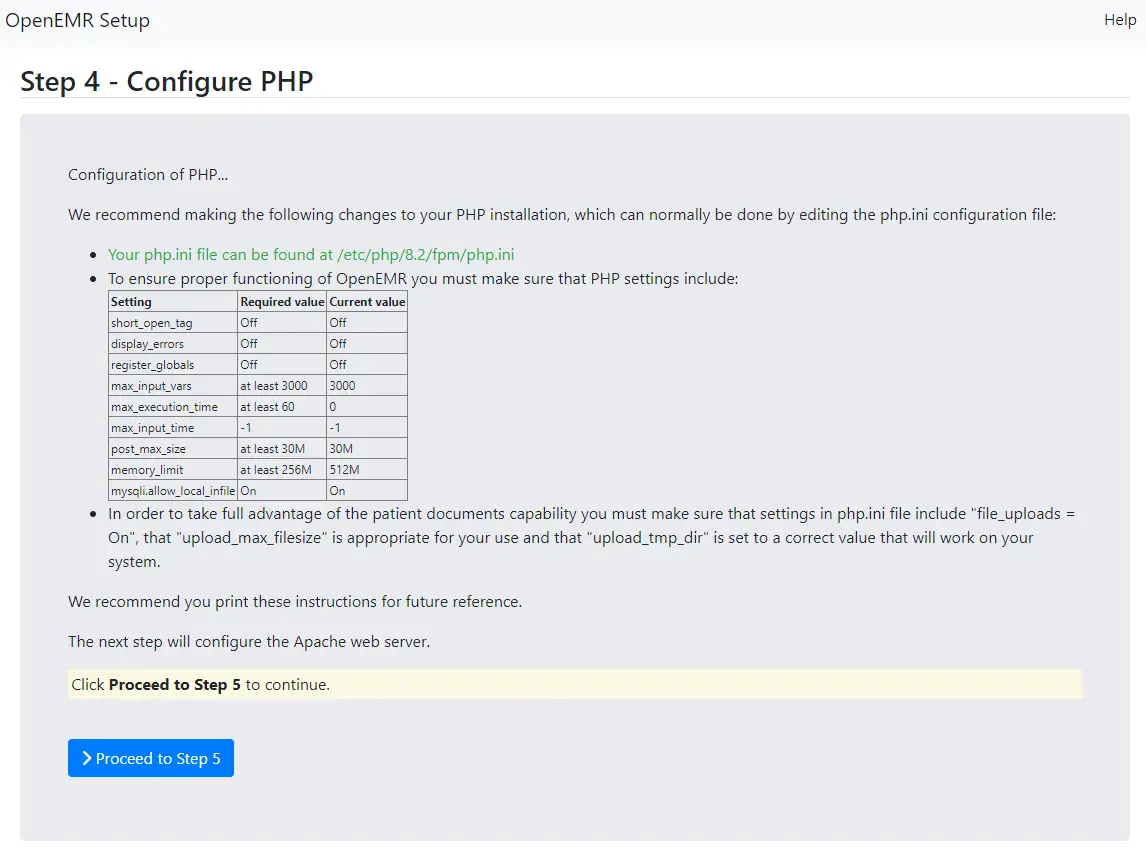
The next page will list the recommended and current values from your php.ini file. Make sure the current values satisfy the requirement. The installer shows the wrong values for the variable max_execution_time for some reason even if you have set it correctly. You can ignore this. You can verify the current value by using the following command.
![]()
Once you are satisfied, click the button to proceed to step 5.
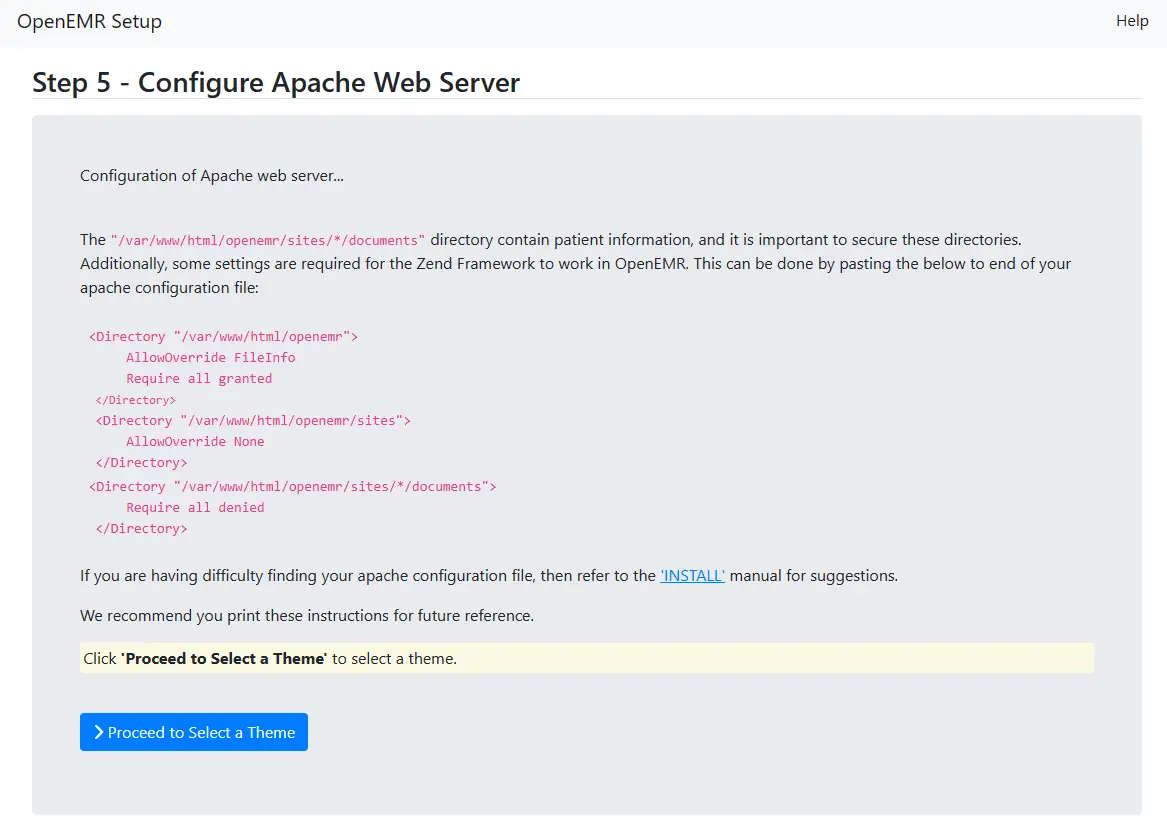
The next step lists Apache server settings which we will ignore since we are using the Nginx server. Click the button to proceed to the next page.
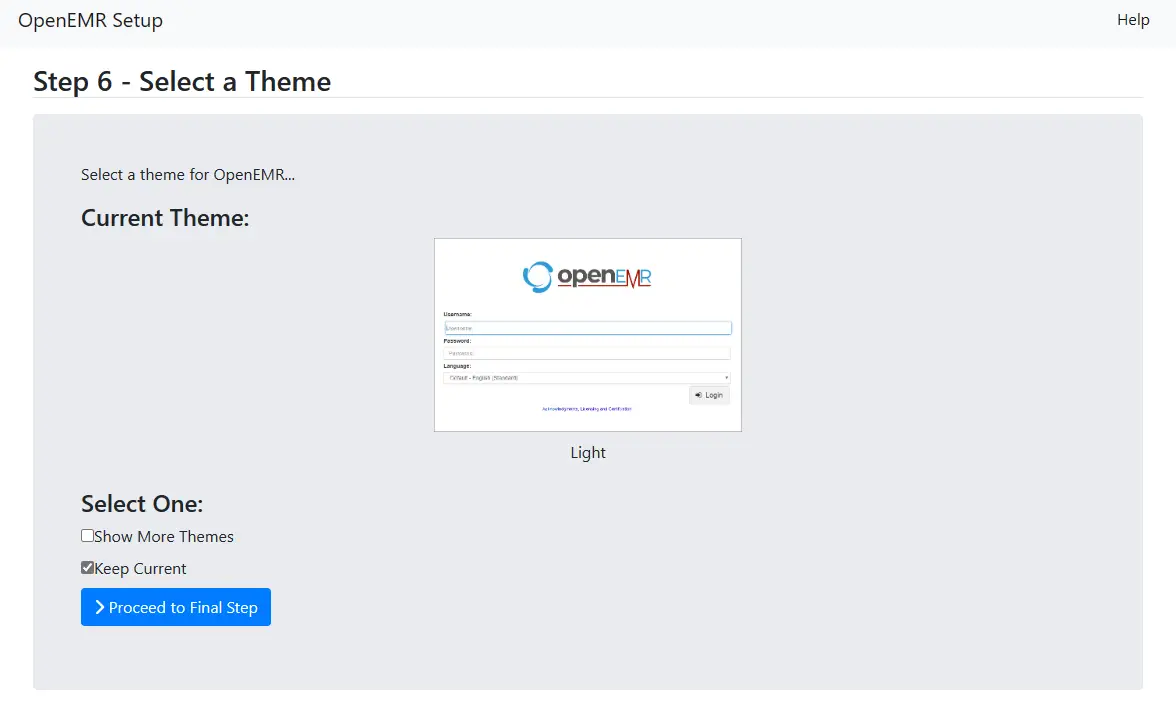
Here you will be asked to select a theme for the administration panel. Select the Keep Current option and click the button to proceed. You can change the theme from the administration panel later on however you won't be able to see how they look. If you choose from the installer page, you can also check how they look before selecting. We will stick with the default theme.
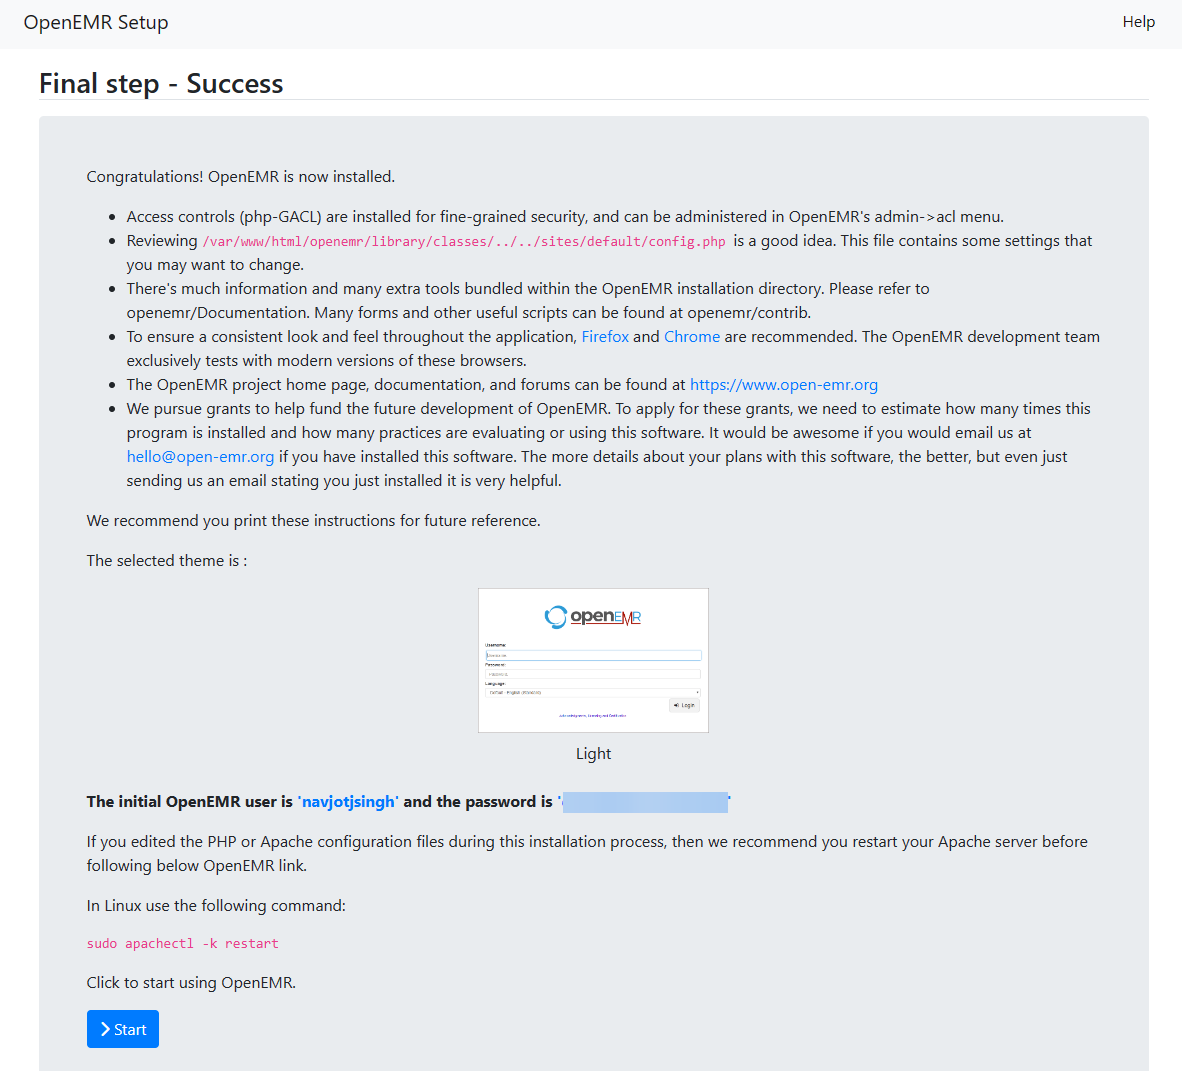
The last page lists some final notes about the software and account credentials. Click the Start button to open the login page.
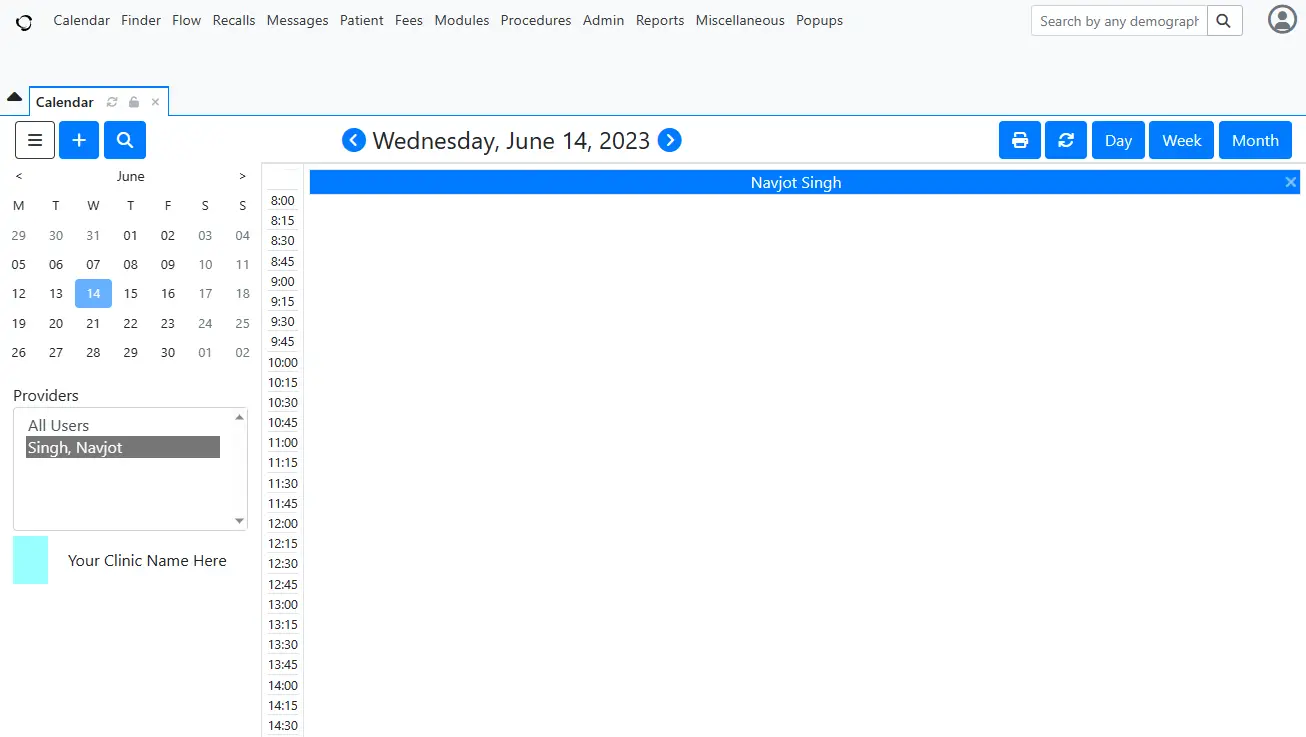
You will get an OpenEMR registration popup to get announcements from their site. You can ignore and enter your credentials and click the Login button to access the dashboard.
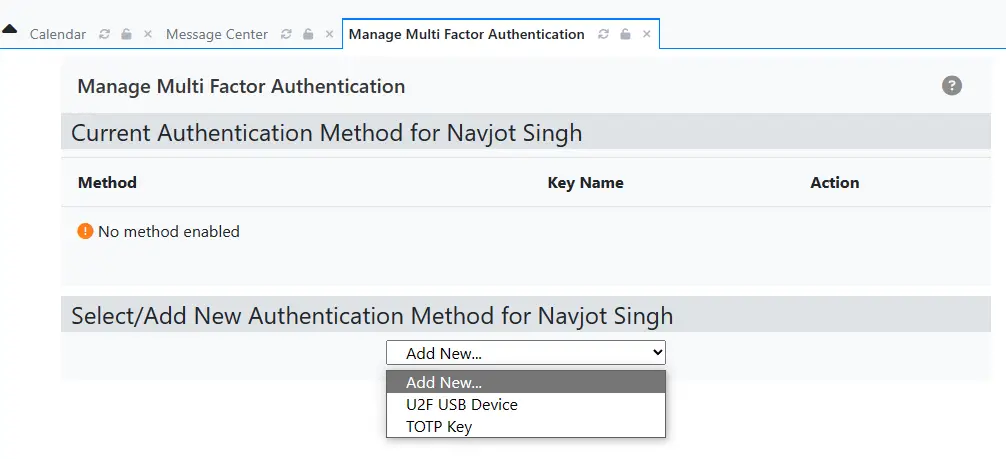
If you didn't configure two-factor authentication during installation, do so by clicking the avatar icon at the top right and selecting the MFA Management option.

On the next page, select the Authentication method from the dropdown menu and start configuring.
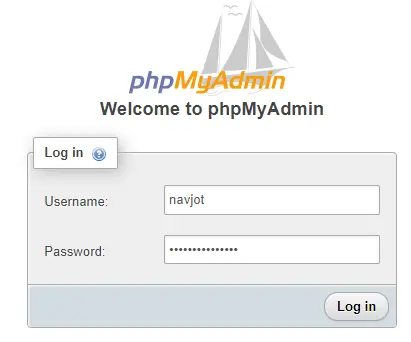
You can start using OpenEMR to manage your health business from here on. To access phpMyAdmin, visit the URL https://openemr.example.com/sm175/ in your browser. You can either log in using the OpenEMR database credentials or the user with root privileges you created in step 4 to log in to phpMyAdmin.
Conclusion
This concludes our tutorial on installing OpenEMR on a Debian 12 server. If you have any questions, post them in the comments below.

