How to Install NFS Server and Client on Ubuntu 22.04
This tutorial exists for these OS versions
- Ubuntu 22.04 (Jammy Jellyfish)
- Ubuntu 20.04 (Focal Fossa)
- Ubuntu 18.04 (Bionic Beaver)
- Ubuntu 14.04 LTS (Trusty Tahr)
- Ubuntu 10.04 (Lucid Lynx)
On this page
- Prerequisites
- Installing and Configuring NFS Server
- Install NFS Server Package
- Setting up Shared Directory
- Securing NFS Server with Firewall
- Installing and Configuring NFS Client
- Installing NFS Client Package
- Setting up Mount Directory
- Verifying Write Access to NFS Server
- Automatically Mount NFS Server with /etc/fstab
- Conclusion
What is NFS? NFS or Network File System is a protocol that allows local users to access remote data from multiple disks and directories in the same way as local access. The NFS protocol is originally developed by Sun Microsystem and become the standard protocol for sharing files over a network. It's widely used in a centralized environment where users or client computers will be able to store and access data on/to the one centralized remote server.
On most Linux systems, NFS can be installed and configured easily for both NFS Server and Client. Almost every Linux distribution provides NFS packages by default on their own repository. The package name is different, but the configuration is still the same for almost Linux distributions.
In this tutorial, you will learn how to install the NFS Server and Client on the Ubuntu 22.04 Server. You will also learn how to mount the NFS shared directory automatically at system boot on the client machine.
Prerequisites
This guide requires the following prerequisites:
- An Ubuntu Server 22.04 - For installing the NFS Server.
- A Linux Client machine - This example will be used by the Ubuntu client machine.
- A non-root user with root/administrator privileges.
Installing and Configuring NFS Server
The first thing you will do here is to install and configure the NFS Server. Before you begin, log in to your server and get the root privileges.
You can log in using the ssh command below. Then run the "sudo su" command to get the root privileges.
ssh user@SERVER-IP
sudo su
Install NFS Server Package
Before installing any packages, run the apt command below to update and refresh your Ubuntu repository.
sudo apt update
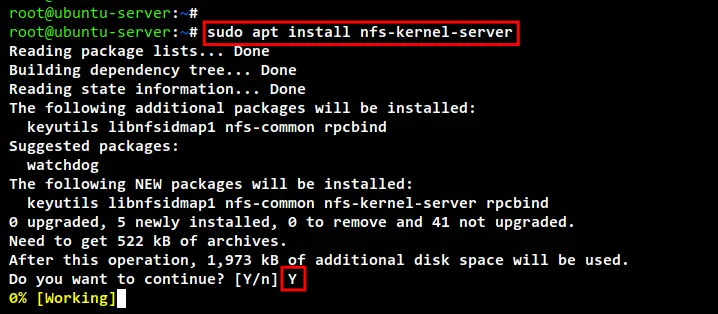
Now install the NFS server package using the command below. Input Y to confirm the installation and press ENTER, and the installation will begin.
sudo apt install nfs-kernel-server
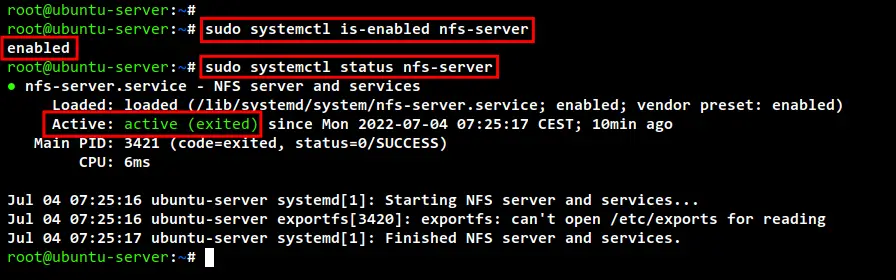
After the NFS server installation is finished, check and verify the NFS server service using the following command. On the Ubuntu installation, the NFS server will be automatically enabled and will be running automatically at system boot.
sudo systemctl is-enabled nfs-server
sudo systemctl status nfs-server
On the Ubuntu 22.04 server, the NFS configuration has changed. The main configuration for NFS is located at the file "/etc/nfs.conf", which allows you to set up and configure the NFS server. Another configuration for the NFS service is located at "/etc/default/nfs-*", this can be used to set up the NFS service on how the service will be running.
Also, the defaults NFS versions enabled on the default installation are the NFSv3 and NFSv4. You can check the default enabled NFS versions using the below command.
cat /proc/fs/nfsd/versions
-2 +3 +4 +4.1 +4.2
Setting up Shared Directory
After installing the NFS server package, now you will be setting up shared directories. NFS shared directories can be defined via the file "/etc/exports" file. Also, you can specify the client IP address for the shared directory or set up the read/write to the shared directory.
Run the below command to create new shared directories. In this example, there will be two shared directories available for clients, "/srv/backups" and "/mnt/shared".
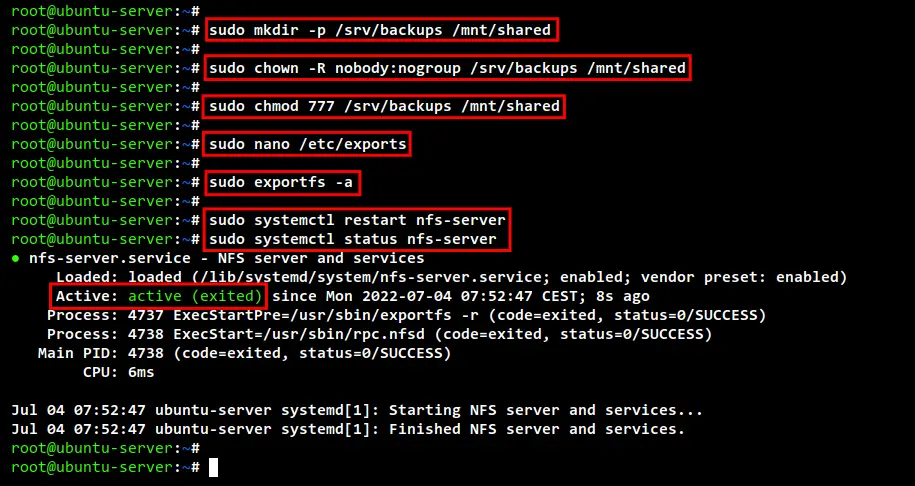
sudo mkdir -p /srv/backups /mnt/shared
Now change the ownership and the permission of shared directories using the below command. The user and group should be "nobody:nogroup" and the permission will be "777" to ensure shared directories is writable.
sudo chown -R nobody:nogroup /srv/backups /mnt/shared
sudo chmod 777 /srv/backups /mnt/shared
Next, modify the file "/etc/exports" using the following command.
sudo nano /etc/exports
Add the following configuration to the file.
/srv/backups  192.168.5.100(rw,sync,no_subtree_check)
/mnt/shared 192.168.10.0/24(rw,sync,no_subtree_check)
Save and close the file when you are done.
- The directory "/srv/backups" will only be available for the NFS client with IP address "192.168.5.100".
- The directory "/mnt/shared" will be available for all clients in the entire network "192.168.10.0/24".
- rw - enable read and write for the shared directory.
- sync - allow NFS to write changes before responding to client machines and ensure the NFS server is always presented to clients.
- no_subtree_check - disable subtree checking and ensure there will be no conflict when users change the filename.
Next, run the following command to apply and export all directories. If you don't get any message, then your settings are correct.
sudo exportfs -a
Now run the following command to restart and verify the NFS service. And you should see the NFS service is running with a new exported directory.
sudo systemctl restart nfs-server
sudo systemctl status nfs-server
Run the following command to check available shared directories on the NFS server. You should see two directories "/srv/backups" and "/mnt/shared" available as shared directories for clients.
sudo exportfs -v

Securing NFS Server with Firewall
After setting up NFS shared directory, it's time to secure the NFS server using the Firewall, in this case, the default firewall for Ubuntu is UFW.
As you can see on top, each shared directory is accessible through a specific client IP address and network. So you will need to specify the client IP address or network in the UFW firewall rule that will be allowed to access the NFS service port.
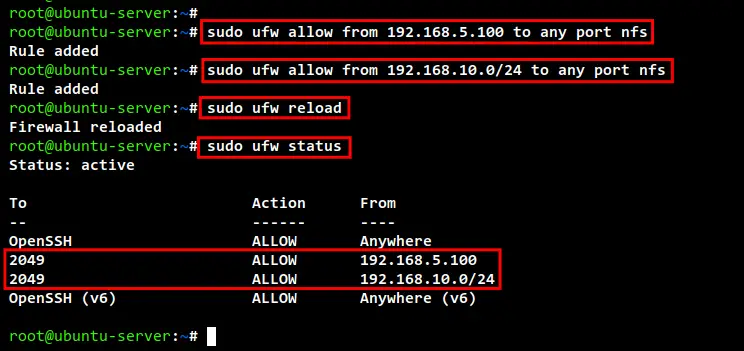
Run the ufw command below to allow the client IP address "192.168.5.100" and the network "192.168.10.0/24" to access the NFS service port.
sudo ufw allow from 192.168.5.100 to any port nfs
sudo ufw allow from 192.168.10.0/24 to any port nfs
Now reload the UFW firewall rule and verify the list of firewall rules using the below command. You should see the default NFS service port "2049" is accessible through specific client IP addresses and networks.
sudo ufw reload
sudo ufw status
Installing and Configuring NFS Client
After you have installed the NFS Server, now it's time to set up the NFS client and mount the shared directory to the client machine. In this example, the client will also be an Ubuntu machine.
Log in to your Ubuntu client machine. If you are using the Ubuntu Desktop, you can just open the terminal on your system. But if you are using the Ubuntu Server version for the client, you can connect using the ssh command as below.
ssh root@CLIENT-IP
Installing NFS Client Package
The first step you will be doing on the client machine is by installing the "nfs-common" package that allows you to mount the NFS server to your client machine.
Run the apt command below to update and refresh your Ubuntu repositories.
sudo apt update
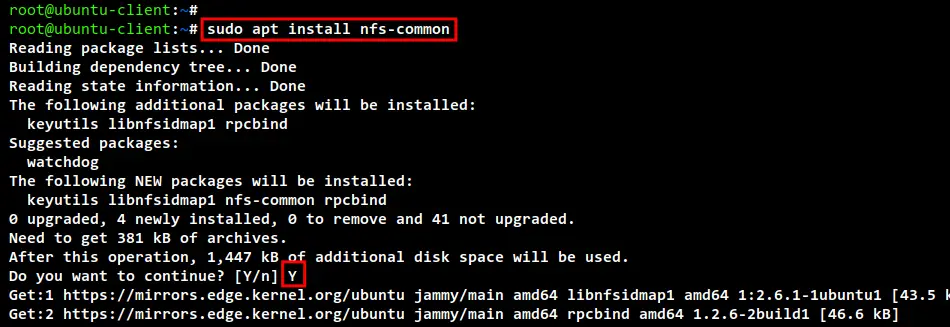
Now install the "nfs-common" package using the following command. Input Y to confirm the installation and press ENTER. Now the installation will begin.
sudo apt install nfs-common
Setting up Mount Directory
Before start mounting the NFS shared directory, you will be creating a new specific directory for the mount destination. In this example. the destination directory for mounting the NFS shares is the "/mnt/data" directory.
Run the command below to create a new directory "/mnt/data".
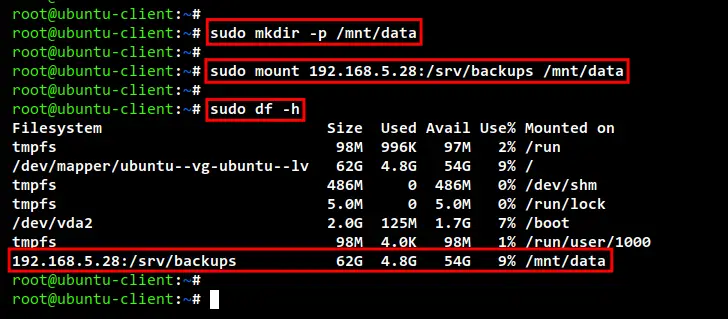
sudo mkdir -p /mnt/data
To mount the NFS shared directory, run the mount command below. In this demo, you will be mounting the shared directory "/srv/backups" to the target directory "/mnt/data".
sudo mount nfs_server_ip:/srv/backups /mnt/data
Now run the following command to check and verify the list of mounted disks on your Ubuntu machine. You should see the NFS shared directory "/srv/backups" is mounted to your local machine on the directory "/mnt/data".
sudo df -h
Verifying Write Access to NFS Server
After you have successfully mounted the NFS shared directory, it's time to verify the write access to the NFS shared directory.
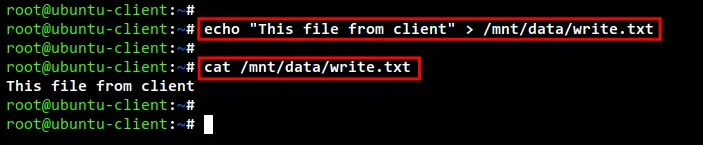
Now run the following command to create and write a new file "write.txt" to the NFS target mounted directory "/mnt/data/".
echo "This file from client" > /mnt/data/write.txt
cat /mnt/data/write.txt
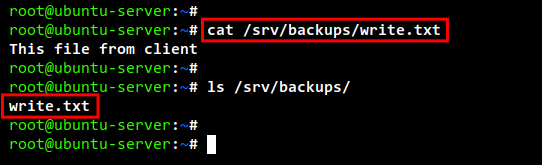
Next, back to the NFS Server and run the following command to check and verify the file "write.txt". You should see the exact same file that you just created from the NFS client machine.
cat /srv/backups/write.txt
ls /srv/backups/
Automatically Mount NFS Server with /etc/fstab
At this point, you have successfully mounted the NFS shared directory on the Ubuntu client machine and checked the write access on the shared directory. Now you will set up the NFS shared directory to be mounted automatically during the system boot, and this can be done via the /etc/fstab file.
Before editing the /etc/fstab file, run the following command to unmount the NFS shared directory from the target "/mnt/data".
sudo umount /mnt/data
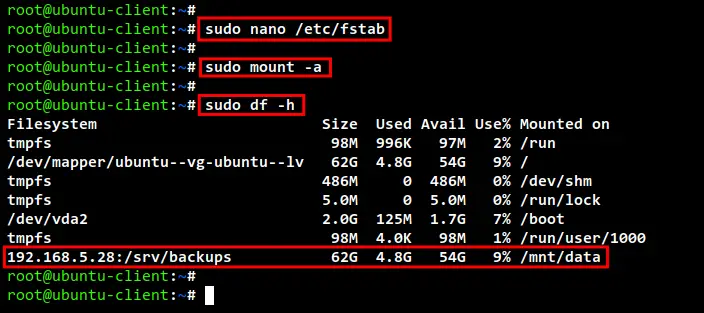
Edit the file "/etc/fstab" using the command below.
sudo nano /etc/fstab
Add the following configuration to the file.
nfs_server_ip:/srv/backups /mnt/data nfs auto,nofail,noatime,nolock,intr,tcp,actimeo=1800 0 0
Save and close the file when you are done.
Next, run the mount command below to check and verify the "/etc/fstab" file. If your configuration is correct, all filesystems on the "/etc/fstab" file will be mounted to your machine.
sudo mount -a
Verify the list of mounted disks on your client machine using the below command. And you should see the NFS shared directory "/srv/backups" is mounted to the target directory "/mnt/data". If you restart/reboot the client machine, the NFS shared directory will be automatically mounted to the "/mnt/data" directory.
sudo df -h
Conclusion
Congratulation! You have now successfully installed the NFS Server on the Ubuntu 22.04 server. you have also secured the NFS Server access using the UFW firewall. In the end, you have also learned how to set up an Ubuntu client machine to mount the NFS shared directory, which includes how to mount the NFS shared directory automatically at system startup via the "/etc/fstab" file.

