How to Install Nessus Security Scanner on Ubuntu 22.04
This tutorial exists for these OS versions
- Ubuntu 24.04 (Noble Numbat)
- Ubuntu 22.04 (Jammy Jellyfish)
On this page
Nessus is an open-source network vulnerability scanner for vulnerability assessments, penetration testing, and ethical hacking. It uses the Common Vulnerabilities and Exposures (CVE) architecture and is one of the most comprehensive vulnerability scanners on the market. With Nessus, you can perform network vulnerability scanning, find misconfigurations and Denial of Service (Dos) vulnerabilities, and many more.
Nessus provides high-speed asset discovery, target profiling, configuration auditing, malware detection, sensitive data discovery and so much more. Also, it/s available in multiple types of versions, including the Nessus Essentials the free vulnerability scanner, and Nessus professional for professional pentester and ethical hackers.
In this guide, you will install Nessus on an Ubuntu 22.04 server. You will also learn how to set up the Nessus command line 'nessuscli' which allows you to manage Nessus from the command-line terminal. You can create and manage scans via the terminal after you have installed the 'nessuscli'.
Prerequisites
To begin with this guide, you will need some following requirements:
- An Ubuntu 22.04 system - You can use Ubuntu Server or Desktop version.
- A non-root user with sudo/root administrator privileges.
Installing Nessus via .deb File
Tenable provides Nessus packages for some Linux Distributions, including Ubuntu, Debian, and CentOS. At the time of this writing, the latest version of Nessus is v10.x. Now you will install it manually to your Ubuntu 22.04 system.
Download the Nessus package for Ubuntu using the following curl command. You should get the .deb file of the Nessus package with the name 'Nessus-10.4.0-ubuntu1404_amd64.deb'.
curl --request GET \
  --url 'https://www.tenable.com/downloads/api/v2/pages/nessus/files/Nessus-10.4.0-ubuntu1404_amd64.deb' \
  --output 'Nessus-10.4.0-ubuntu1404_amd64.deb'

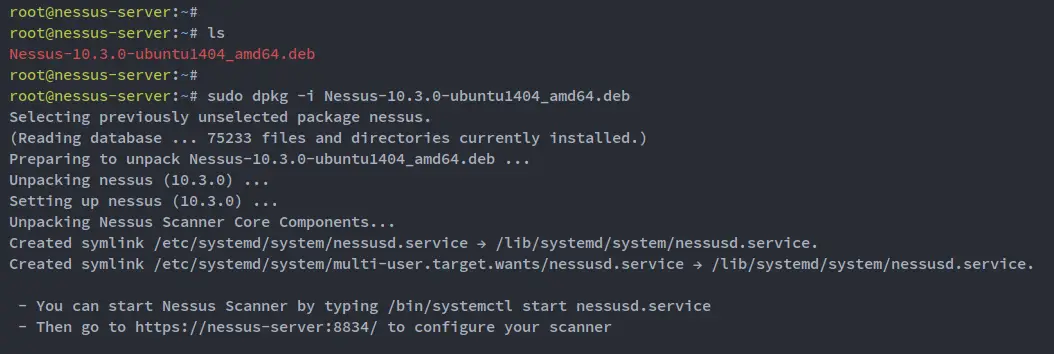
Run the following dpkg command to install the Nessus package 'Nessus-10.4.0-ubuntu1404_amd64.deb'.
sudo dpkg -i Nessus-10.4.0-ubuntu1404_amd64.deb
When the installation is finished, you will see that the Nessus service 'nessusd' is enabled and also you can see the instruction for setting up Nessus that runs on the default port 8834.
Next, run the following systemctl command below to start the Nessus service 'nessusd'.
sudo systemctl start nessusd
After that, verify the 'nessusd' service to ensure that the service is enabled and running.
sudo systemctl is-enabled nessusd
sudo systemctl status nessusd
You should see the Nessus service 'nessusd' is enabled and will be run automatically at system boot. And the status of the 'nessusd' service is running.

Setting up UFW Firewall
The default Nessus installation is running on the TCP port 8834 with HTTPS protocol. To access your Nessus installation, you must open port 8834 on your Ubuntu system via the firewall settings.
On the modern and newest Ubuntu version, the default firewall is UFW (Uncomplicated Firewall). You will now set up the UFW firewall and open the Nessus port 8834.
Ensure the OpenSSH service is added and enabled on your UFW firewall. If you haven't the OpenSSH service enabled, you can allow it via the following ufw command.
sudo ufw allow "OpenSSH"
Next, run the following command to open the Nessus port 8834.
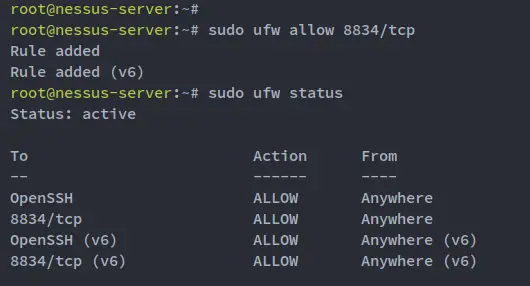
sudo ufw allow 8834/tcp
Now that the OpenSSH service and the Nessus port is added, you can enable the UFW firewall via the following command.
sudo ufw enable
You will be prompted to run and enable the UFW firewall service, input y to confirm, and press ENTER to proceed.
Lastly, run the following ufw command to verify the UFW firewall status. You should see the UFW firewall is 'active' with the OpenSSH and the Nessus port 8834 enabled.
sudo ufw status
Nessus Basic Configuration
After configured the UFW firewall, you will start the configuration of Nessus via the web installer.
Open up your web browser and visit the server IP address followed by the Nessus port 8834 (i.e: https://192.168.5.100:8834/). If you get an error about the SSL Certificates, press Continue - This certificate is automatically generated by Nessus.
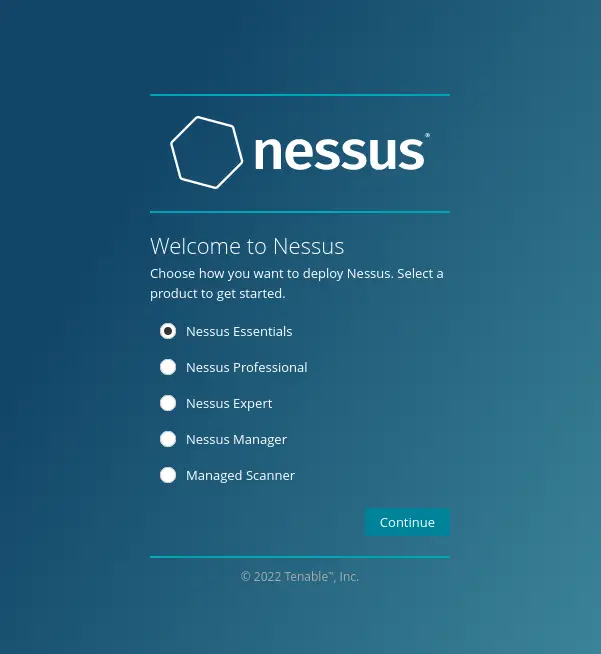
On the first page, select the type of Nessus installation that you want. In this example, you will install "Nessus Essentials", so select the option "Nessus Essentials" and click Continue.
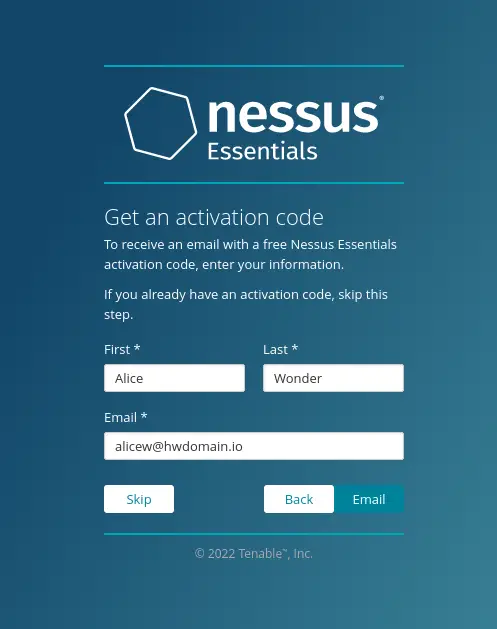
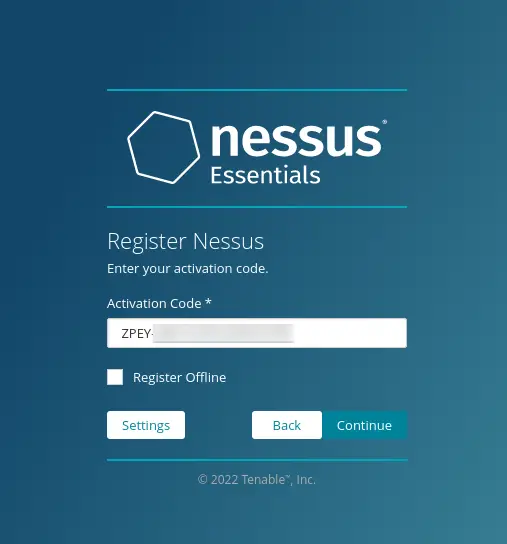
Now you will need an activation code for your Nessus installation. Input details user and email address (real email address) that will be used to receive the activation code of your Nessus installation.
Click the "Email" button to get the Nessus activation code. Then, check your email to get your activation code.
Now, paste the Nessus activation code that you just got from your email and click Continue. This will register your Nessus installation to the Tenable site.
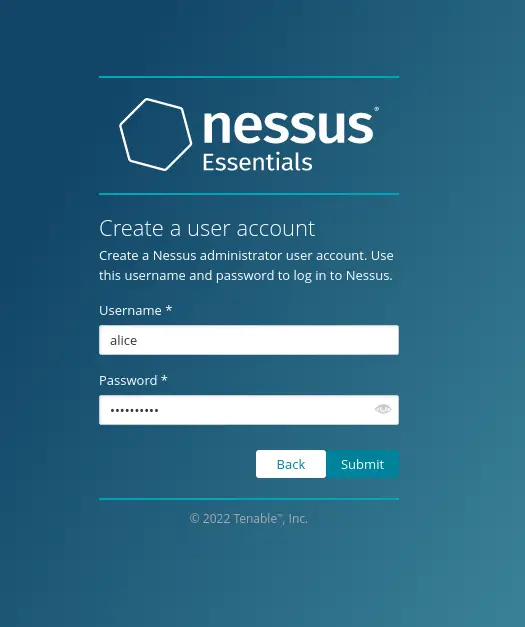
If your Nessus activation code is correct, you will be prompted to create the administrative user for your Nessus installation.
Input the username and password for your Nessus administrator and click Submit.
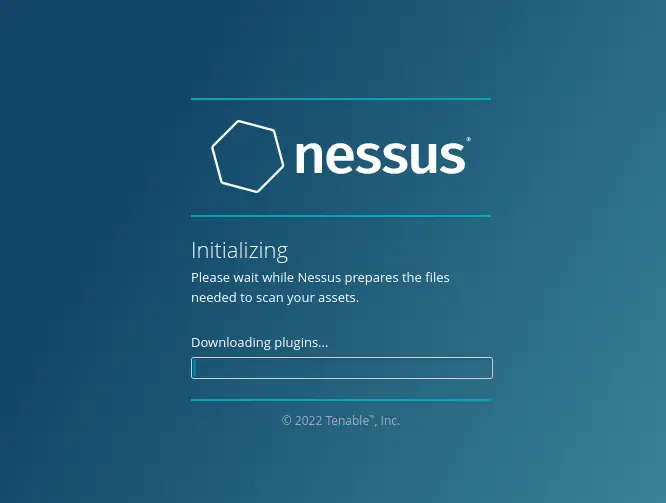
The Nessus installation is now starting. This also will install some of the necessary Nessus plugins to your installation and will take some time.
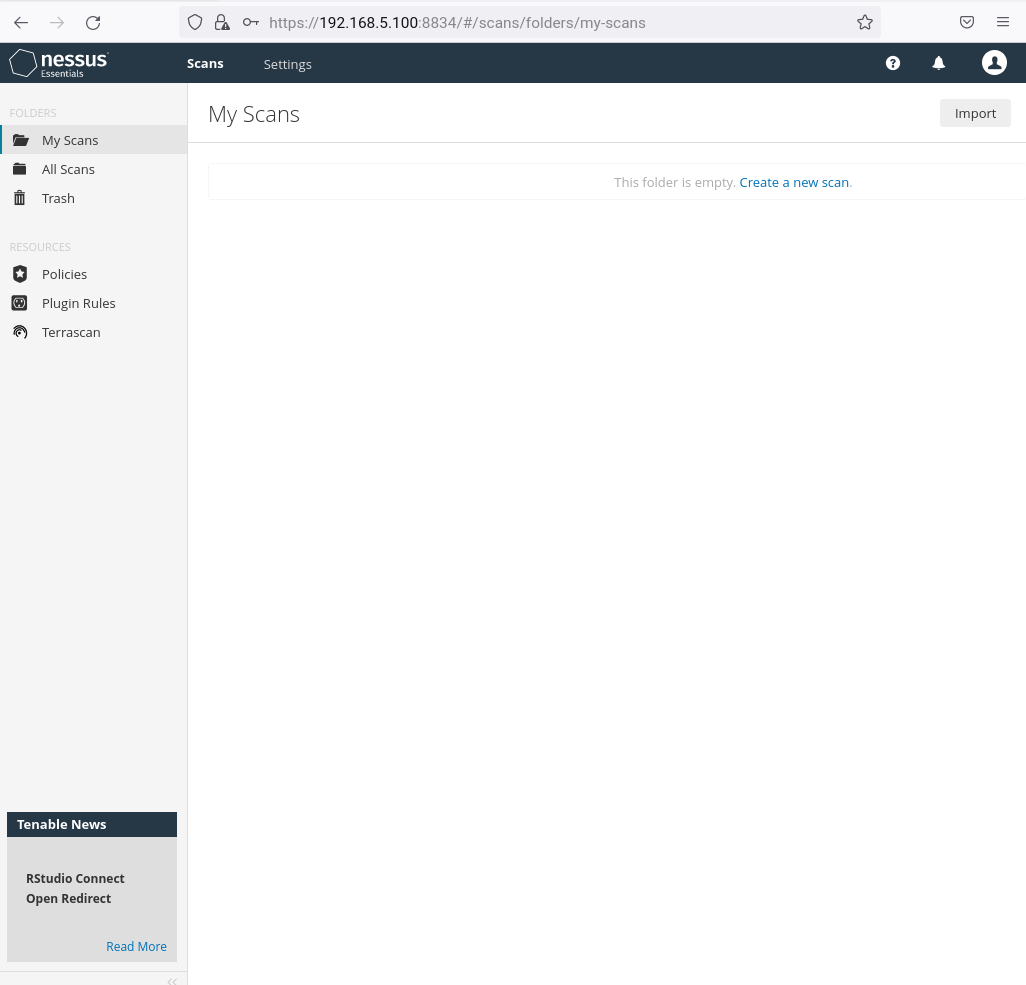
Once the Nessus installation is finished, you will see the Nessus administration dashboard. You can now create a new scan for your server infrastructure.
Setting up Nessus Command Line nessuscli
In step, you will be setting up the Nessus command line on the system. This allows you to manage Nessus via the terminal command line.
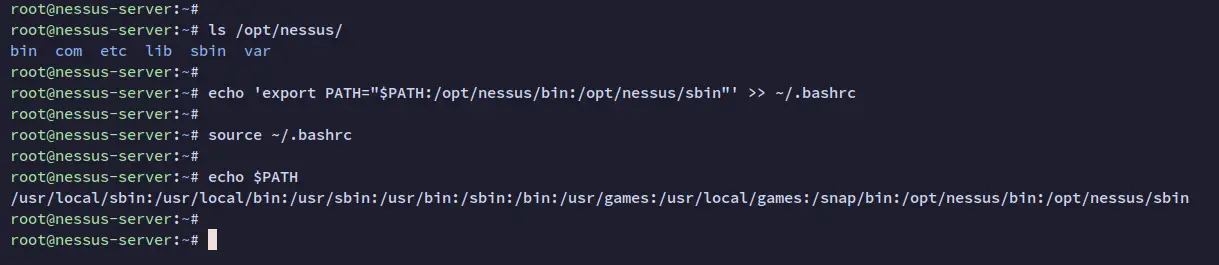
Run the following command to verify the bin directory for Nessus. You should see two bin directories for your Nessus installation 'bin' and 'sbin'.
ls /opt/nessus
Add both Nessus bin directories to the system PATH via the ~/.bashrc config file. Run the following command to add a new bin PATH to your system.
echo 'export PATH="$PATH:/opt/nessus/bin:/opt/nessus/sbin"' >> ~/.bashrc
Now reload the ~/.bashrc configuration using the following command. Then, verify the new $PATH environment variable on your system.
source ~/.bashrc
echo $PATH
You will now see both Nessus binary path '/opt/nessus/bin' and '/opt/nessus/sbin' is added to the system $PATH.
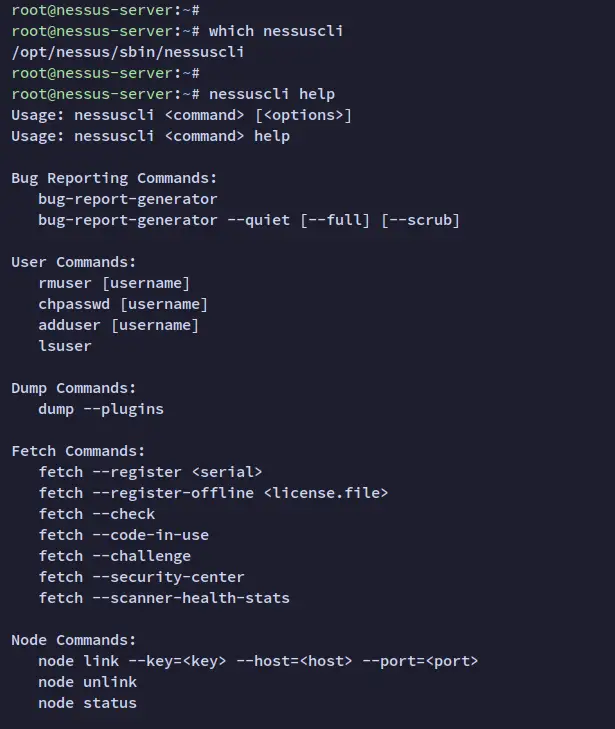
You can now run the nessuscli command to verify your configuration. You should see the nessuscli binary file is available on the '/opt/nessus/sbin' directory, and also you will see the detailed help menu for the nessuscli command.
which nessuscli
nessuscli help
Create First Scan with Nessus
In this step, you will learn how to scan the system for vulnerabilities via the Nessus web dashboard. So before you get started, ensure that you have logged in to your Nessus installation.
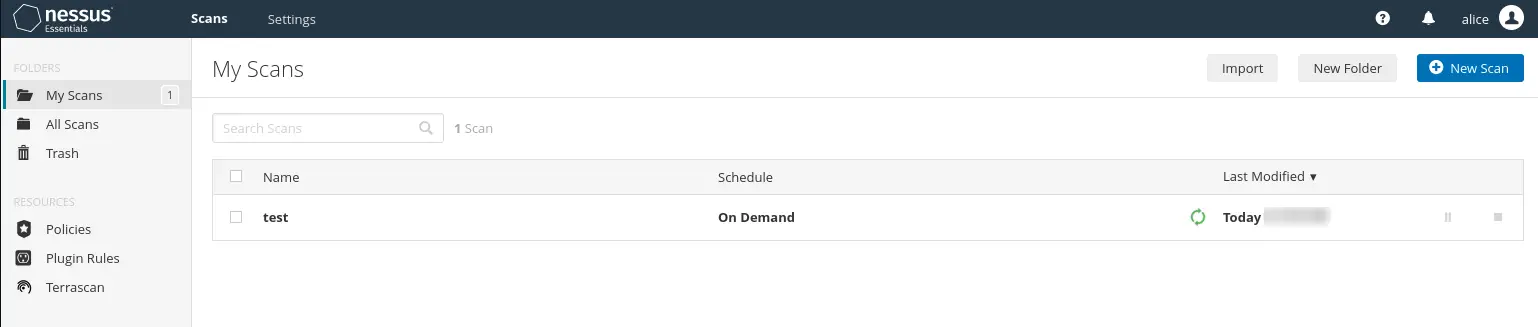
Click the 'My Scan' menu on the left and click 'Create a new scan' to set up and create a scan for your server.

Select the scan templates for your new scan. In this example, we will use the template 'Basic Network Scan', which is suitable for a generic host or server.

Now, input the name of your scan, the description, the folder for storing the scan, and the target server. Then, click Save to save the new scan.

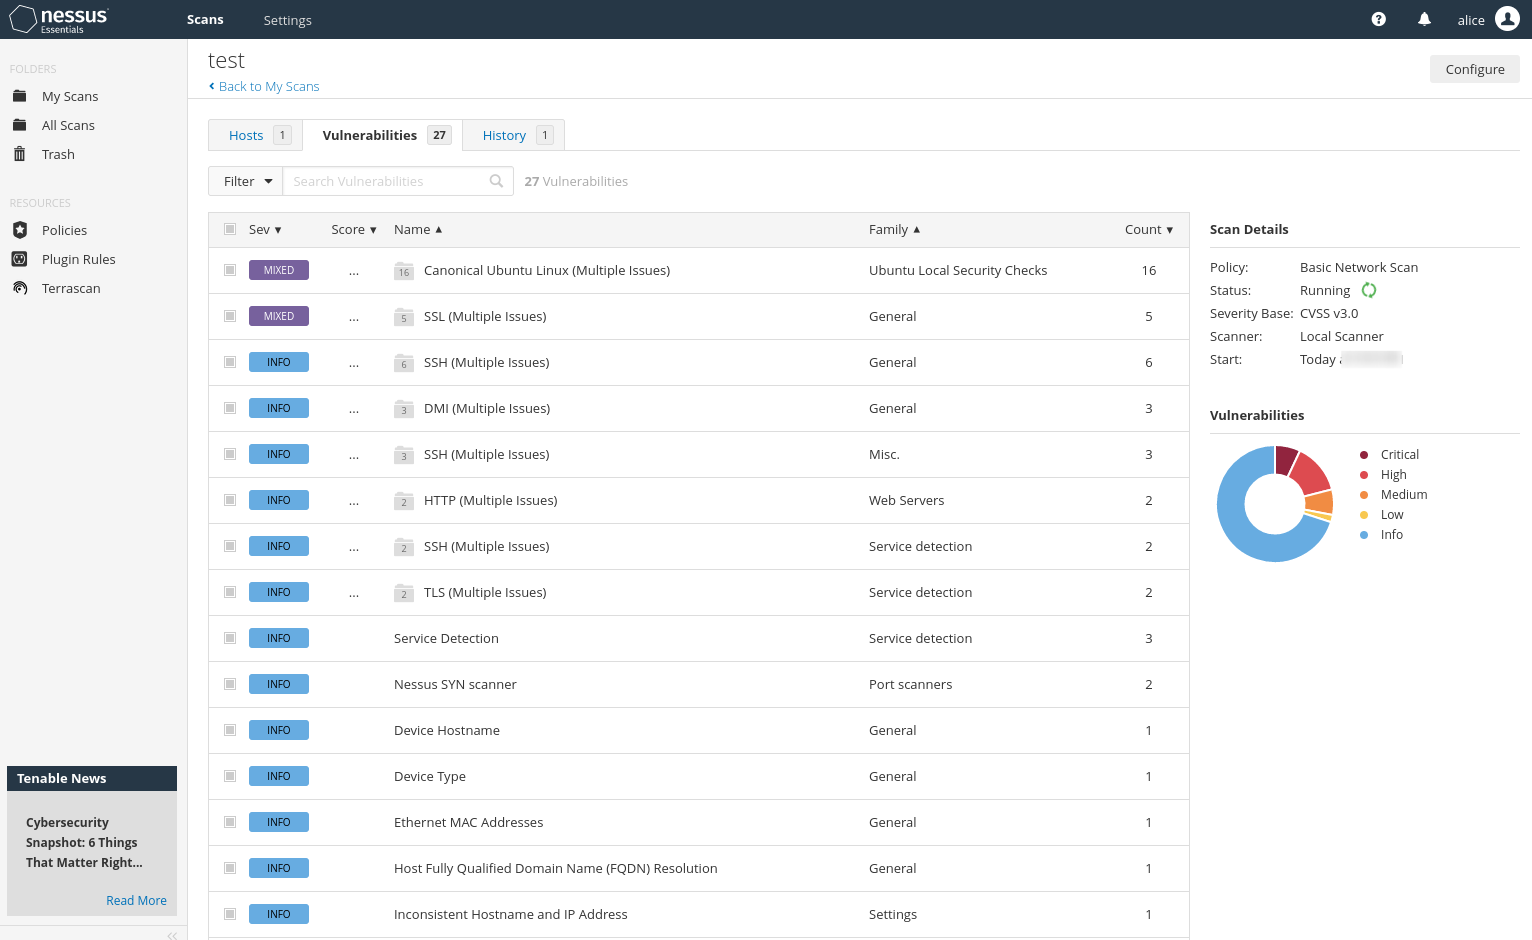
On the 'My Scan' page, you will see the new scan that you just created. Click the start button to start the scan. In the below screenshot, you can see the 'test' scan is running.
Below is the summary of the scan with Nessus. You can see each severity of the scan of your host server.
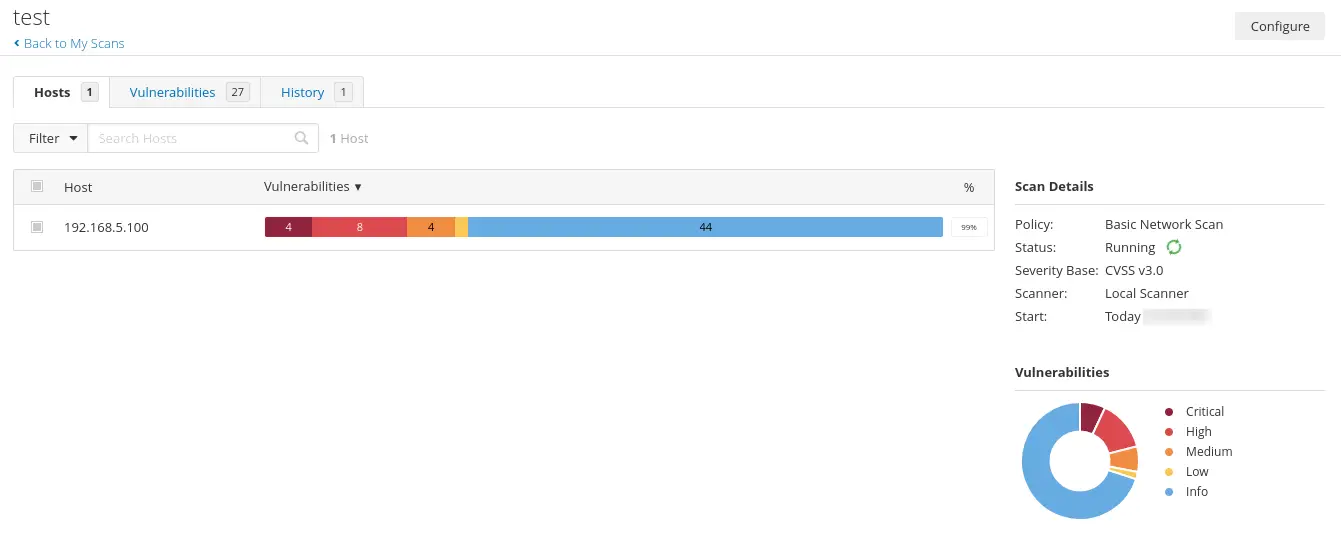
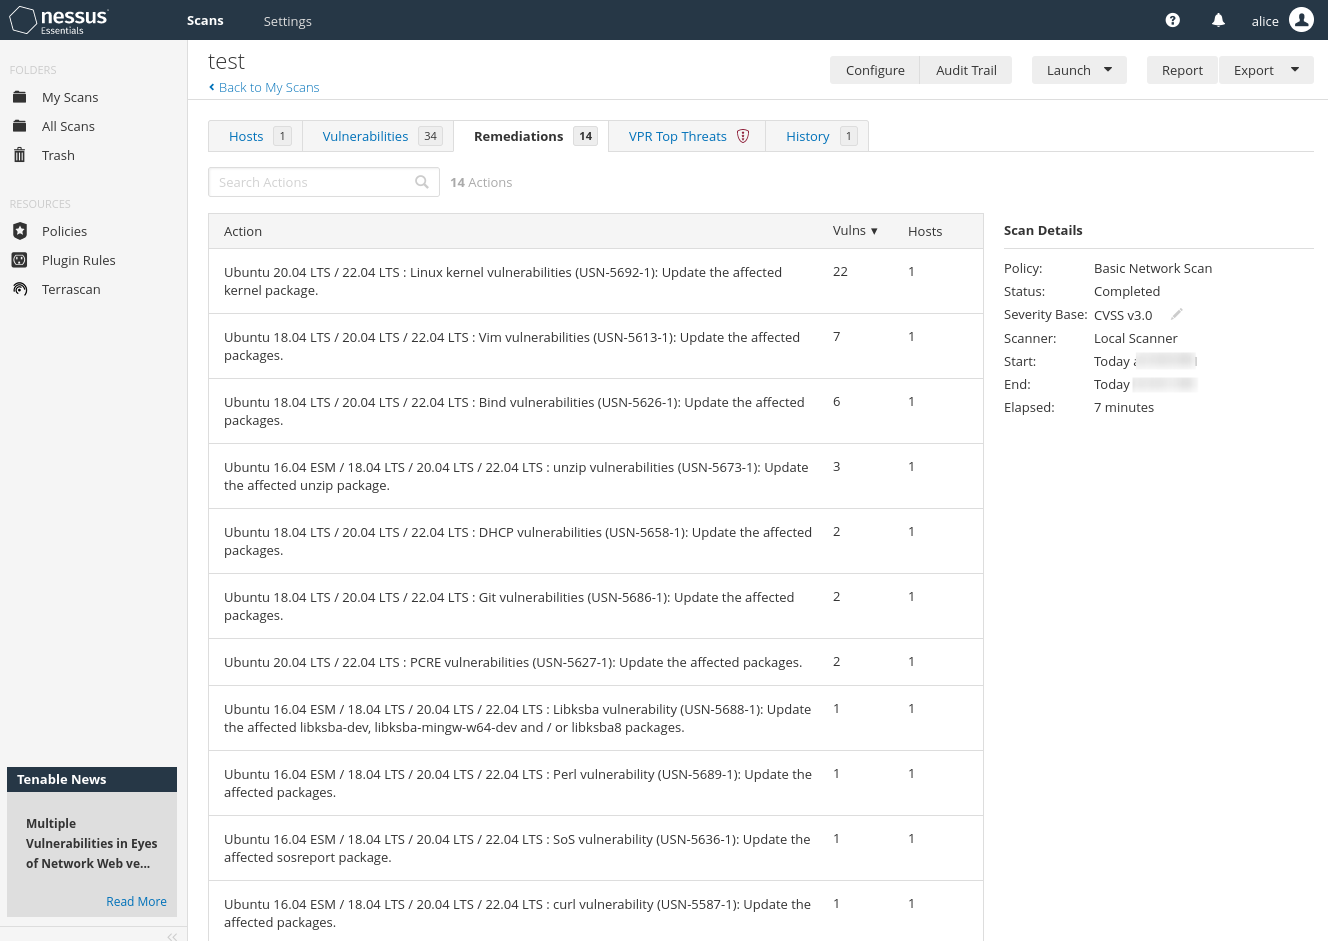
Below is the list of vulnerabilities detected by the Nessus scan. You can click on each item and get details information about the detected vulnerability.
In the 'Recommendations' section, you can see detailed instructions for security recommendations based on the scan that you just completed.
Conclusion
Congratulation! You have now successfully installed Nessus Security Scanner on Ubuntu 22.04 server. You also have completed the basic configuration of Nessus and configured the nessuscli command line that allows you to run a scan and manage your scan via the command-line terminal.
In the end, you also have learned how to create a scan on Nessus and scan the server to detect security vulnerabilities and get some security recommendations.

