How to Install Lighttpd with PHP, MariaDB and Let's Encrypt SSL on Debian 10
Lighttpd is a free, open-source and high-speed webserver specially designed for speed-critical environments. It requires low memory footprint compared to other web servers, such as Apache and Nginx and especially fast for running AJAX applications. Lighttpd also allows us to host web applications written in other programming language using the FastCGI, SCGI and CGI interfaces. Lighttpd is the best choice for you if your server is suffering load problems.
In this tutorial, we will learn how to install Lighttpd on Debian 10 with PHP-FPM and MariaDB support and we will secure the webserver with a Let's Encrypt SSL certificate.
Requirements
- A server running Debian 10.
- A root password is setup to your server.
I will be using the domain name example.com in this tutorial. Replace example.com in all file names and configuration settings with your own domain name below.
Getting Started
Before starting, you will need to update your system with the latest version. You can do this by running the following command:
apt-get update -y
 apt-get upgrade -y
Once your server is updated, restart your server to apply the changes.
Install Lighttpd
By default, Lighttpd is available in the Debian 10 default repository. You can install it by just running the following command:
apt-get install lighttpd -y
Once the installation is finished, start Lighttpd service and enable it to start after system reboot with the following command:
systemctl start lighttpd
 systemctl enable lighttpd
You can also check the status of Lighttpd with the following command:
systemctl status lighttpd
You should get the following output:
? lighttpd.service - Lighttpd Daemon
   Loaded: loaded (/lib/systemd/system/lighttpd.service; enabled; vendor preset: enabled)
   Active: active (running) since Fri 2019-09-06 02:09:35 EDT; 29s ago
 Main PID: 4445 (lighttpd)
    Tasks: 1 (limit: 1138)
   Memory: 1.4M
   CGroup: /system.slice/lighttpd.service
           ??4445 /usr/sbin/lighttpd -D -f /etc/lighttpd/lighttpd.conf

Sep 06 02:09:35 debian systemd[1]: Starting Lighttpd Daemon...
Sep 06 02:09:35 debian systemd[1]: Started Lighttpd Daemon.
Sep 06 02:09:36 debian systemd[1]: /lib/systemd/system/lighttpd.service:6: PIDFile= references path below legacy directory /var/run/, updating
lines 1-12/12 (END)
Once you have finished, you can proceed to the next step.
Install MariaDB Server
You can install the MariaDB server by running the following command:
apt-get install mariadb-server mariadb-client -y
Once installed, you will need to secure the MariaDB installation. You can secure it by running the following script:
mysql_secure_installation
Answer all the questions as shown below:
Change the root password? [Y/n] n
Remove anonymous users? [Y/n] Y
Disallow root login remotely? [Y/n] Y
Remove test database and access to it? [Y/n] Y
Reload privilege tables now? [Y/n] Y
Once you have finished, you can proceed to the next step.
Install PHP and PHP-FPM
Next, you will need to install PHP, PHP-FPM and FastCGI to your system. By default, Debian 10 ships with PHP version 7.3. You can install it by just running the following command:
apt-get install php php-cgi php-fpm php-mysql -y
Once all the packages are installed, you will need to edit the php.ini file and set cgi.fix_pathinfo to 1. You can do it with the following command:
nano /etc/php/7.3/fpm/php.ini
Change the following line:
cgi.fix_pathinfo=1
Save and close the file when you are finished.
By default, PHP points to the UNIX socket /var/run/php/php7.3-fpm.sock. So, you will need to configure PHP-FPM pool to set PHP listens to TCP socket.
You can do this by editing /etc/php/7.3/fpm/pool.d/www.conf file:
nano /etc/php/7.3/fpm/pool.d/www.conf
Find the following line:
listen = /run/php/php7.3-fpm.sock
And replace it with the following line:
listen = 127.0.0.1:9000
Save and close the file when you are finished. Then, restart PHP-FPM service to apply the configuration changes:
systemctl restart php7.3-fpm
Next, you will need to modify 15-fastcgi-php.conf file:
nano /etc/lighttpd/conf-available/15-fastcgi-php.conf
Find the following lines:
"bin-path" => "/usr/bin/php-cgi",
"socket" => "/var/run/lighttpd/php.socket",
And replace them with the following:
"host" => "127.0.0.1",
"port" => "9000",
Save and close the file when you are finished. Then, enable both FastCGI and FastCHI-PHP module with the following commands:
lighty-enable-mod fastcgi
 lighty-enable-mod fastcgi-php
Finally, restart Lighttpd service to apply the changes:
systemctl restart lighttpd
Create Lighttpd Virtual Host
Next, you will need to create a new virtual host file to test PHP with Lighttpd. You can create it with the following command:
nano /etc/lighttpd/conf-available/example.com.conf
Add the following lines:
$HTTP["host"] == "www.example.com" {
    server.document-root = "/var/www/html/"
    server.errorlog      = "/var/log/lighttpd/example.com-error.log"
}
Save and close the file when you are finished. Then, enable the Virtual host with the following command:
ln -s /etc/lighttpd/conf-available/example.com.conf /etc/lighttpd/conf-enabled/
Next, create a sample index.php file in Lighttpd document root directory with the following command:
nano /var/www/html/index.php
Add the following line:
<?php phpinfo(); ?>
Save and close the file. Then, change the ownership of the Lighttpd document root directory to www-data with the following command:
chown -R www-data:www-data /var/www/html/
Finally, restart Lighttpd service to apply all the configuration changes:
systemctl restart lighttpd
Secure Lighttpd with Let's Encrypt Free SSL
First, you will need to install Certbot tool to secure your web server with Let’s Encrypt. By default, the latest version of Certbot is not available in the Debian 10 default repository.
You can add the Certbot repository with the following command:
apt-get install software-properties-common
 add-apt-repository ppa:certbot/certbot
Next, update the repository and install Certbot with the following command:
apt-get update -y
 apt-get install certbot -y
Next, create a Let’s Encrypt certificate with the following command:
certbot certonly --webroot -w /var/www/html/ -d www.example.com
You will be asked to provide your email address and accept the term of license as shown below:
Saving debug log to /var/log/letsencrypt/letsencrypt.log
Plugins selected: Authenticator webroot, Installer None
Enter email address (used for urgent renewal and security notices) (Enter 'c' to
cancel): [email protected]

- - - - - - - - - - - - - - - - - - - - - - - - - - - - - - - - - - - - - - - -
Please read the Terms of Service at
https://letsencrypt.org/documents/LE-SA-v1.2-November-15-2017.pdf. You must
agree in order to register with the ACME server at
https://acme-v02.api.letsencrypt.org/directory
- - - - - - - - - - - - - - - - - - - - - - - - - - - - - - - - - - - - - - - -
(A)gree/(C)ancel: A

- - - - - - - - - - - - - - - - - - - - - - - - - - - - - - - - - - - - - - - -
Would you be willing to share your email address with the Electronic Frontier
Foundation, a founding partner of the Let's Encrypt project and the non-profit
organization that develops Certbot? We'd like to send you email about our work
encrypting the web, EFF news, campaigns, and ways to support digital freedom.
- - - - - - - - - - - - - - - - - - - - - - - - - - - - - - - - - - - - - - - -
(Y)es/(N)o: Y
Once the certificates are downloaded successfully, you should see the following output:
IMPORTANT NOTES:
 - Congratulations! Your certificate and chain have been saved at:
   /etc/letsencrypt/live/example.com/fullchain.pem
   Your key file has been saved at:
   /etc/letsencrypt/live/example.com/privkey.pem
   Your cert will expire on 2019-12-06. To obtain a new or tweaked
   version of this certificate in the future, simply run certbot
   again. To non-interactively renew *all* of your certificates, run
   "certbot renew"
 - If you like Certbot, please consider supporting our work by:

   Donating to ISRG / Let's Encrypt:   https://letsencrypt.org/donate
   Donating to EFF:                    https://eff.org/donate-le
Next, you will need to combine both the certificate and private key in one file. You can do it with the following command:
cat /etc/letsencrypt/live/example.com/cert.pem /etc/letsencrypt/live/example.com/privkey.pem > /etc/letsencrypt/live/example.com/web.pem
Next, you will need to edit the Lighttpd virtual host file and define the Let's Encrypt SSL certificate path.
You can do it with the following command:
nano /etc/lighttpd/conf-enabled/example.com.conf
Change the file as shown below:
$HTTP["host"] == "www.example.com" {
    server.document-root = "/var/www/html/"
}

$SERVER["socket"] == ":443" {
ssl.engine = "enable"
ssl.pemfile = "/etc/letsencrypt/live/example.com/web.pem" # Combined Certificate
ssl.ca-file = "/etc/letsencrypt/live/example.com/chain.pem" # Root CA
server.name = "www.example.com" # Domain Name OR Virtual Host Name
server.document-root = "/var/www/html/" # Document Root
server.errorlog = "/var/log/lighttpd/example.com_error.log"
accesslog.filename = "/var/log/lighttpd/example.com_access.log"
}

$HTTP["scheme"] == "http" {
$HTTP["host"] == "www.example.com" { # HTTP URL
url.redirect = ("/.*" => "https://www.example.com$0") # Redirection HTTPS URL
}
}
Save and close the file. Then restart Lighttpd service to apply the configuration changes:
systemctl restart lighttpd
Access Lighttpd Web Interface
Lighttpd is installed and configured with PHP and PHP-FPM support. Now, it's time to test it.
Open your web browser and type the URL https://www.example.com. You will be redirected to the following page:
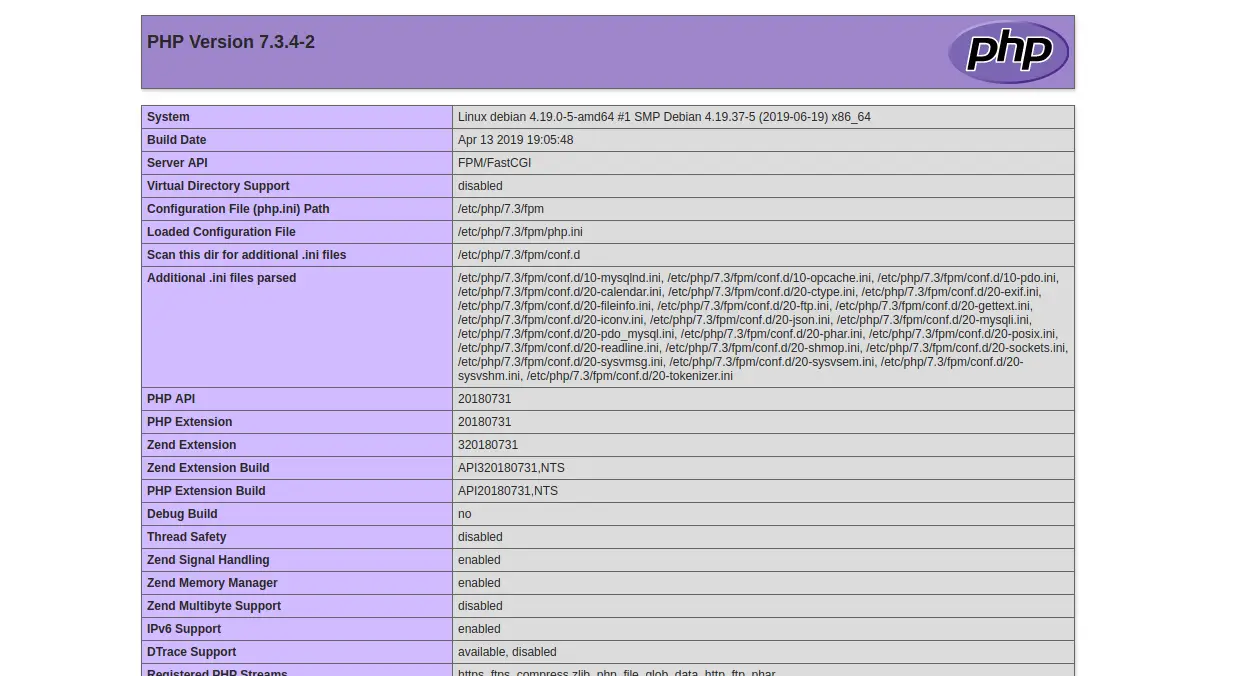
The above page indicates that PHP is working well with FastCGI.
Conclusion
Congratulations! you have successfully installed and configured Lighttpd web server with PHP-FPM and FastCGI support on Debian 10. You can now host your own web server with ease. For more information, visit the Lighttpd official documentation page at Lighttpd Doc.

