How to Install Java OpenJDK/OracleJDK on AlmaLinux 9
Java is a class-based and object-oriented programming language created by Sun Microsystem in 1995. Java is a high-level programming language designed to be portable and to have as few dependencies as possible to run on any system.
The general purpose of the Java programming language is to let developers write programs or applications once, but the application itself can be run on any system across multiple operating systems.
In this guide, I will show you how to Install Java OpenJDK or/and Java Oracle JDK on the AlmaLinux 9 server. Also, we'll go over the configuration of the JAVA_HOME environment variable and how to set up the default Java version.
Prerequisites
To proceed with this guide, ensure that you have the following:
- An AlmaLinux 9 server - This demo uses AlmaLinux 9 with hostname almalinux9-server.
- A non-root user with sudo/root administrator privileges.
Introduction
Before you get started, you must decide which Java version you want to use. There are two Java versions that you must know:
- Java Oracle JDK: The Java SE (Standard Edition) implementation by Sun MicroSystems which is acquired by Oracle in 2009 and become Oracle Java or Oracle JDK.
- Java OpenJDK: An open-source version of Oracle JDK and has the same code base. The main contributor to OpenJDK is Oracle and the open Java Community.
Below are some key differences between Oracle JDK and OpenJDK:
- License: Oracle JDK has a commercial license to get software updates, while OpenJDK is fully open-source with 6-month updates.
- Features: Oracle JDK comes with more features, which is used for commercial license.
- Performance: There is a major debate about performance. The Oracle JDK has better performance, but the OpenJDK performance keeps improving at a fast pace.
Next, what are JDK and JRE?
- JRE or Java Runtime Environment provides everything that you need to run compiled Java applications, but can't be used to create or compile Java applications.
- JDK or Java Development Kit provides completed tools for both running and writing Java applications. The JDK includes JRE packages, but also additional tools such as javac, jdb, jshell, etc.
Installing Java OpenJDK
By default, the AlmaLinux repository provides multiple versions of Java OpenJDK, including OpenJDK v11 and v17. You can install both Java OpenJDK versions using the DNF package manager.
Installing Java OpenJDK 11
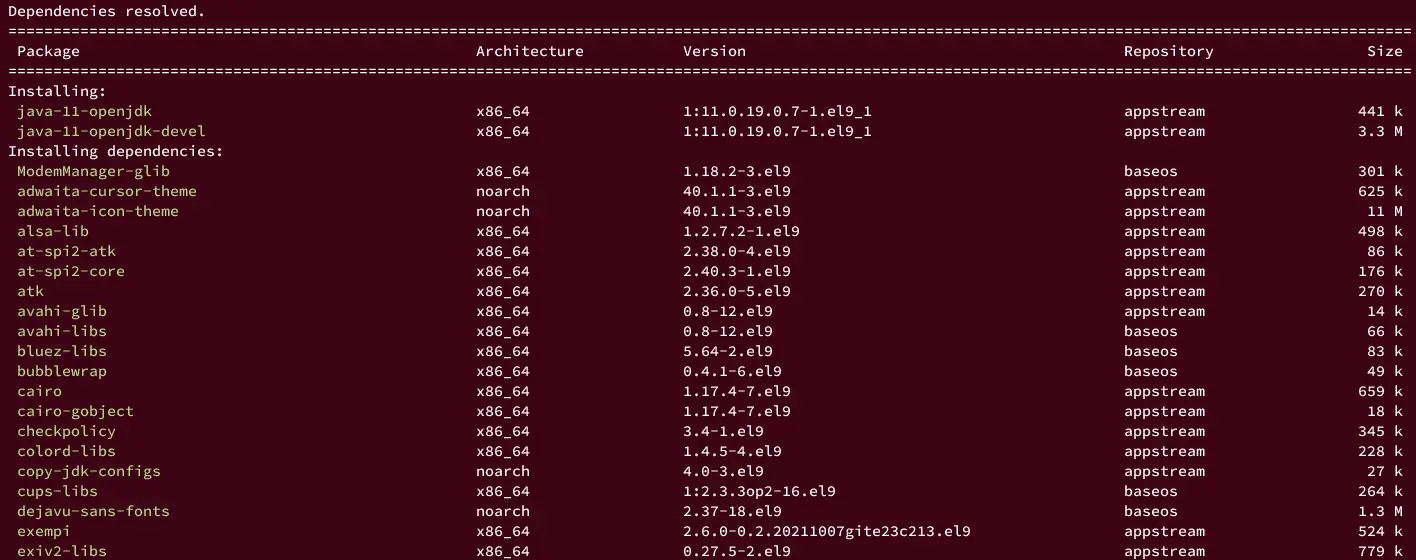
To install Java OpenJDK 11, run the following dnf command. When prompted, input y to confirm and press ENTER.
sudo dnf install java-11-openjdk java-11-openjdk-devel
Once Java installation is finished, enter the following command to verify the Java version.
java --version
You should expect an output like this:

Installing Java OpenJDK 17
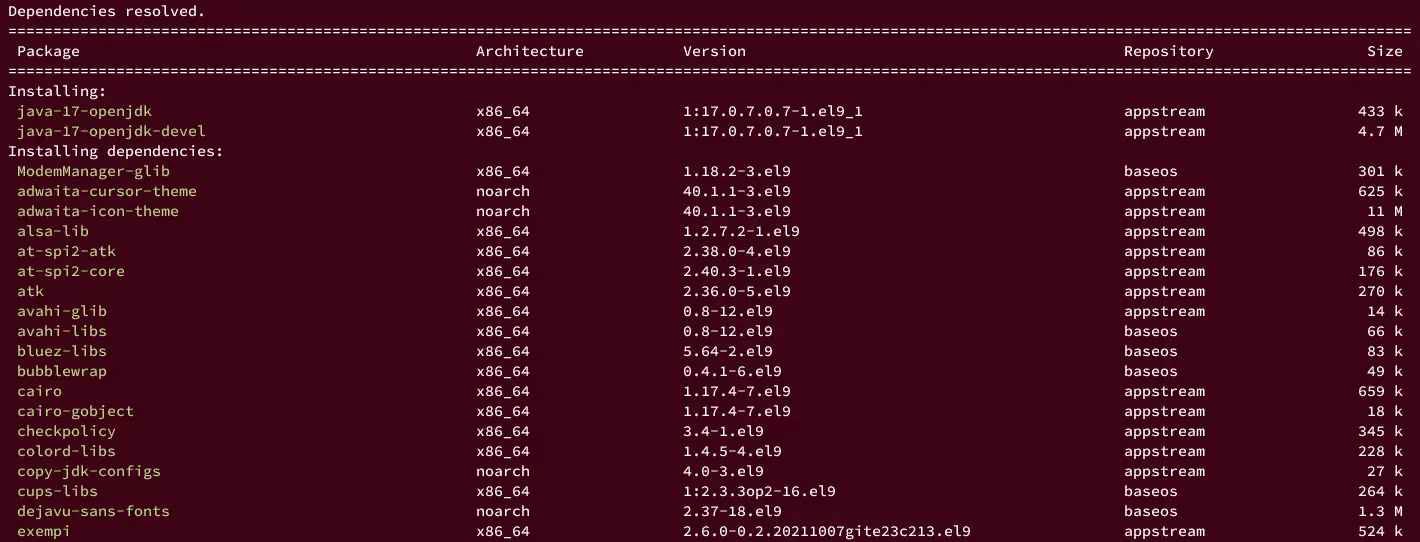
At the time of this writing, the latest version of Java OpenJDK on the AppStream repository is v17. Run the following dnf command to install Java OpenJDK 17.
sudo dnf install java-17-openjdk java-17-openjdk-devel
Input y to confirm the installation, then press ENTER.
After Java is installed, run the following command to verify the Java version.
java --version
The following output show that Java OpenJDK 17 is installed.

Installing Java Oracle JDK
If you decide to install and use Java Oracle JDK, go through the following steps.
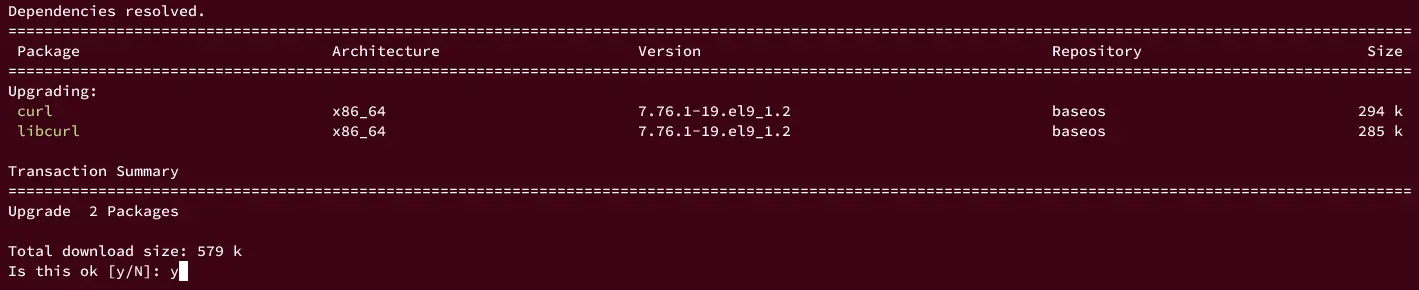
First, run the following command to install curl to your system.
sudo dnf install curl -y
At this time, Oracle provides two versions of Java Oracle JDK. In this example, you will learn how to install Java Oracle JDK 17, which is the latest LTS (Long Term Supports) release, and Java Oracle JDK 20, the latest version of Java.
You can install Oracle JDK via tar.gz or by using the RPM package for RedHat-based distributions, or the DEB package for Debian-based distributions.
Installing Java Oracle JDK 17
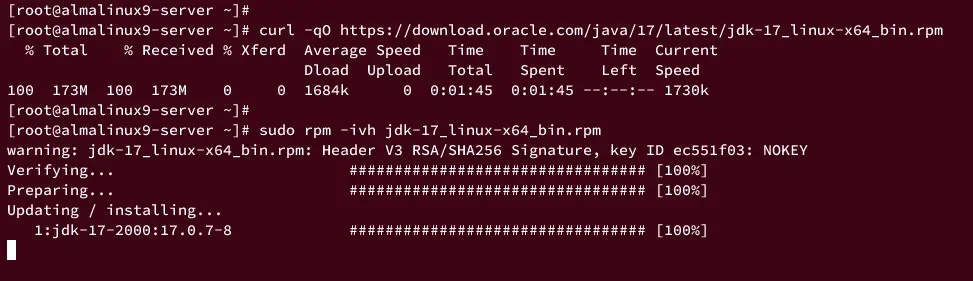
Run the curl command below to download the RPM package of Java Oracle JDK 17.
curl -qO https://download.oracle.com/java/17/latest/jdk-17_linux-x64_bin.rpm
Once the download process is finished, install the RPM file of Java Oracle JDK 17 using the following command.
sudo rpm -ivh jdk-17_linux-x64_bin.rpm
After installation is finished, check the Java version using the following command.
java --version
You'll notice that the Java SE Runtime Environment (JRE) 17 is installed on your system.

Installing Java Oracle JDK 20
At the time of this writing, the latest Oracle JDK version is v20. Download the RPM file of it using the curl command below.
curl -qO https://download.oracle.com/java/20/latest/jdk-20_linux-x64_bin.rpm
After that, install the Java Oracle JDK 20 using the following rpm command.
sudo rpm -ivh jdk-20_linux-x64_bin.rpm
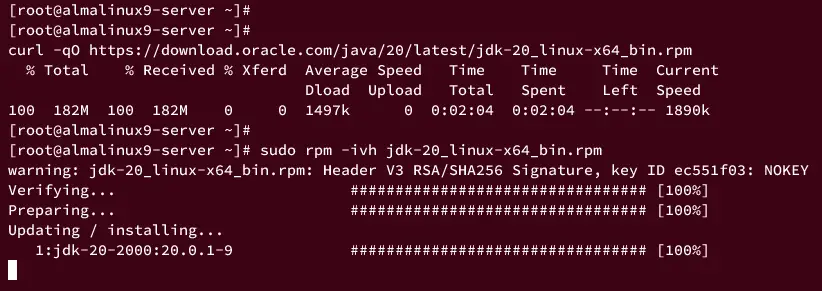
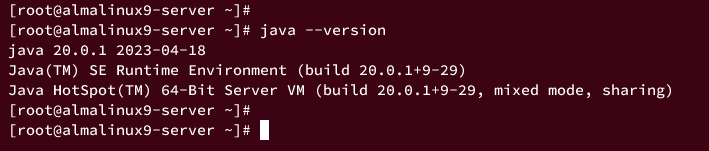
Once the Oracle JDK is installed, run the following command to verify the Java version.
java --version
You will see the Java SE Runtime Environment (JRE) 20 installed.
Setting Up Default Java Version
With the multiple Java versions installed on your system, you should select the default Java version that want to use to run your applications. And the recommended way to do this is by utilizing the 'alternatives' command on your AlmaLinux system.
Enter the command below to get the list of alternatives command on your system.
sudo alternatives --list
If you have multiple Java versions, you should get an output similar to this:

Now run the following command to set up the default Java version. Input the number of your preferred Java version and press ENTER to confirm.
sudo alternatives --config java
In the following example, we'll use Java OpenJDK 17, which is the number 1.
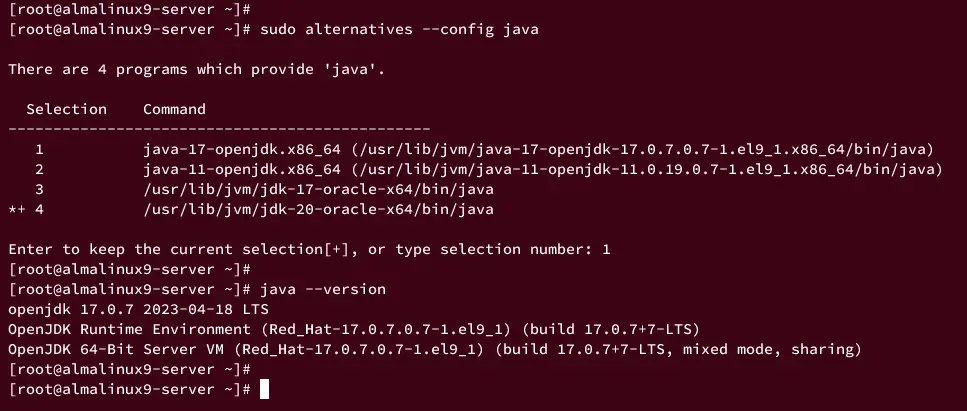
Next, run the following command to verify the Java version. And if successful, the default Java version is changed to OpenJDK 17.
java --version
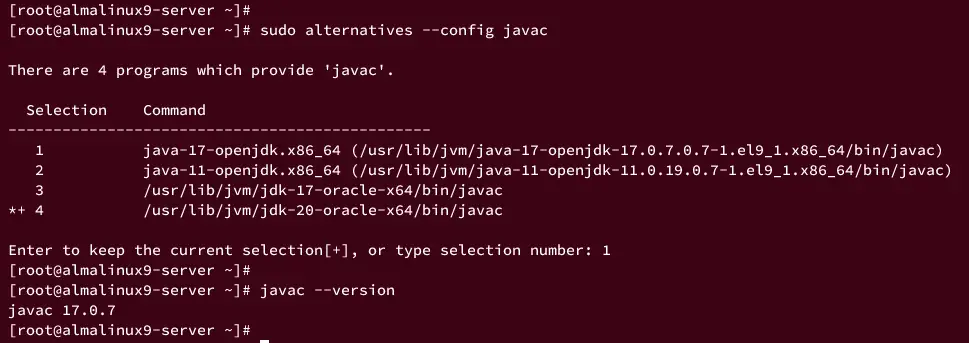
You may also need to change the default javac tools version similarly, by using the alternatives command, selecting the default javac version, then verifying the javac version.
sudo alternatives --config javac
javac --version
Lastly, if you're going to use Java OpenJDK, you might also consider setting up the default JDK and JRE using the following command.
sudo alternatives --config jre_openjdk
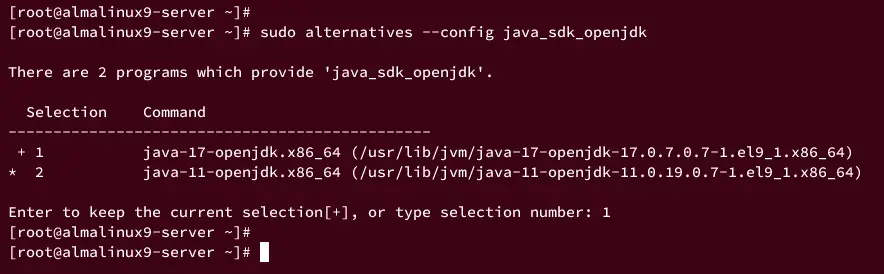
sudo alternatives --config java_sdk_openjdk
Below is the screenshot when changing default JRE.

Below is the screesnhot when changing the default JDK.
Configuring JAVA_HOME Environment Variable
When you expect to use third applications such as Apache Tomcat and Gradle, then you must configure the default JAVA_HOME environment variable on your AlmaLinux server.
You can set up the JAVA_HOME environment variable as a system-wide or per-user configuration.
Setup JAVA_HOME System-wide
To use JAVA_HOME system-wide, you can utilize the bash profile configuration on the /etc/profile.d/ directory, which will be loaded automatically at login.
Create a new script /etc/profile.d/java.sh using the nano editor command below.
sudo nano /etc/profile.d/java.sh
Insert the following configuration. In this example, we'll set up JAVA_HOME with Java OpenJDK 17.
JAVA_HOME="/usr/lib/jvm/java-17-openjdk"
Save and exit the editor when you're finished.
Now run the following command to make the script /etc/profile.d/java.sh executable and load it to your current session.
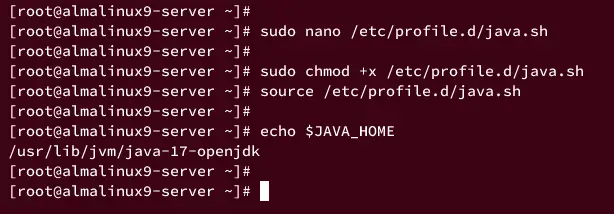
sudo chmod +x /etc/profile.d/java.sh
source /etc/profile.d/java.sh
Verify the JAVA_HOME environment variable using the following command. If the operation was successful, you should see the JAVA_HOME environment variables pointed to your default OpenJDK directory.
echo $JAVA_HOME
Setup JAVA_HOME Per-user
If you want to set up JAVA_HOME as per-user, you can utilize the ~/.bashrc script that will be loaded automatically upon login.
Log in to your user using the following command.
su - username
Edit the ~/.bashrc file using the nano editor command below.
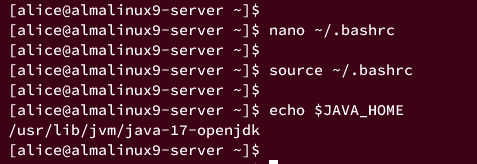
nano ~/.bashrc
Add the following configuration to the bottom of the line.
JAVA_HOME="/usr/lib/jvm/java-17-openjdk"
Save the changes and exit the editor when finished.
Now reload the ~/.bashrc to apply the changes, then verify the JAVA_HOME environment variable using the command below.
source ~/.bashrc
echo $JAVA_HOME
When the operation was successful, you should get an output like this:
Conclusion
You're all set! You've completed the installation of Java OpenJDK and/or Java Oracle JDK on the AlmaLinux 9 system. You have also configured the default Java version via the alternatives command and configured the JAVA_HOME environment variable for both system-wide and per-user. You can now use it to develop your Java application projects or deploy Java applications on your system.

