How to Install Cacti on Rocky Linux
Cacti is a web-based open source monitoring tool based on PHP and MySQL. It is a robust network monitoring and graphing tool that uses the SNMP (Simple Network Management Protocol) to collect and store data in the RRDTool (Round-robin database tool) data engine. The RRDtool is also responsible for creating graphs.
Cacti comes with some great features and has become one of the best tools for graphics-based monitoring tasks. It is suitable for different types of businesses. It is well suited for companies such as ISPs (Internet Service Providers) as Cacti offers a wide range of hardware monitoring features. It is also suitable for dedicated server providers as it supports multiple users and each user can create their own diagram.
Cacti is an extensible framework for operational monitoring and fault management. It offers multiple templates for different devices and different graphs/aggregates/graph templates. It can also run with different types of web servers such as Apache/httpd and Nginx.
Prerequisites
This guide will teach you how to install the cacti monitoring tool on the Rocky Linux system. Cacti is based on PHP and MySQL, so you will be installing those packages too. Also, you will be installing the httpd web server.
Below is the example environment for our cacti installation:
- OS: Rocky Linux 8.4 (Green Obsidian)
- Server IP address: 192.168.1.10
- Sudo root privilege
Now let's begin the installation of the cacti monitoring tool.
Install Packages dependencies
At first, you must install some packages dependencies for cacti. You must run all commands below using the root/sudo privilege.
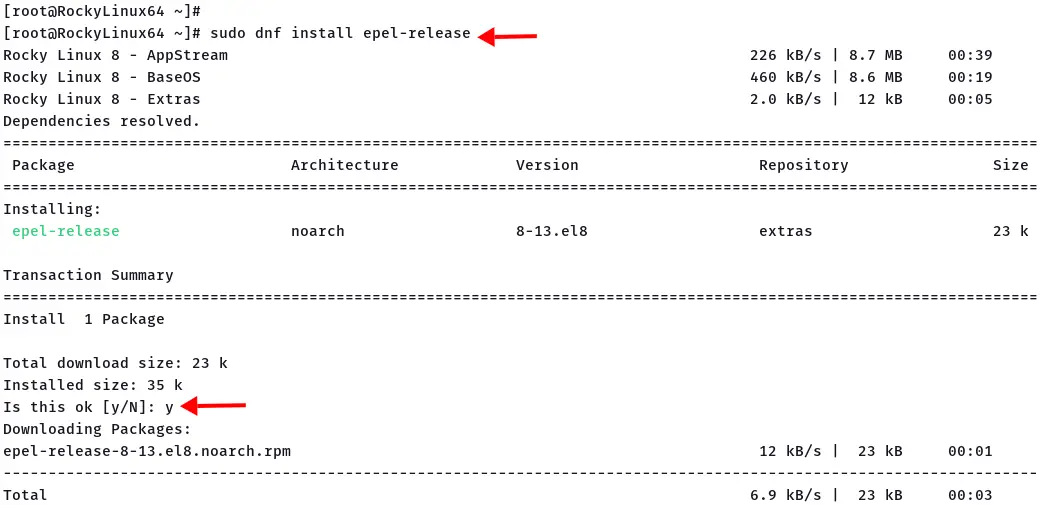
1. Add the EPEL (Extra Packages for Enterprise Linux) repository to the Rocky Linux system using the command below.
sudo dnf install epel-release
Type 'y' and press 'Enter' to continue the installation.
2. Install the httpd web server using the following command.
sudo dnf install httpd -y
And if the httpd installation completes, start and enable the httpd service.
sudo systemctl enable --now httpd
sudo systemctl is-enabled httpd

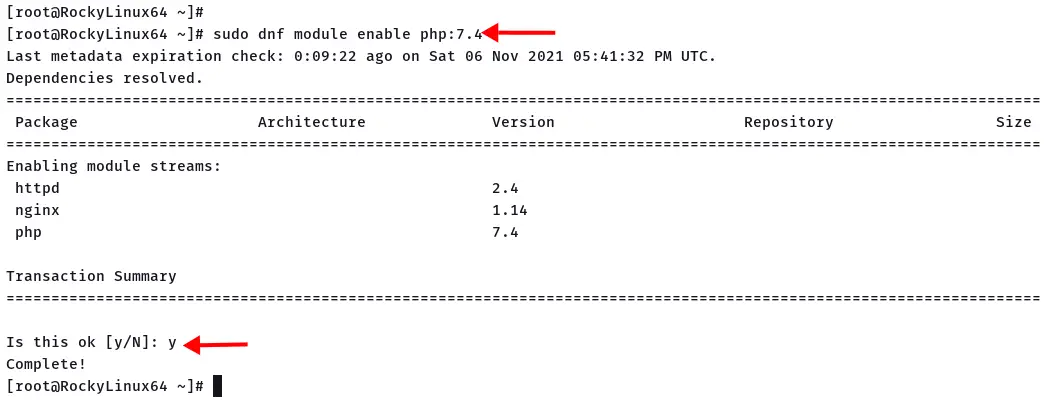
3. Next, you must install PHP on your system. By default, the Rocky Linux repository provides multiple versions of PHP. And you will be installing the latest version available on the repository is PHP 7.4.
Enable the PHP module for version 7.4 using the dnf command below.
dnf module enable php:7.4
Type 'y' to confirm and press 'Enter'.
Now execute the DNF command below to install PHP packages.
sudo dnf install -y php php-xml php-session php-sockets php-ldap php-gd php-json php-mysqlnd php-gmp php-mbstring php-posix php-snmp php-intl
When PHP packages installation completes, edit the '/etc/php.ini' configuration using nano/vim editor.
nano /etc/php.ini
Uncomment the option 'date.timezone' and type your current timezone.
date.timezone = Europe/Amsterdam
Change the option 'memory_limit' and 'max_execution_time' as below.
memory_limit = 512M
max_execution_time = 60
Save the configuration and exit.
Now reload the httpd service to apply and complete the PHP configuration.
sudo systemctl restart httpd
4. After installing all of those packages, you must install SNMP and rrdtool.
The SNMP is used by cacti for gathering devices information, and the rrdtool is used to store that gathered data into the .rra format, then shown on the cacti dashboard as graphical information.
Install SNMP and rrdtool using the dnf command below.
sudo dnf install -y net-snmp net-snmp-utils net-snmp-libs rrdtool -y
After installation completes, start and enable the SNMP service using the following command.
sudo systemctl enable --now snmpd
sudo systemctl is-enabled snmpd

Now move to the next stage for installing and configuring the MariaDB database.
Installing and Configuring MariaDB
In this step, you will be installing and configuring the mariadb database on the Rocky Linux system. Also, you will be adding some additional configuration to the mariadb database, as cacti requirements and recommendations.
1. Execute the DNF command below to install mariadb packages on your system.
sudo dnf install -y @mariadb
Wait for all packages installation completes.
2. Next, change your current working directory to '/etc/my.cnf.d' directory and edit the mariadb configuration 'mariadb-server.conf' using nano/vim.
cd /etc/my.cnf.d/
nano mariadb-server.cnf
Paste the following configuration under the '[mysqld]' line. This configuration is based on the cacti installation requirements.
character-set-server=utf8mb4
collation-server=utf8mb4_unicode_ci

innodb_file_format = Barracuda
max_heap_table_size=32M
tmp_table_size=32M
join_buffer_size=64M
# 25% Of Total System Memory
innodb_buffer_pool_size=1GB
# pool_size/128 for less than 1GB of memory
innodb_buffer_pool_instances=10
innodb_flush_log_at_timeout=3
innodb_large_prefix=1
innodb_read_io_threads=32
innodb_write_io_threads=16
innodb_io_capacity=5000
innodb_io_capacity_max=10000

log-error                      = /var/log/mariadb/mariadb-error.log
log-queries-not-using-indexes  = 1
slow-query-log                 = 1
slow-query-log-file            = /var/log/mariadb/mariadb-slow.logSave the configuration and exit.
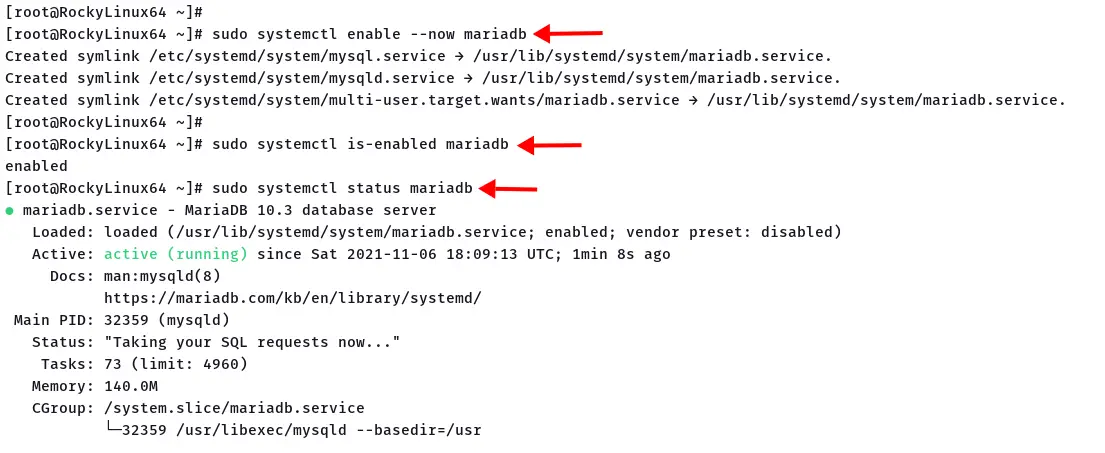
3. Next, start and enable the mariadb service using the following command.
sudo systemctl enable --now mariadb
Check the current mariadb service.
sudo systemctl is-enabled mariadb
sudo systemctl status mariadb
Make sure the mariadb service is active and running. Below is the similar output you will get.
4. After all mariadb configuration completes, load and populate timezone table with available timezone on your system to the default database 'mysql'.
Load and populate timezone tables to database 'mysql' using the following command.
mysql_tzinfo_to_sql /usr/share/zoneinfo | mysql -u root -p mysql
Type the password for your mariadb root password and press 'Enter'. Now continue to the next step to create a new database and user for cacti installation.
Create New Database and User for Cacti
For this step, you will be creating a new mariadb database and user.
At first, log in to the mysql shell using the mysql command below.
mysql -u root -p
Type your mariadb root password and press 'Enter'.
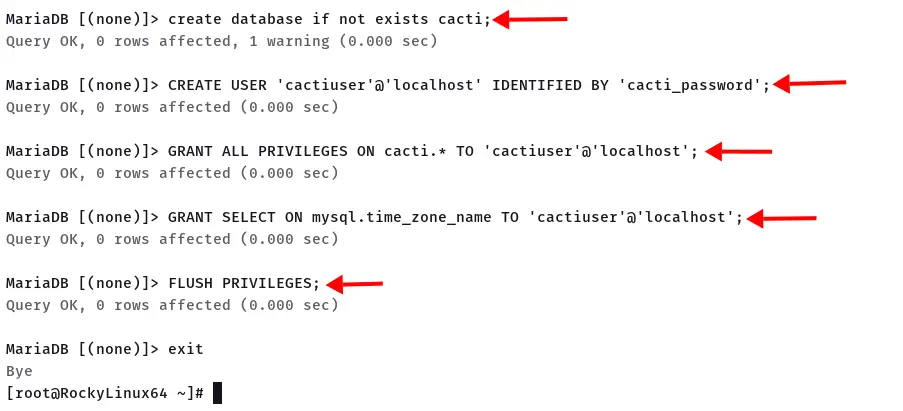
1. Create a new database 'cacti' using the following query.
create database if not exists cacti;
2. Create a new user 'cactiuser' and grant all database privileges on 'cacti' to the new user.
CREATE USER 'cactiuser'@'localhost' IDENTIFIED BY 'cacti_password';
GRANT ALL PRIVILEGES ON cacti.* TO 'cactiuser'@'localhost';
3. Also, you must grant the privilege 'SELECT' on the table 'time_zone_name' (which is available on the database 'mysql') to the user 'cactiuser'.
GRANT SELECT ON mysql.time_zone_name TO 'cactiuser'@'localhost';
Now reload all tables privileges and type 'exit'.
FLUSH PRIVILEGES;
exit
Now all requirements for the cacti are installation, and you're ready for installing the Cacti monitoring tool.
Installing and Configuring Cacti
By default, the EPEL repository provides cacti packages and is ready to install. The version of cacti on the EPEL repository is version 1.2.17, and the current version on the cacti official website is version 1.2.19.
For this step, you will be installing and configuring cacti on the Rocky Linux system.
1. Execute the DNF command below to install cacti on your system.
sudo dnf install cacti
Type 'y' to confirm and press 'Enter'.
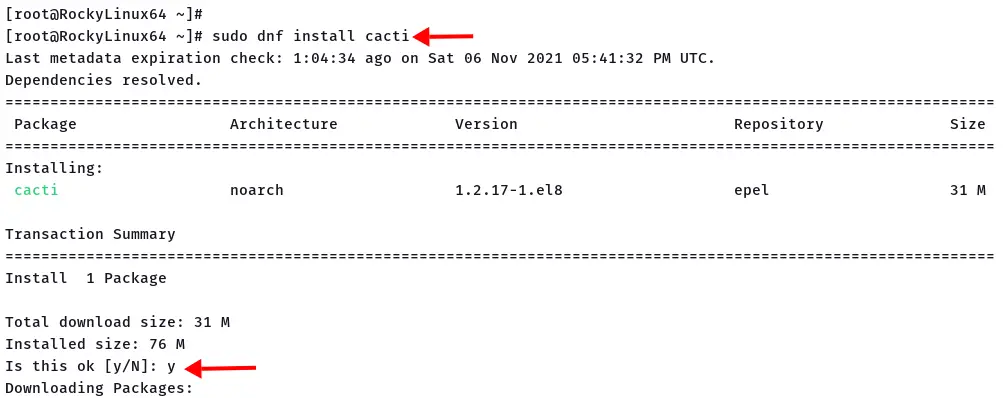
And all cacti source code will be available at the '/usr/share/cacti/' directory.
2. After cacti installation completes, import the database schema to the 'cacti' database using the mysql command below.
mysql -u cactiuser -p cacti < /usr/share/doc/cacti/cacti.sql
Type the password for 'cactiuser', and for this example, the password is 'cacti_password'.
3. Next, edit the cacti configuration '/usr/share/cacti/cacti.php' using nano/vim editor.
nano /usr/share/cacti/include/config.php
Change details database configuration as below.
$database_type = 'mysql';
$database_default = 'cacti';
$database_hostname = 'localhost';
$database_username = 'cactiuser';
$database_password = 'cacti_password';
$database_port = '3306';
Save the configuration and exit.
4. By default, the cacti installation is only accessible from the local host. To allow access from the outside network, edit the httpd configuration for cacti.
Edit the configuraiton '/etc/httpd/conf.d/cacti.conf' using nano/vim editor.
nano /etc/httpd/conf.d/cacti.conf
Change the option 'Require host localhost' to 'Require all granted' as below.
Require all granted
Save the configuration and exit.
Now restart the httpd service to apply a new configuration.
sudo systemctl restart httpd
5. Next, edit the cron configuration '/etc/cron.d/cacti' to enable the cacti poller.
nano /etc/cron.d/cacti
Uncomment the line as below.
*/5 * * * * apache /usr/bin/php /usr/share/cacti/poller.php > /dev/null 2>&1
Save the configuration and exit.
6. If you have got the firewalld running on your server, add the HTTP and HTTPS services to the firewalld using the command below.
firewall-cmd add-service=http --permanent
firewall-cmd --reload
Now you've completes the basic cacti configuration. Go to the next step to start and complete the Cacti installation wizard.
Cacti Installation Wizard
Open your web browser and type the server IP address with the path '/cacti' to access the setup page/installation wizard.
http://192.168.1.10/cacti/
1. At first, you will be redirected to the installation login page as below.
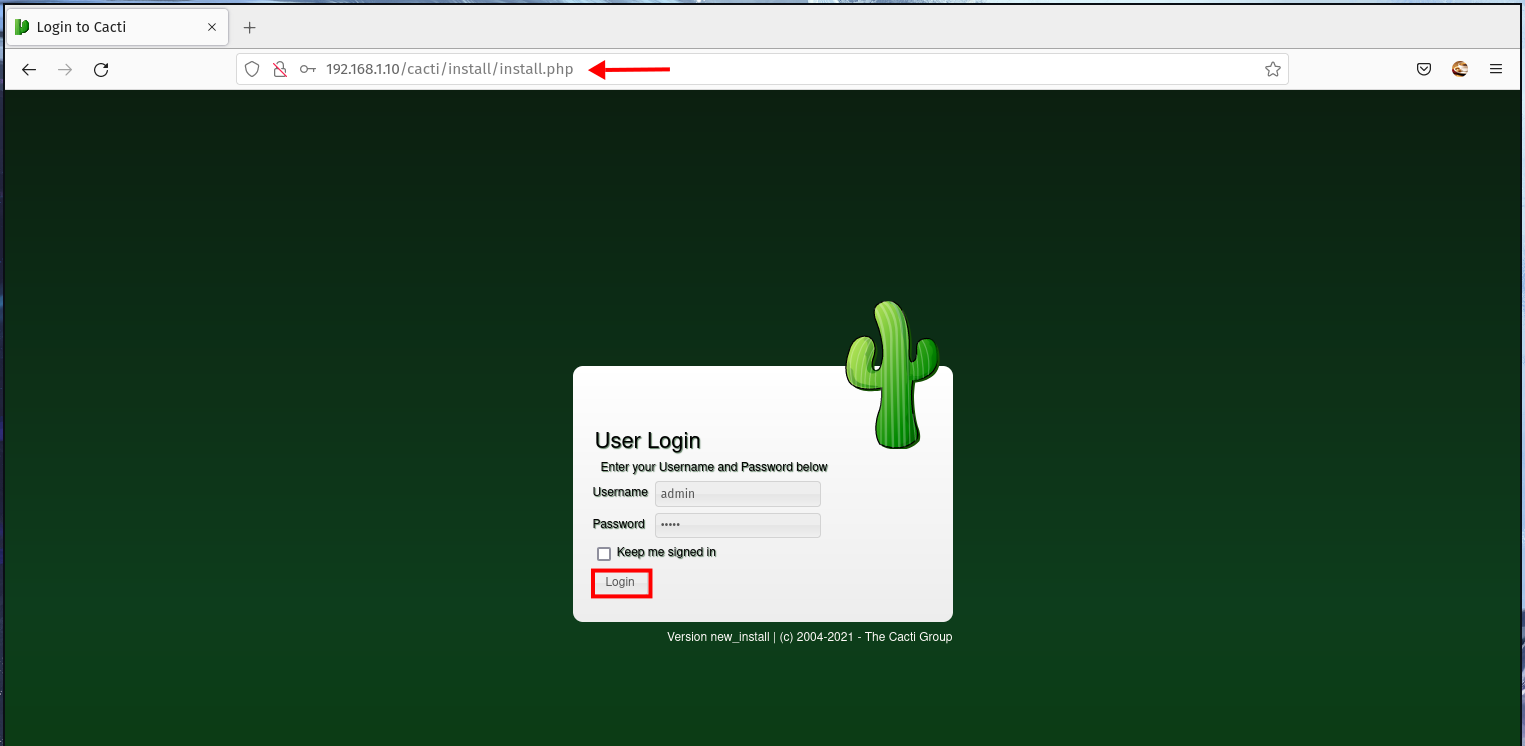
Log in with the default user 'admin' and the password 'admin', then click the 'Login' button.
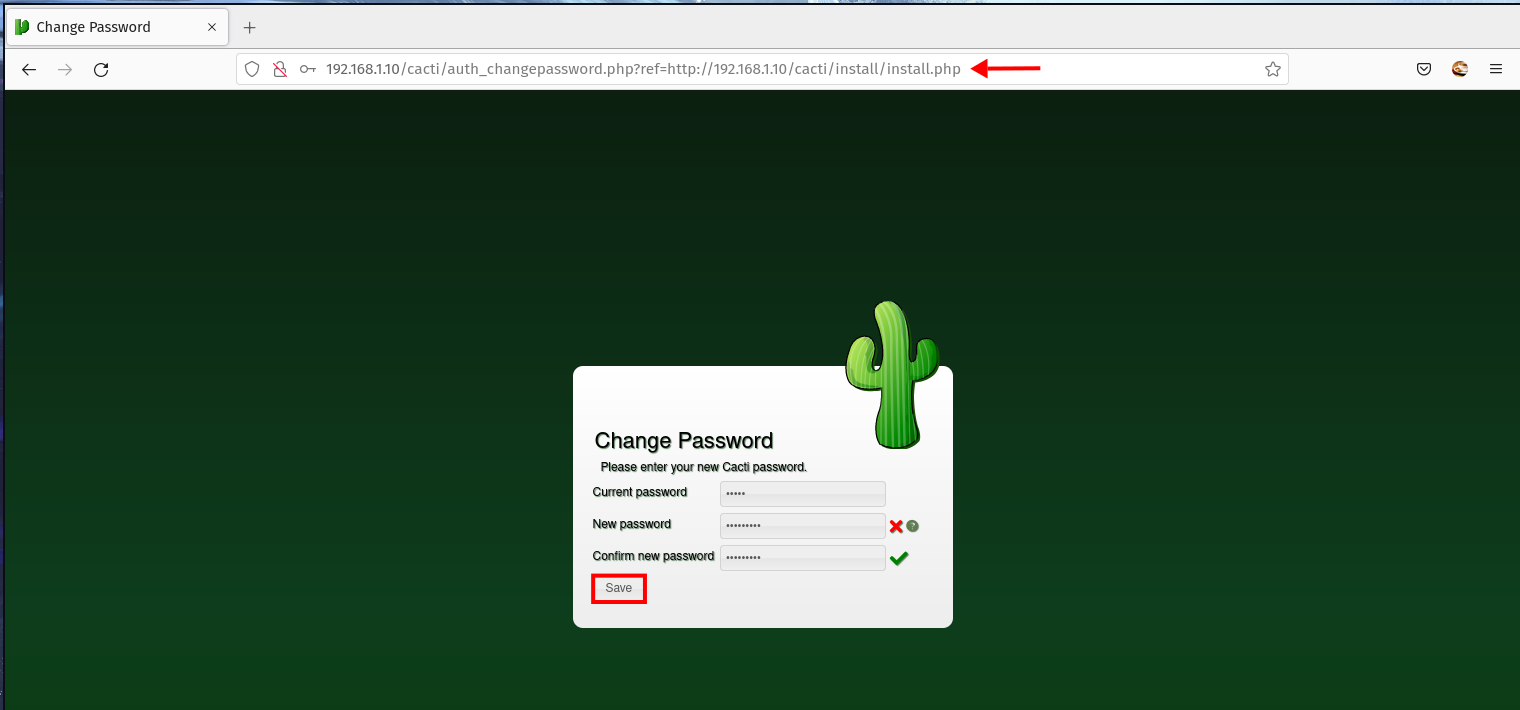
2. Change the default password 'admin' with the strong password and repeat, then click the 'Save' button.
3. For the license agreement, cacti used the GPL License.
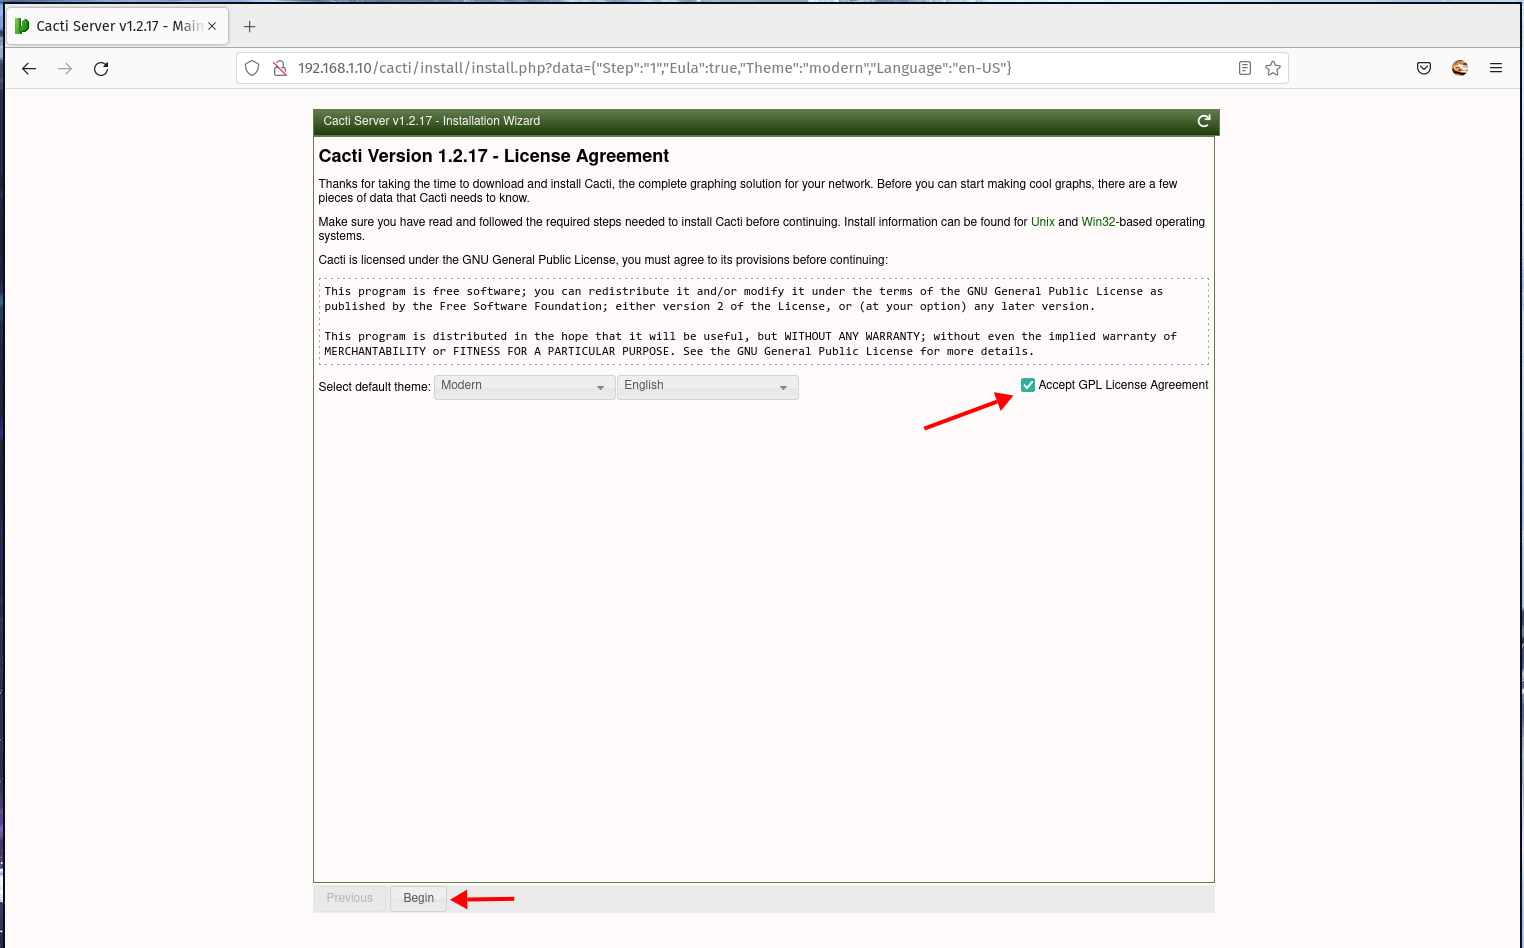
Mark as a check on the option 'Accept GPL License Agreement' and click the button 'Begin' to start the installation.
4. Now the cacti installation wizard will check all requirements for the cacti installation. Make sure all result checks status is green as on the screenshot below.
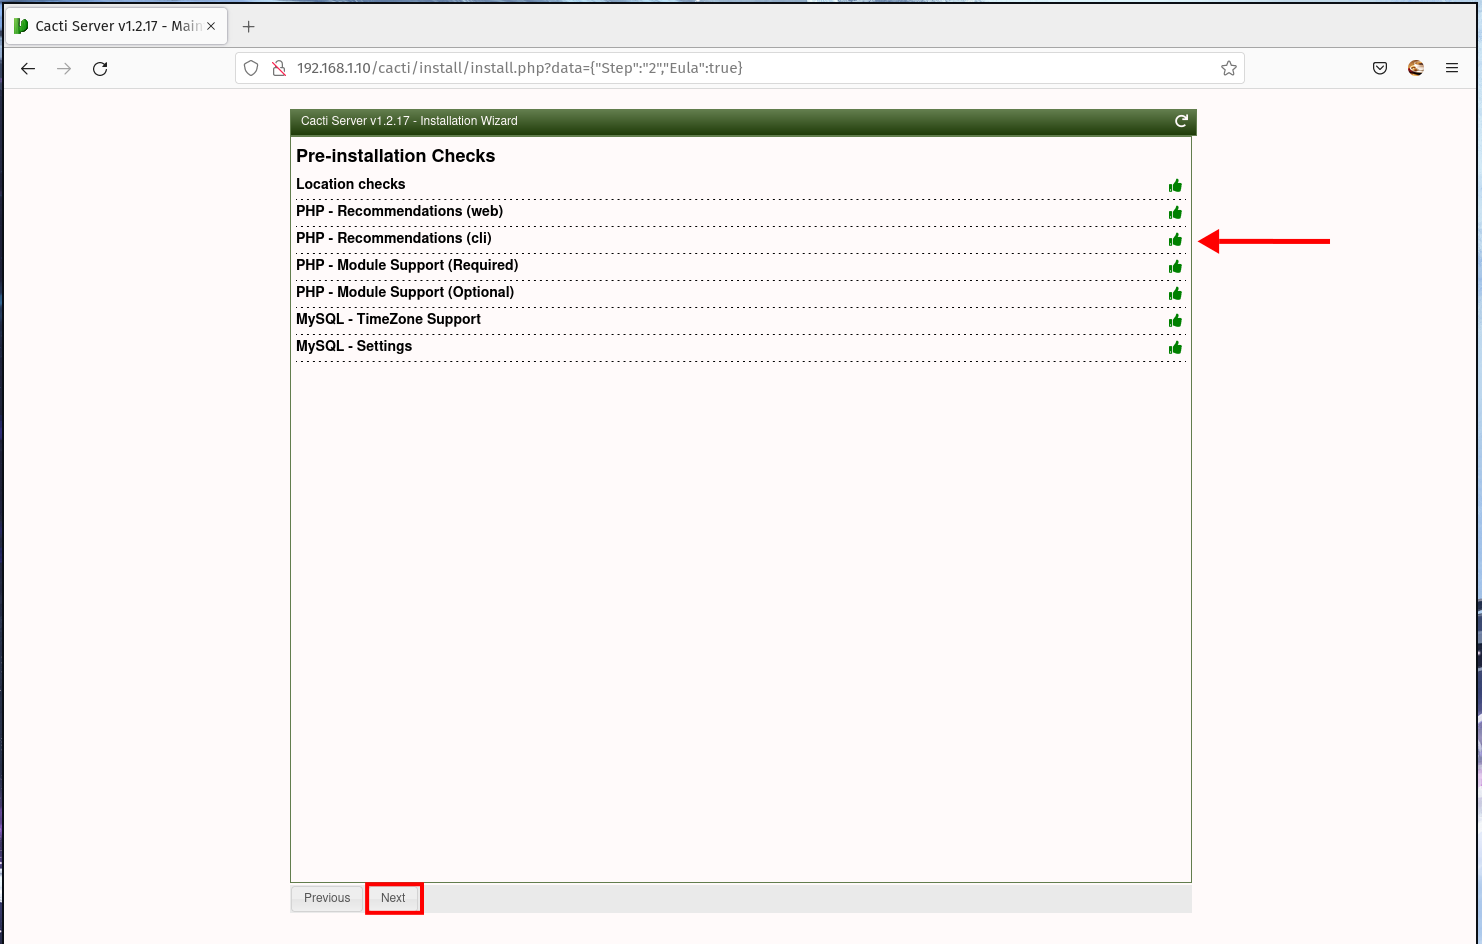
Click the 'Next' button to continue.
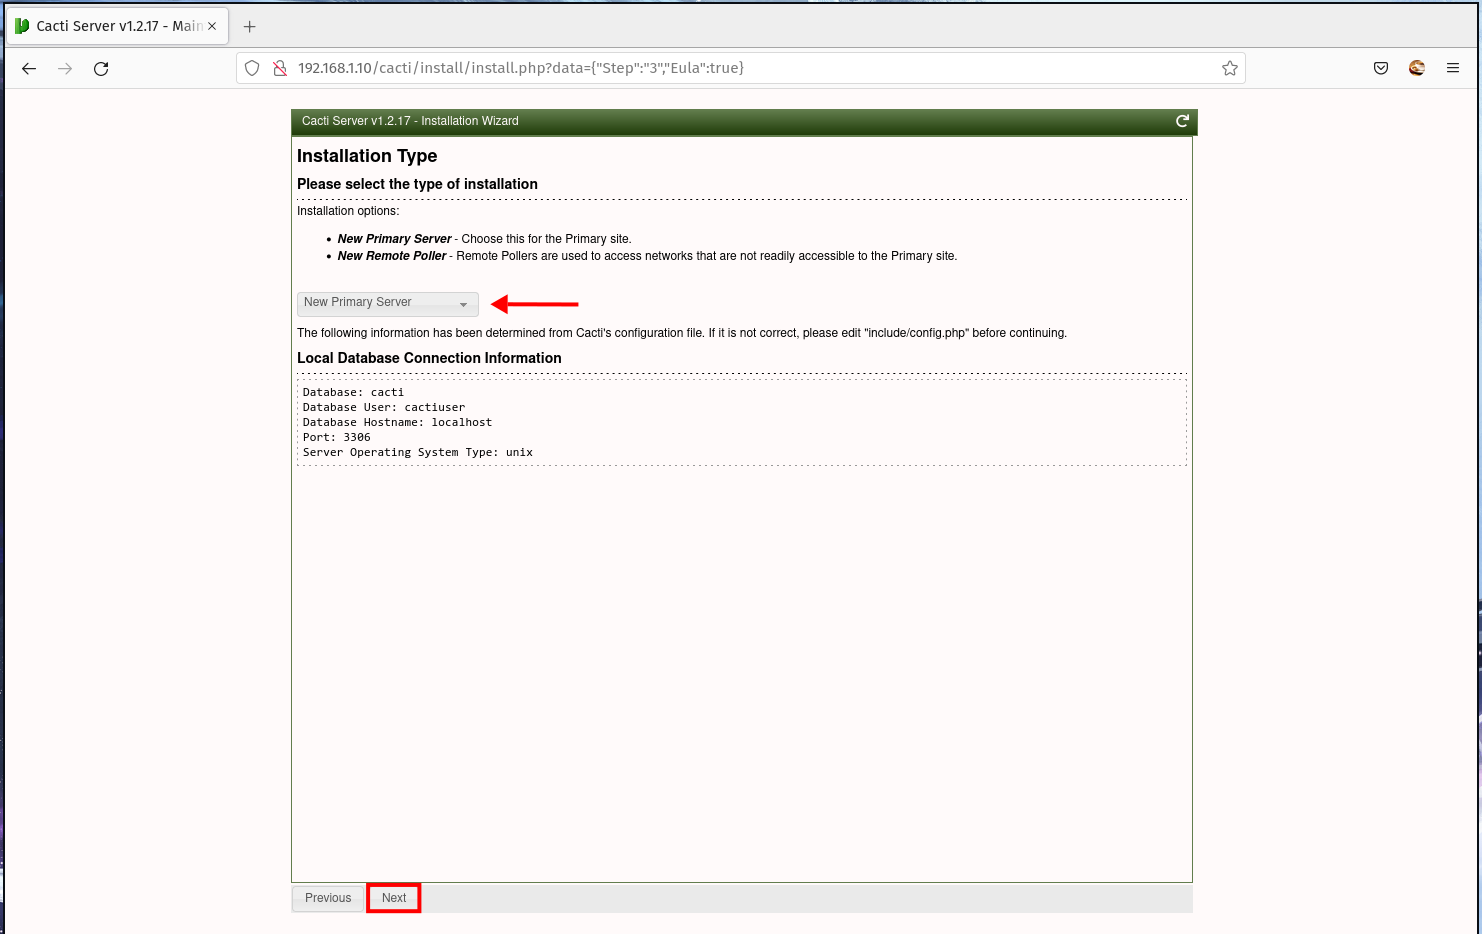
5. Select the option 'New Primary Server' for the cacti installation type, because this is the first cacti server. Then you can click 'Next' again.
6. You will get directory permission checks for Cacti. Ensure all permission checks status are green as the screenshot below.
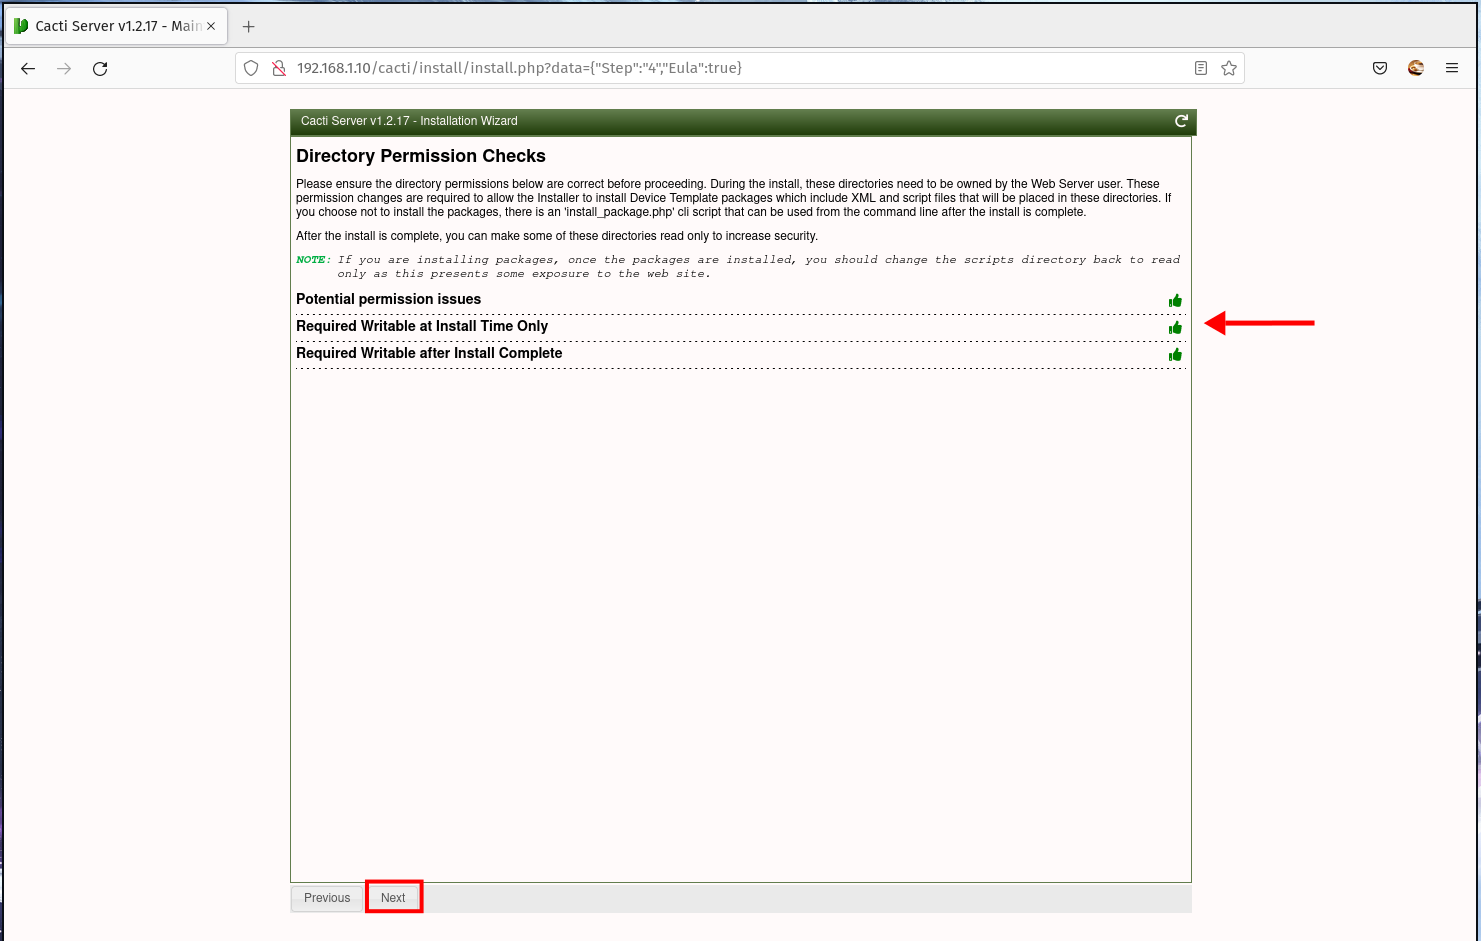
Click 'Next' again.
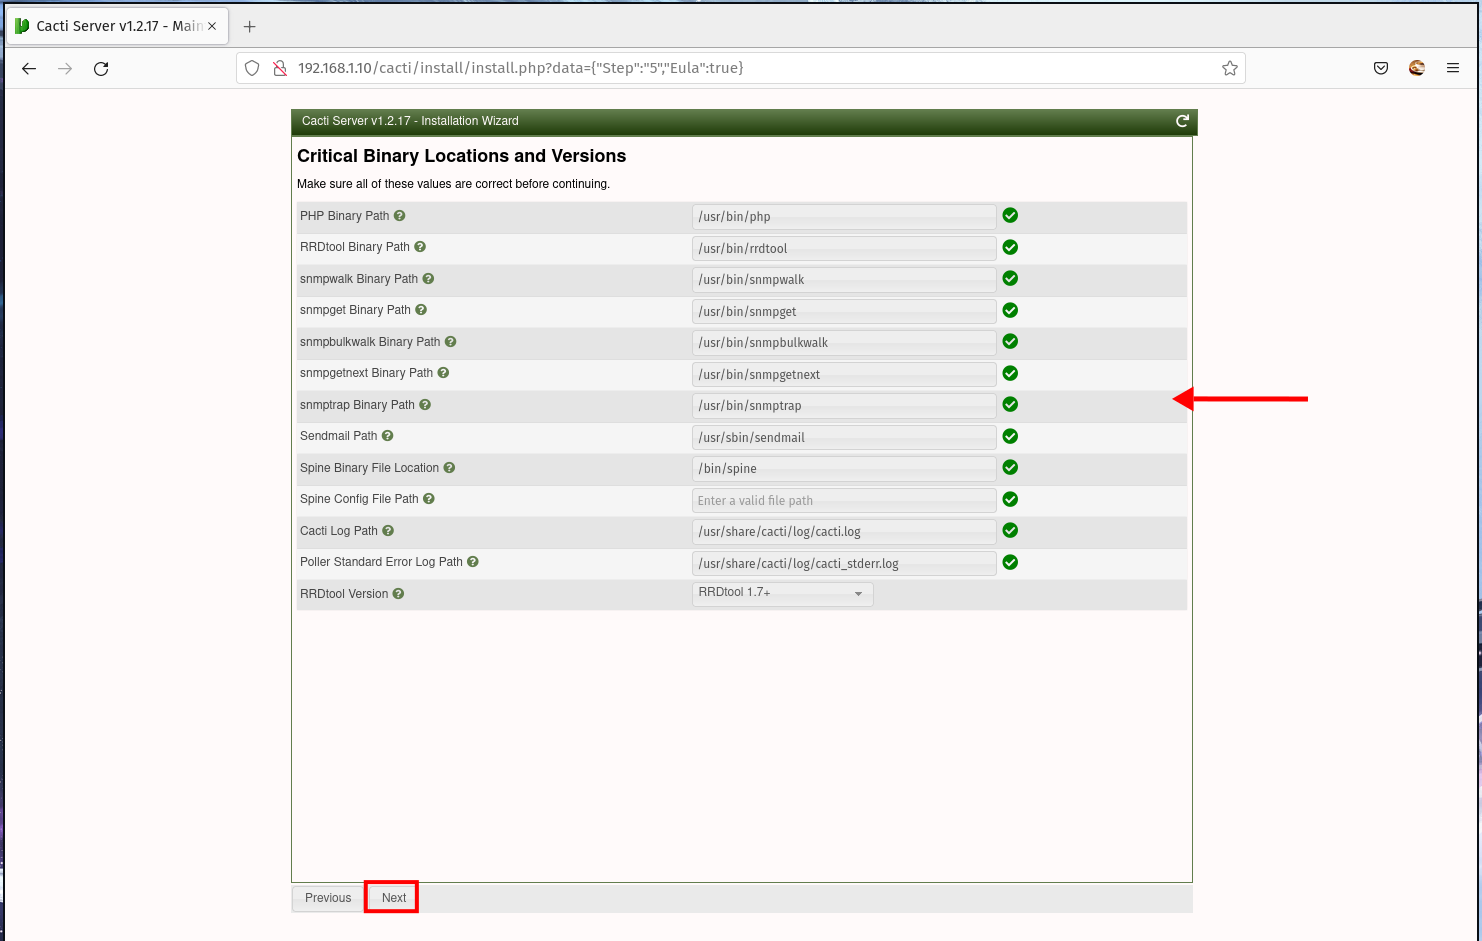
7. Now, you will be setting up the path of binary applications used by Cacti.
You can leave it as default, then click the 'Next' button.
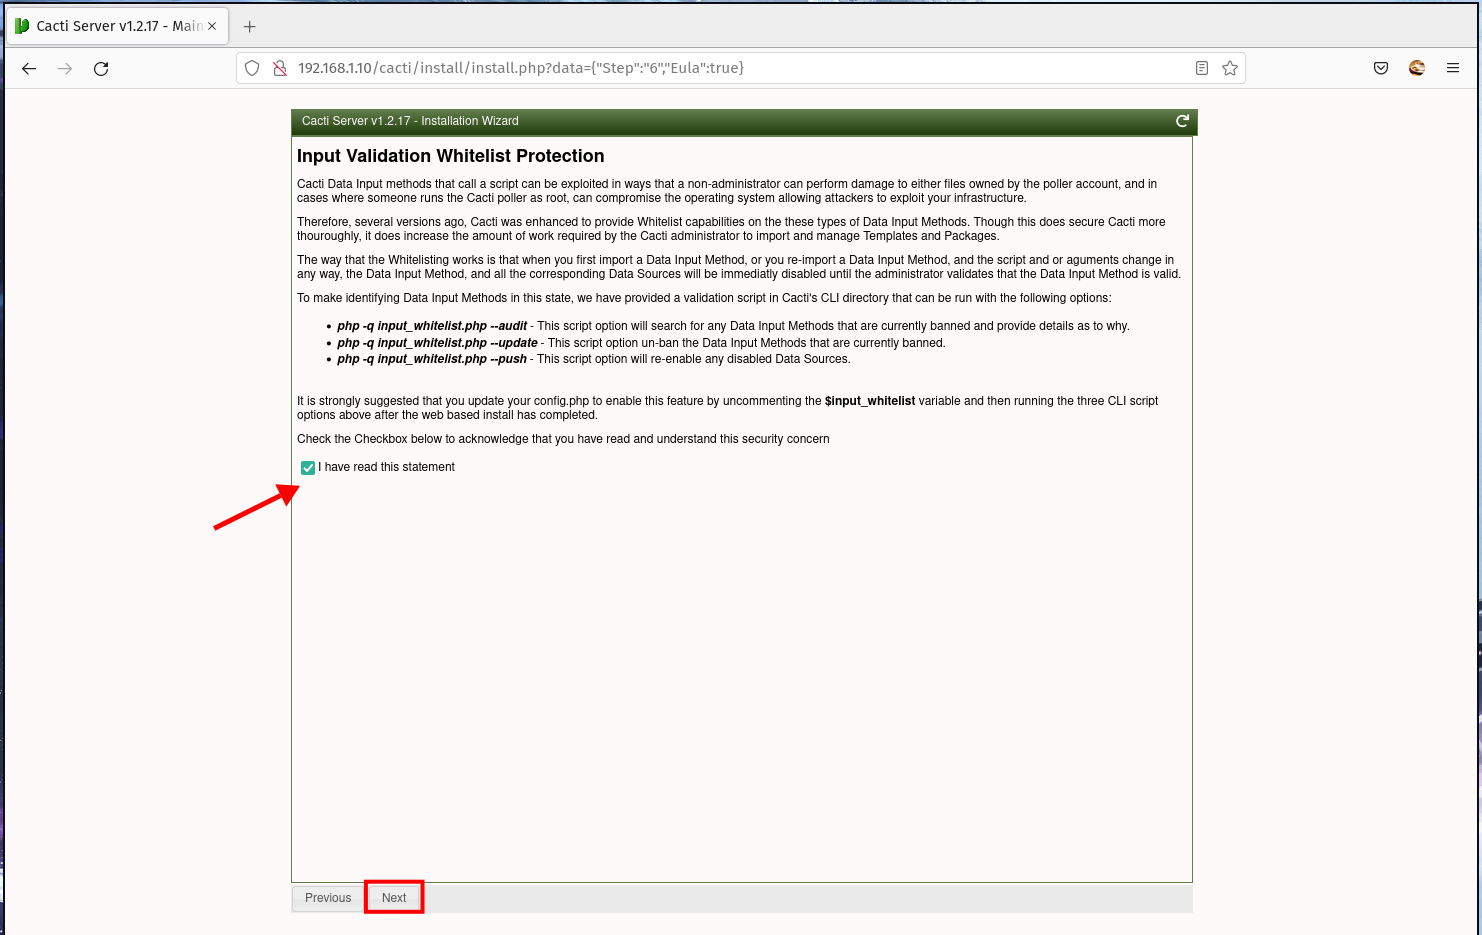
8. Now read all information about the "input validation whitelist protection". This is important, especially for security reasons.
The Cacti script 'input_whitelist.php' allows you to manage data input methods on Cacti. You can ban or un-ban the data input methods on the whitelist, depending on your personal security preferences.
Make sure to mark a check on the option 'I have read this statement", then click again 'Next'.
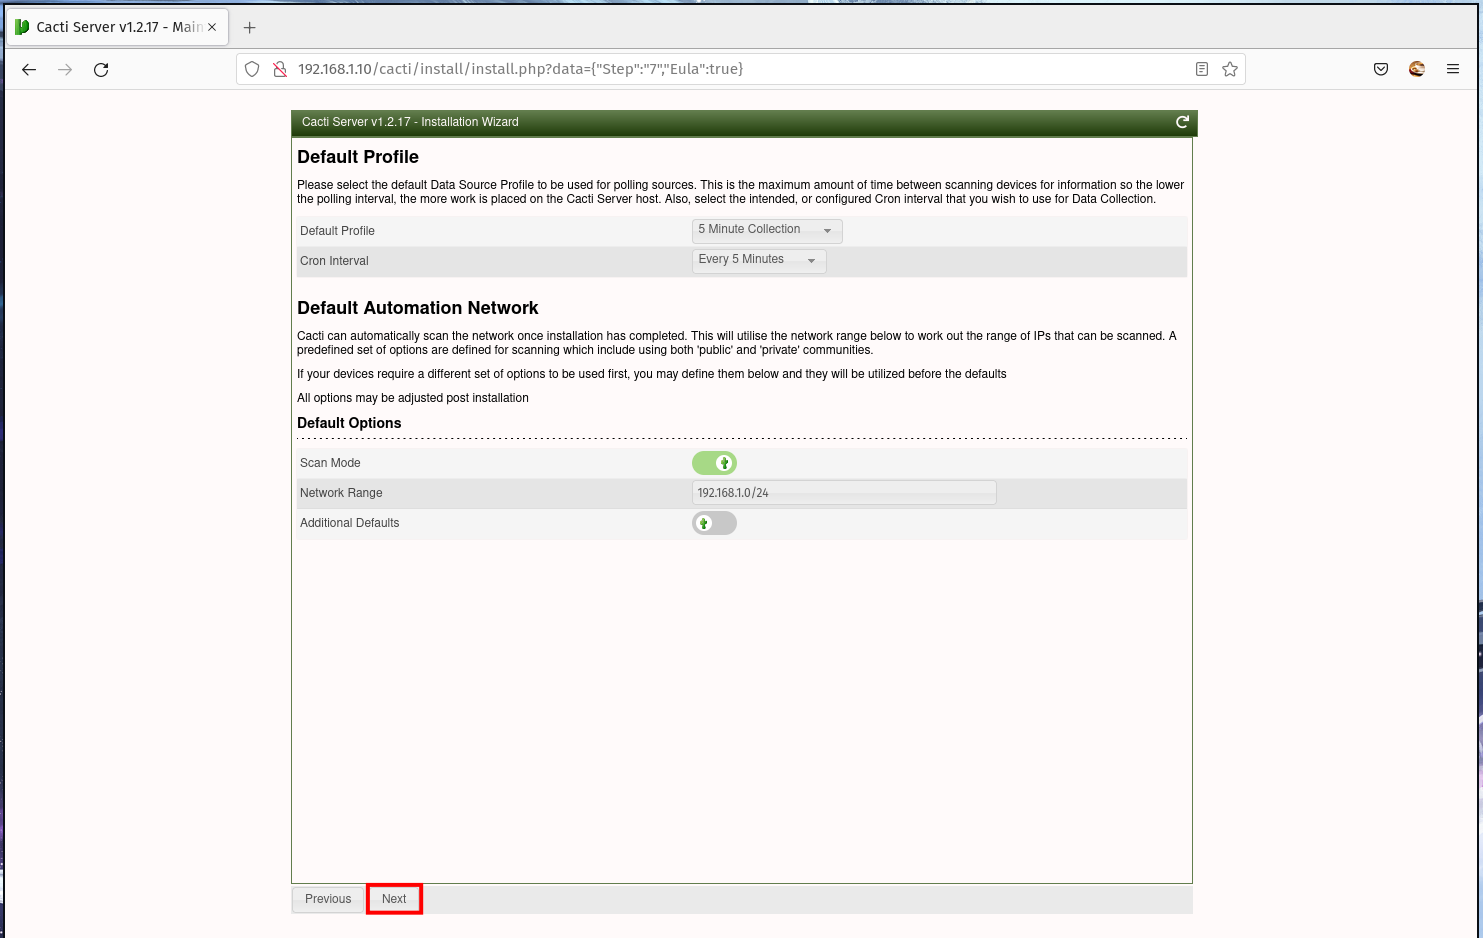
9. For the profile configuration, leave it as default and click the 'Next' button to continue.
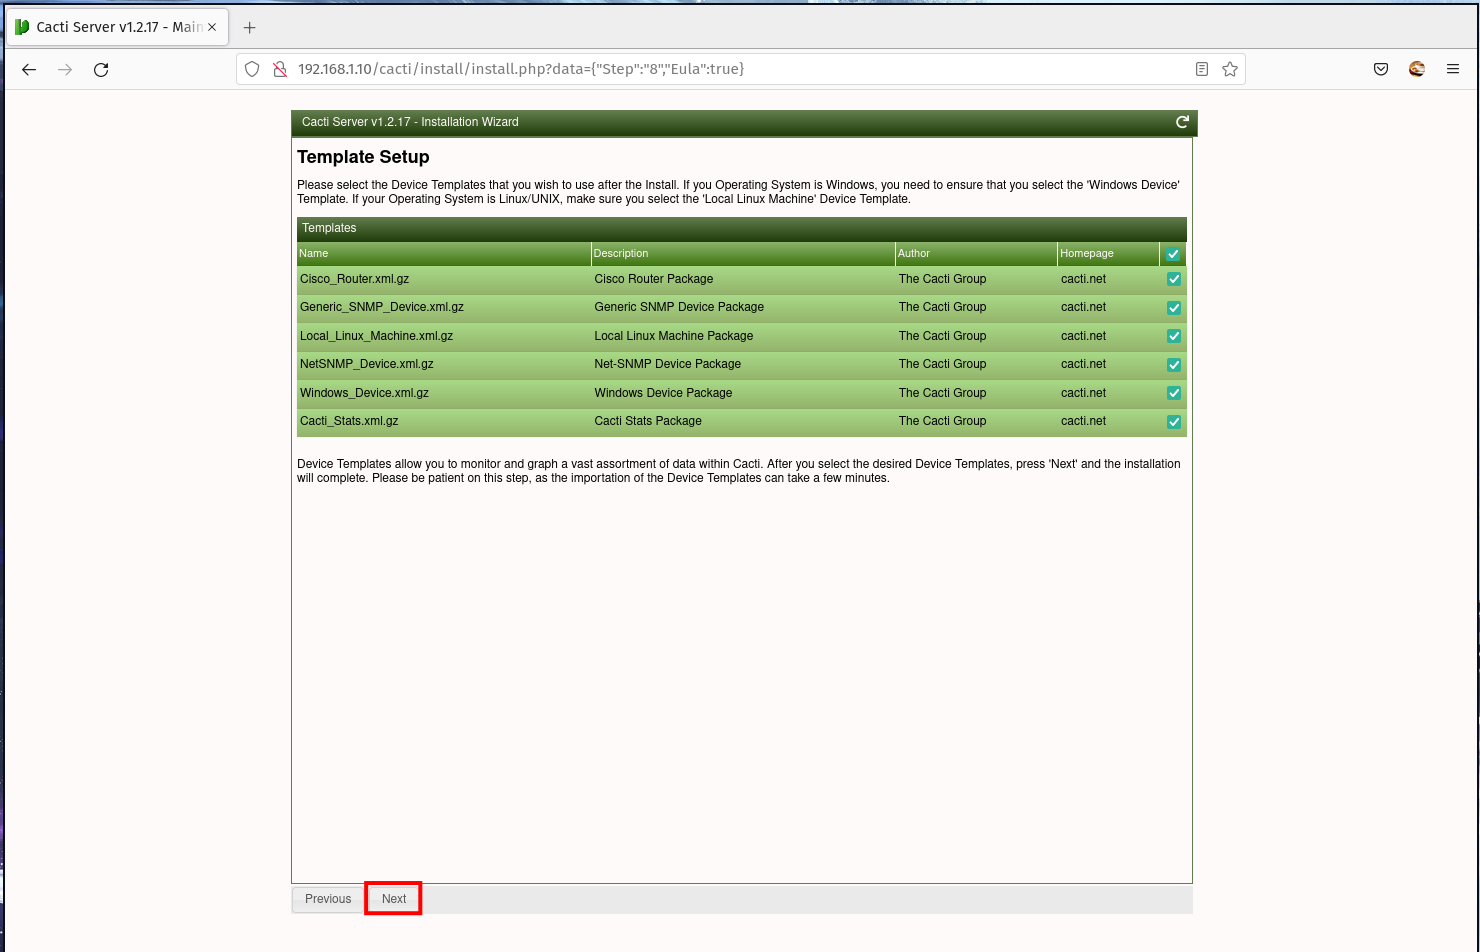
10. You can select templates depending on your host/client machine for the template setup. Or you can just leave it as default and click 'Next' again.
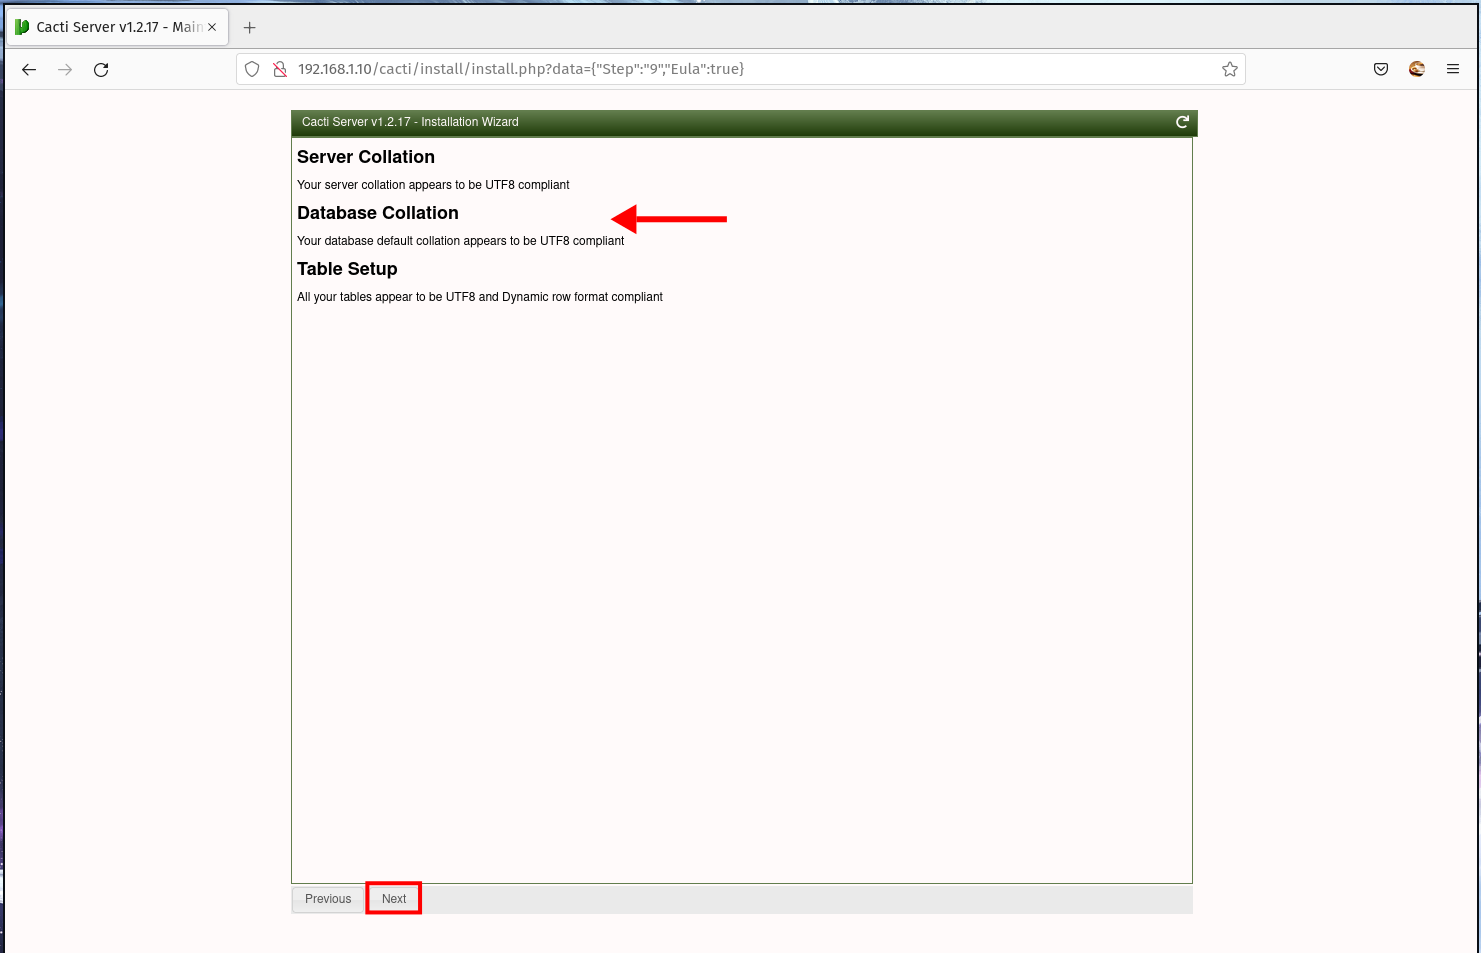
11. Now the installation wizards will check the localization for your database and the current system.
Make sure there are no error messages and click the 'Next' button.
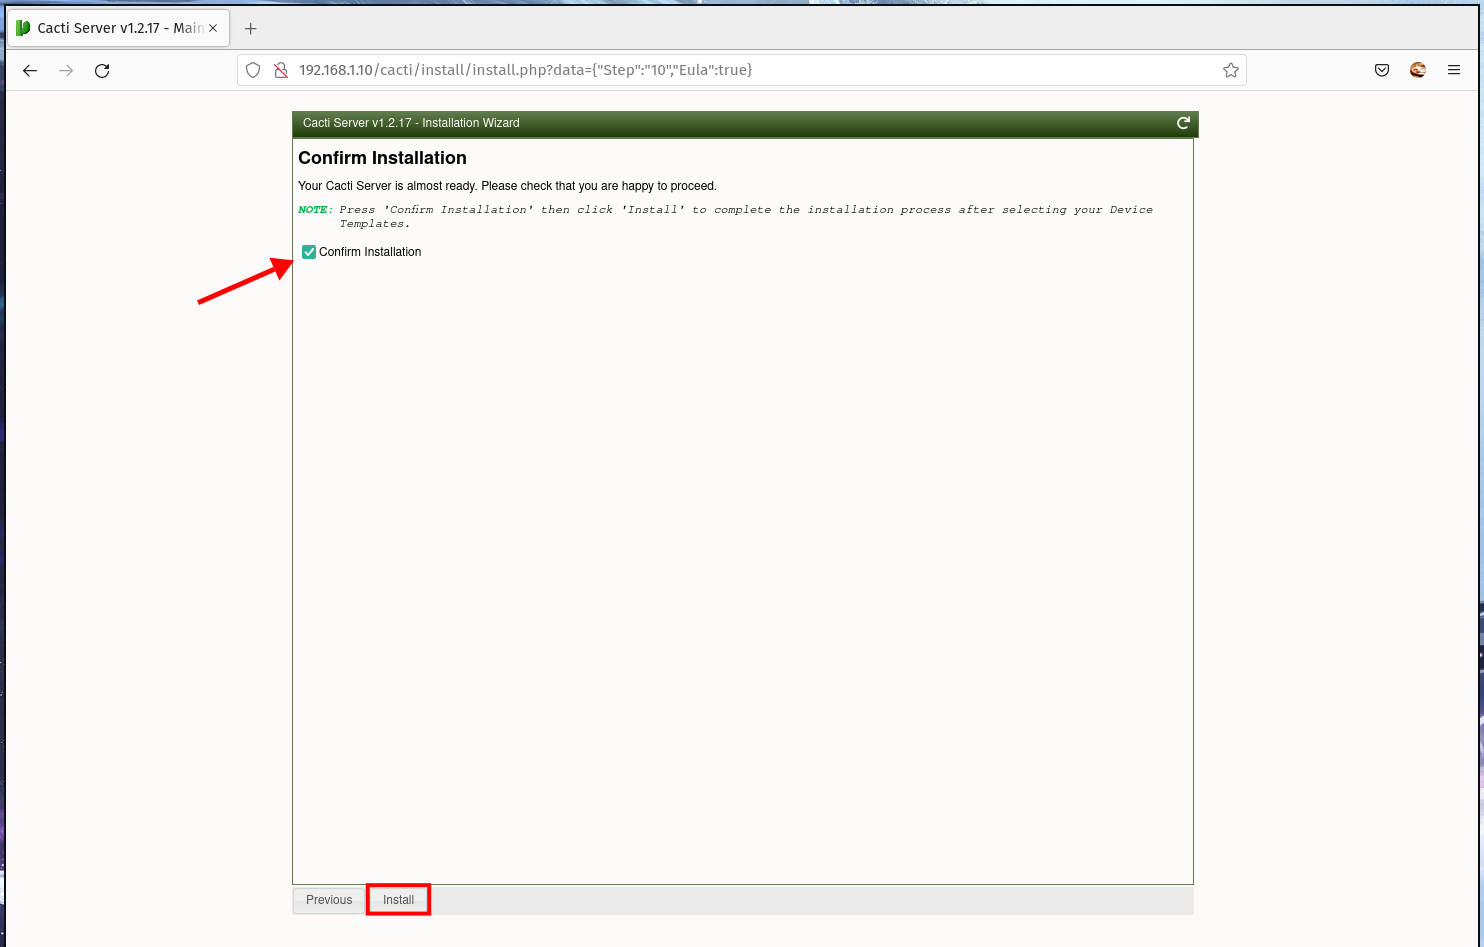
12. Now the option 'Confirm installation' and click the 'Install' button to start the cacti installation.
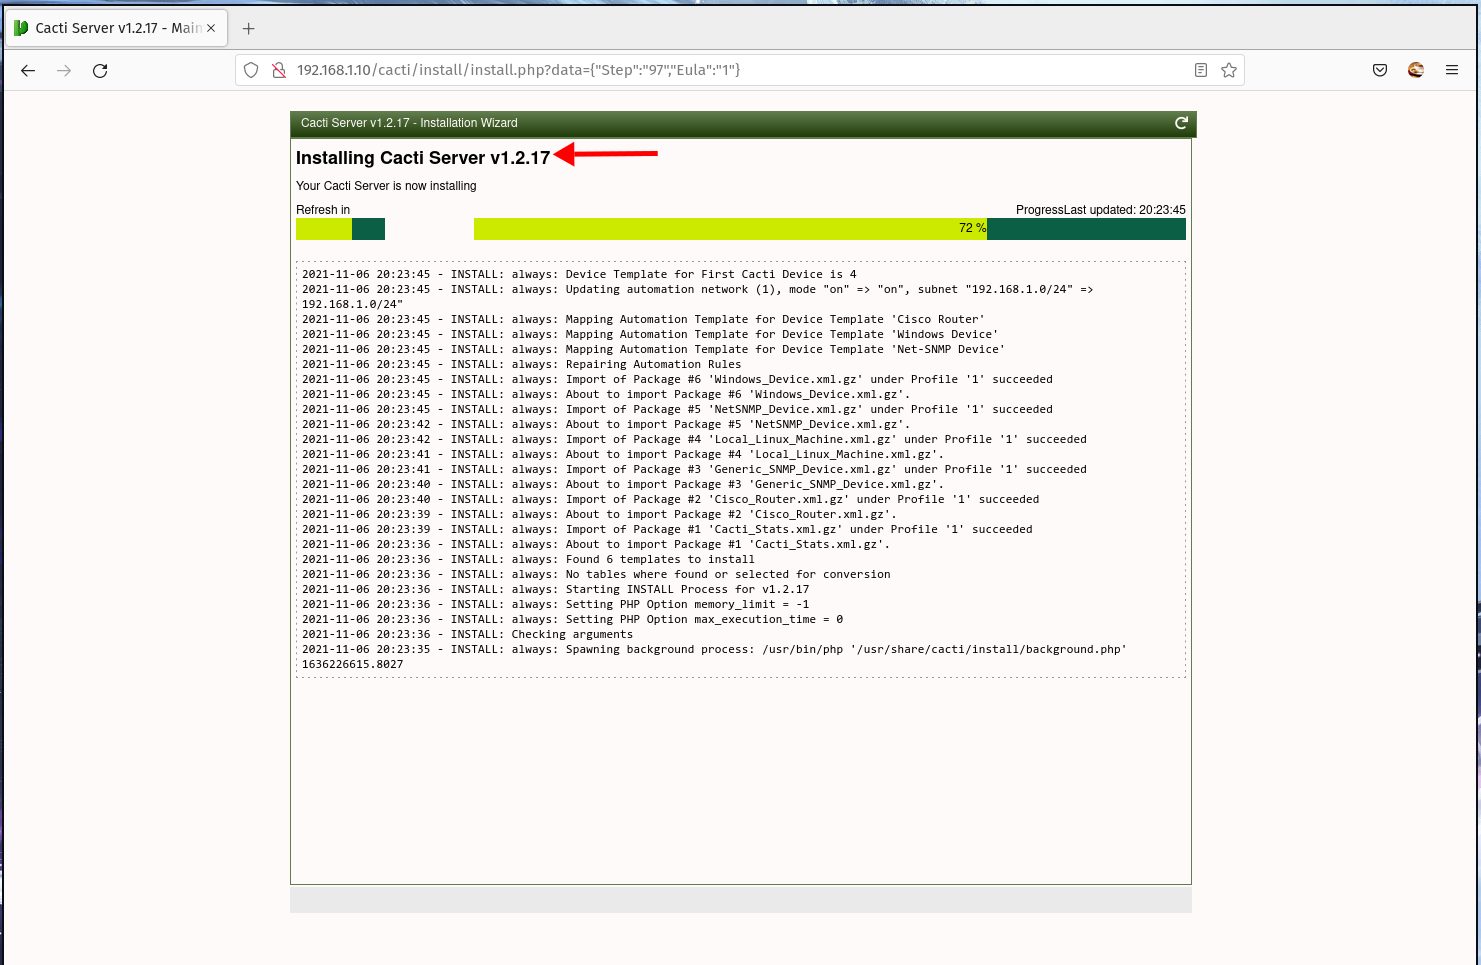
13. The installation process is working as below.
14. When the cacti installation completes, you will see the following messages as the screenshot below.
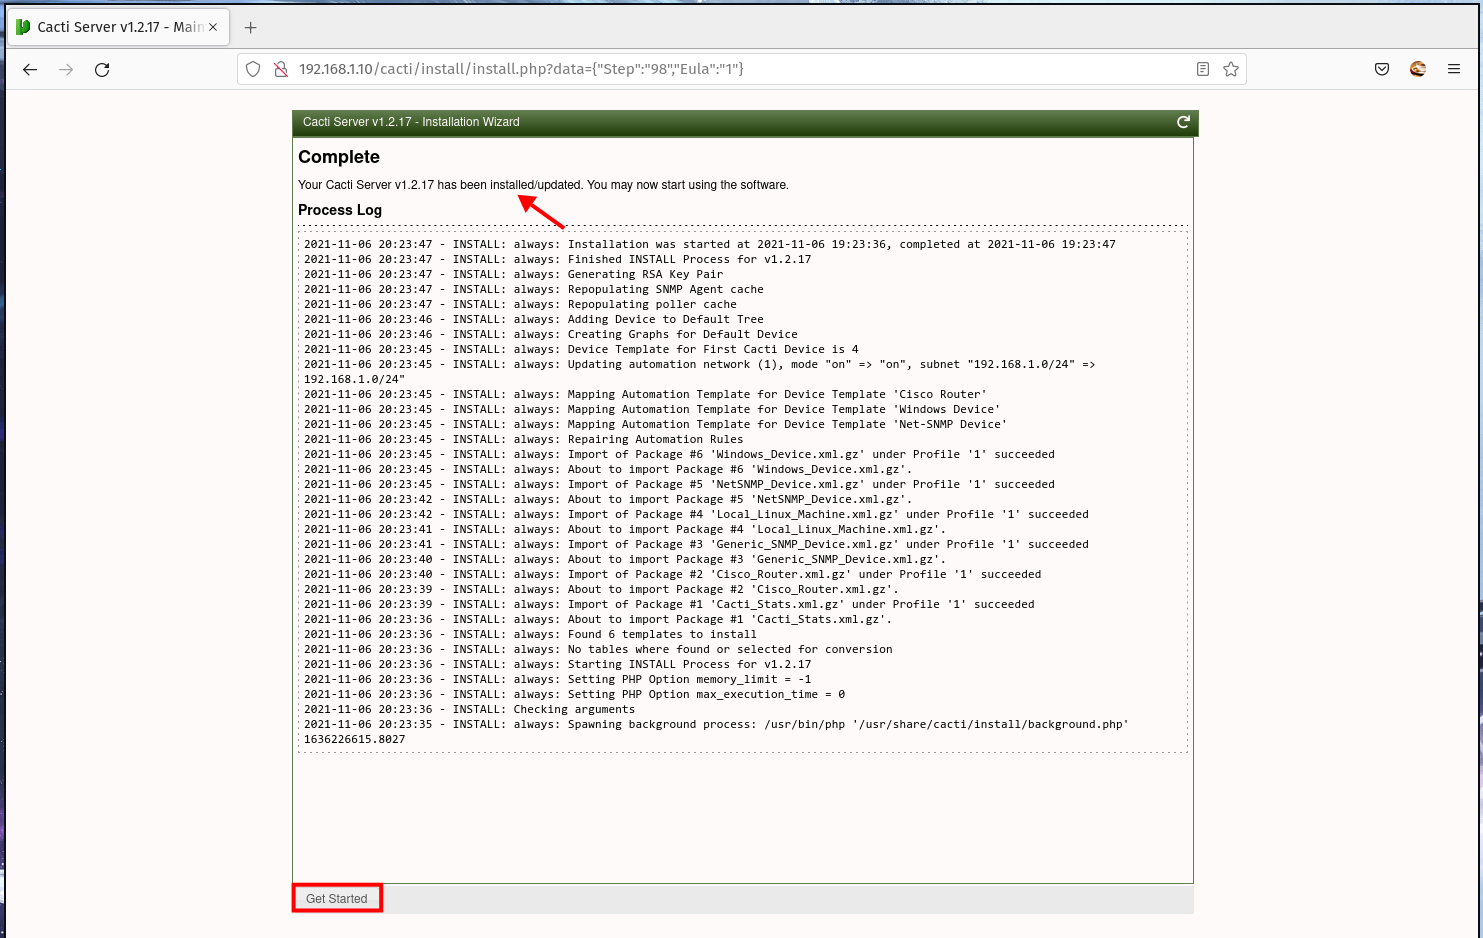
Click the button 'Get Started'.
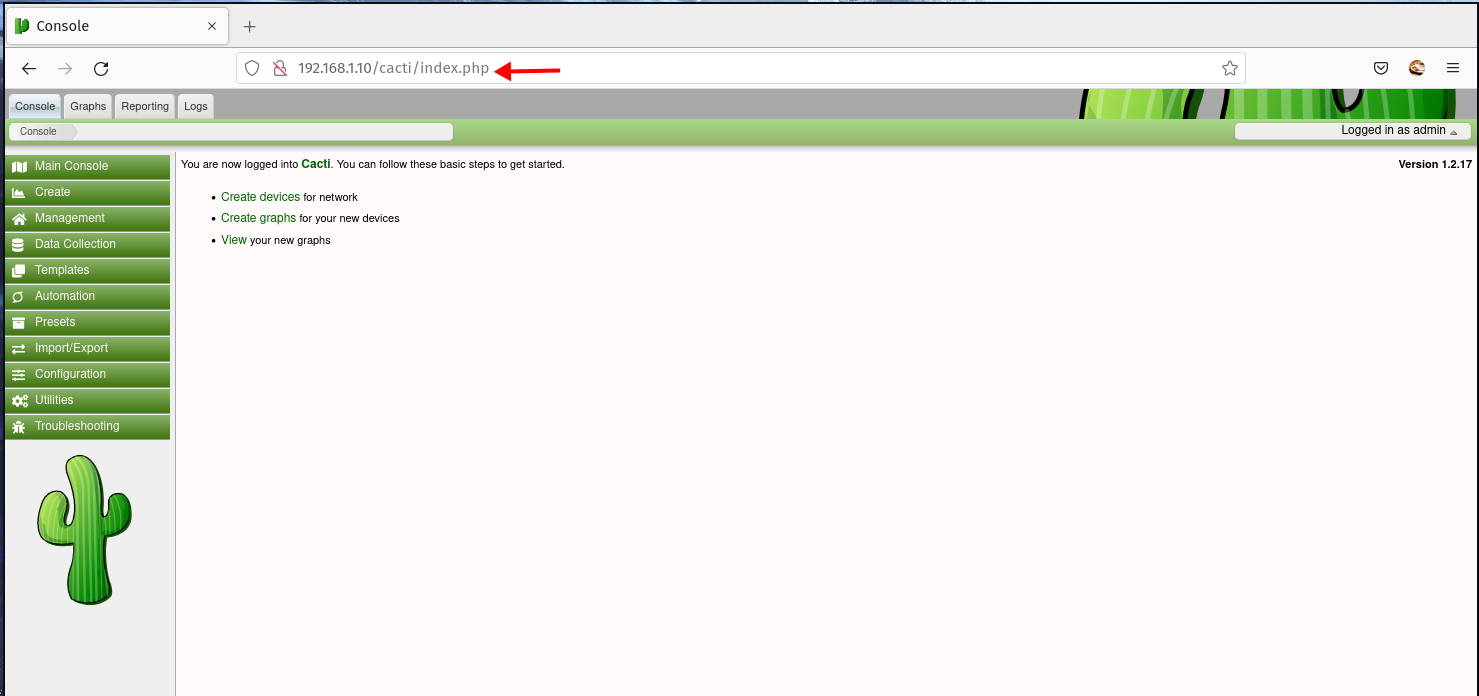
15. And you will be redirected to the Cacti default admin dashboard as below.
16. Now, wait around 19-20 minutes for the cacti service to gather data about your system.
When you're ready, click on the menu 'Graph', and you will see the current status of your Rocky Linux cacti server.
Below is an example of a Cacti server graph from the current environment.
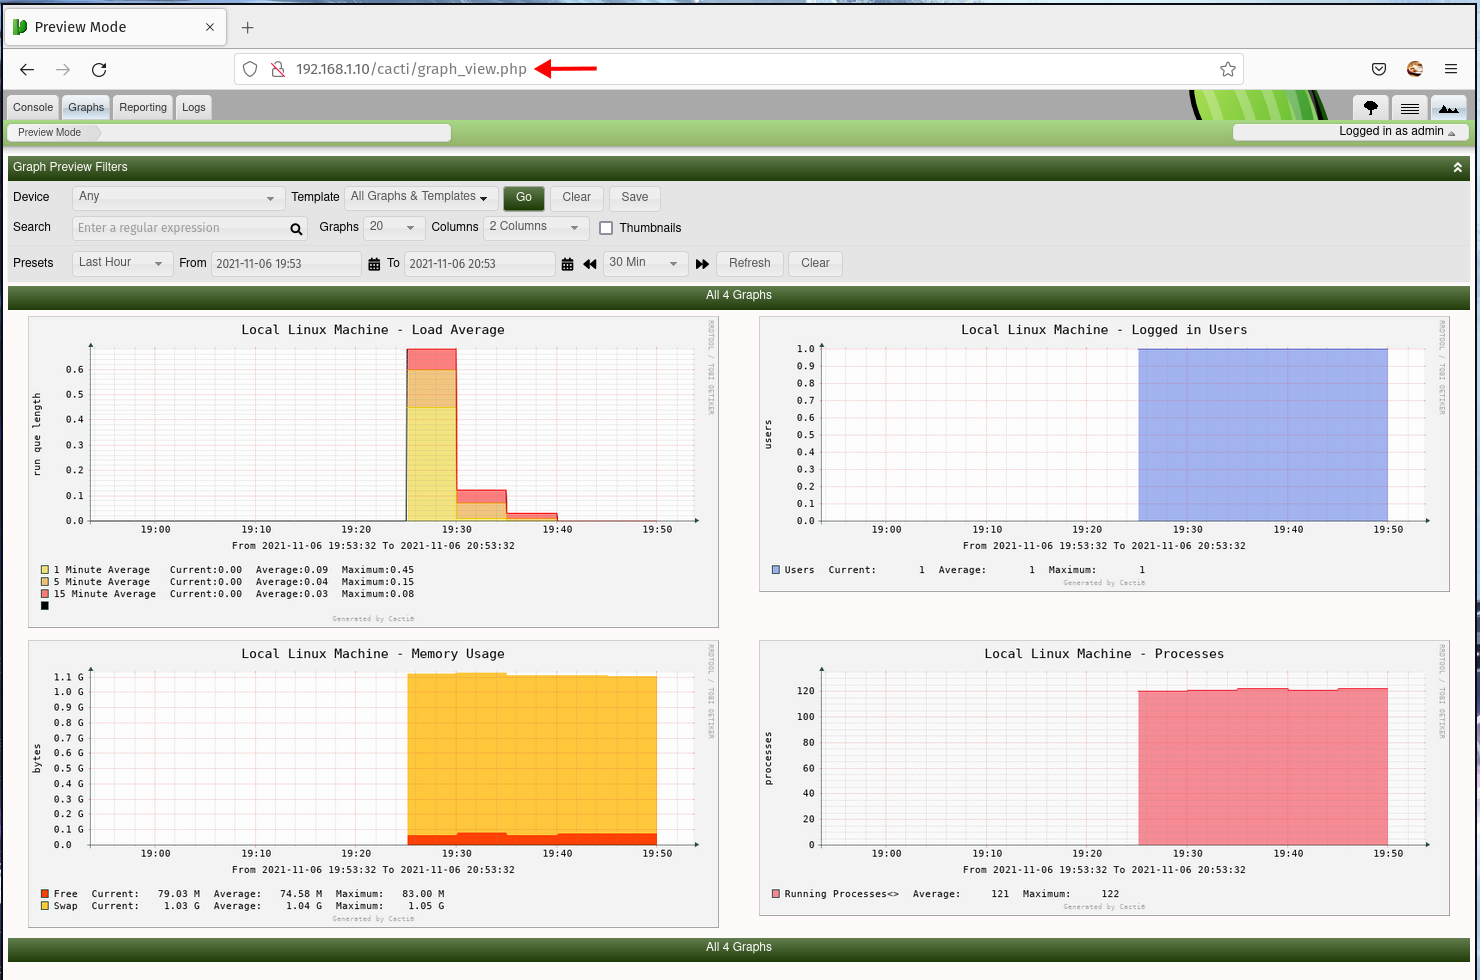
If you can see the graph of your current Rocky Linux system, your cacti installation was successful.
Conclusion
Congratulations! You've installed the Cacti monitoring tool on the Rocky Linux system.
For the next step, you need to set up 'spine', a multi-threaded Data Collector for cacti, then add new hosts/machines/devices to monitor to your cacti server.

