How to Install Apache Kafka on Rocky Linux
Apache Kafka is a distributed data store for processing streaming data in real-time. it's developed by Apache Software Foundation and written in Java and Scala. Apache Kafka is used to build real-time streaming data pipelines and applications that adapt to the data stream, especially for enterprise-grade applications and mission-critical applications. It's one of the most popular data stream platforms used by thousands of companies for high-performance data pipelines, streaming analytics, and data integration.
Apache Kafka combines messaging, storage, and stream processing in one place. Allow users to set up high-performance and powerful data stream for collecting, processing, and streaming data in real time. It's used in modern distributed applications with the capability of scaling to handle billions of streamed events.
In this tutorial, we will install Apache Kafka on the Rocky Linux server and learn the basic usage of Kafka as a message broker for streaming data via the Kafka plugin.
Prerequisites
To follow this tutorial, you will need the following requirements:
- A Rocky Linux server - You can use the Rocky Linux v8 or v9.
- A non-root user with sudo root privileges.
Installing Java OpenJDK
Apache Kafka is a Java-based application. To install Kafka, you will first install Java on your system. At the time of this writing, the latest version of Apache Kafka required at least Java OpenJDK v11.
In the first step, you will install Java OpenJDK 11 from the official Rocky Linux repository.
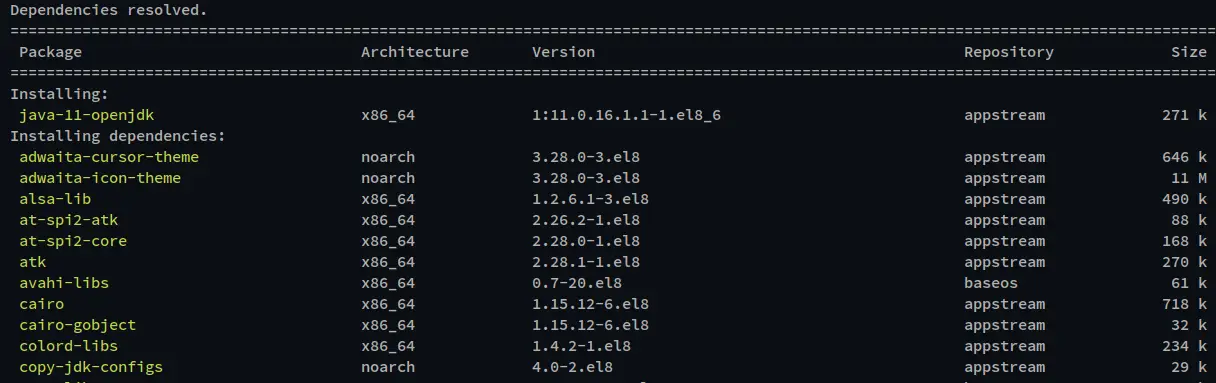
Run the dnf command below to install Java OpenJDK 11 to your Rocky Linux system.
sudo dnf install java-11-openjdk
When prompted to confirm the installation, input y and press ENTER to proceed.
After Java is installed, verify the Java version using the following command. You will see that Java OpenJDK 11 is installed on your Rocky Linux system.
java version

Now that the Java is installed, you will next start the Apache Kafka installation.
Downloading Apache Kafka
Apache Kafka provides multiple binary packages for multiple operating systems, including Linux/Unix. In this step, you will create a new dedicated system user for Kafka, download Kafka binary package, and configure the Apache Kafka installation.
Run the following command to create a new system user named 'kafka'. This will create a new system user for Kafka with the default home directory '/opt/kafka', which will be used as the Kafka installation directory.
sudo useradd -r -d /opt/kafka -s /usr/sbin/nologin kafka
Now move your working directory to '/opt'. Then, download the Apache Kafka binary package via the curl command below. You will now see the file 'kafka.tar.gz'.
cd /opt
sudo curl -fsSLo kafka.tgz https://downloads.apache.org/kafka/3.3.1/kafka_2.12-3.3.1.tgz

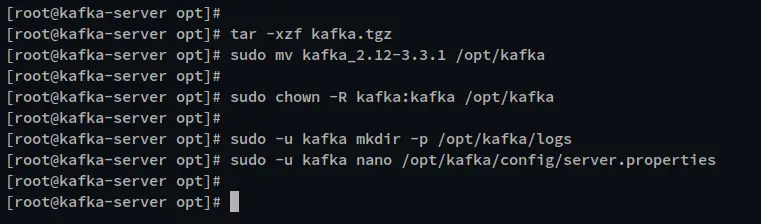
Extract the file 'kafka.tar.gz' via the tar command and rename the extracted directory '/opt/kafka'.
tar -xzf kafka.tgz
sudo mv kafka_2.12-3.3.1 /opt/kafka
Next, change the ownership of the '/opt/kafka' directory to the 'kafka' user via the chmod command below.
sudo chown -R kafka:kafka /opt/kafka
After that, create a new logs directory for Apache Kafka. Then, edit the default configuration 'server.properties' via the nano editor.
sudo -u kafka mkdir -p /opt/kafka/logs
sudo -u kafka nano /opt/kafka/config/server.properties
The Kafka logs directory will be used to store Apache Kafka logs, and you must define the logs directory on the Kakfka configuration sertver.properties.
Uncomment the 'log.dirs' option and change the value to '/opt/kafka/logs'.
# logs configuration for Apache Kafka
log.dirs=/opt/kafka/logs
Save the file and exit the editor when you are done.
You have now completed the basic installation and configuration of Apache Kafka. Next, you will be setting up and running the Apache Kafka as a systemd service.
Running Kafka as Systemd Service
The Apache Kafka package includes another application Zookeeper that is used to centralize services and maintain Kafka controller election, configurations of topics, and ACLs (Access Control Lists) for the Apache Kafka cluster.
To run the Apache Kafka, you must run the Zookeeper first on your system. And in this step, you will create a new systemd service file for both Zookeeper and Apache Kafka. Both services also will be running under the same user 'kafka'.
Create a new service file for Zookeeper '/etc/systemd/system/zookeeper.service' using the following command.
sudo nano /etc/systemd/system/zookeeper.service
Add the configuration to the file.
[Unit]
Requires=network.target remote-fs.target
After=network.target remote-fs.target

[Service]
Type=simple
User=kafka
ExecStart=/opt/kafka/bin/zookeeper-server-start.sh /opt/kafka/config/zookeeper.properties
ExecStop=/opt/kafka/bin/zookeeper-server-stop.sh
Restart=on-abnormal

[Install]
WantedBy=multi-user.target
Save the file and exit the editor when you are done.
Next, create a new service file for Apache Kafka '/etc/systemd/system/kafka.service' using the below command.
sudo nano /etc/systemd/system/kafka.service
Add the following configuration to the file. You can see in section '[Unit]' that the Kafka service is required the 'zookeeper.service' to be running first, and it's always running after the 'zookeeper.service'.
[Unit]
Requires=zookeeper.service
After=zookeeper.service

[Service]
Type=simple
User=kafka
ExecStart=/bin/sh -c '/opt/kafka/bin/kafka-server-start.sh /opt/kafka/config/server.properties > /opt/kafka/logs/start-kafka.log 2>&1'
ExecStop=/opt/kafka/bin/kafka-server-stop.sh
Restart=on-abnormal

[Install]
WantedBy=multi-user.target
Save the file and exit the editor when you are finished.
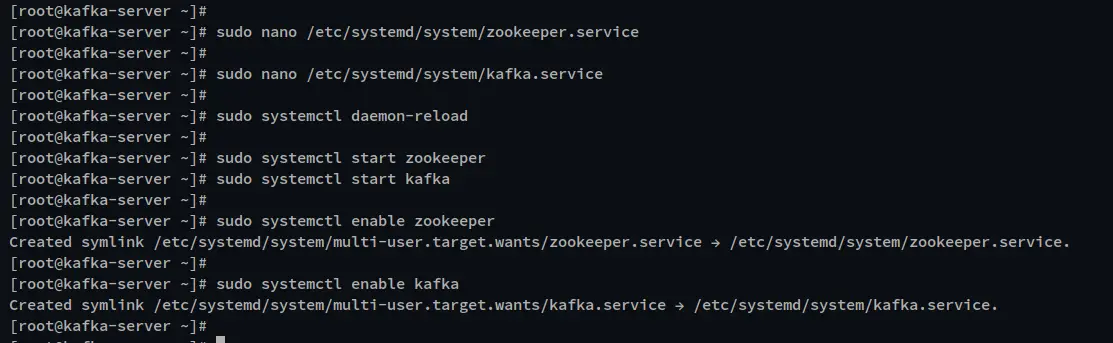
Next, run the following systemctl command to reload the systemd manager and apply new services.
sudo systemctl daemon-reload
Now start the zookeeper and kafka services using the following command.
sudo systemctl start zookeeper
sudo systemctl start kafka
Enable both kafka and zookeeper services to be run automatically at system boot via the systemctl command below.
sudo systemctl enable zookeeper
sudo systemctl enable kafka
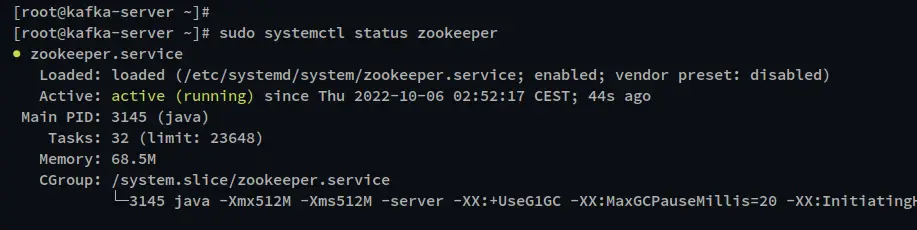
Lastly, verify both the zookeeper and kafka service using the below command.
sudo systemctl status zookeeper
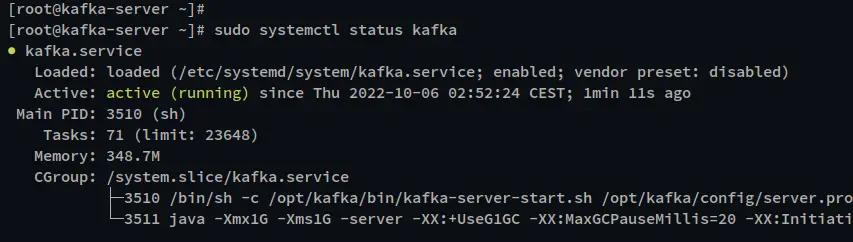
sudo systemctl status kafka
In the below output, you can see the current status of the zookeeper service is running and it's also enabled.
And below for the kafka service status, which is running and also the service is enabled.
Now that you have finished the Apache Kafka installation and it's now up and running. next, you will learn the basic usage of Apache Kafka as a message broker for producing messages, and also you will learn how to use the Kafka plugin to stream data in real time.
Basic Operation using Kafka Console Producer and Consumer
Before you begin, all of the command that will be used for this example is provided by the Kafka package that is available on the '/opt/kafka/bin' directory.
In this step, you will learn how to create and list Kafka topics, start the producer and insert data, stream data via the consumer script, and lastly, you will clean up your environment by deleting the Kafka topic.
Run the following command to create a new Kafka topic. You will use the script 'kafka-topics.sh' to create a new topic with the name 'TestTopic' with one replication and partition.
sudo -u kafka /opt/kafka/bin/kafka-topics.sh \
--create --bootstrap-server localhost:9092 --replication-factor 1 --partitions 1 --topic TestTopic
Now run the following command to verify the list of topics on your Kafka. You should see the 'TestTopic' is created on your Kafka server.
sudo -u kafka /opt/kafka/bin/kafka-topics.sh --list --bootstrap-server localhost:9092

Next, to produce messages you can use the script 'kafka-console-producser.sh' and then insert data to that will be processed.
Run the following command to start Kafka Console Producer and specify the topic to the 'TestTopic'.
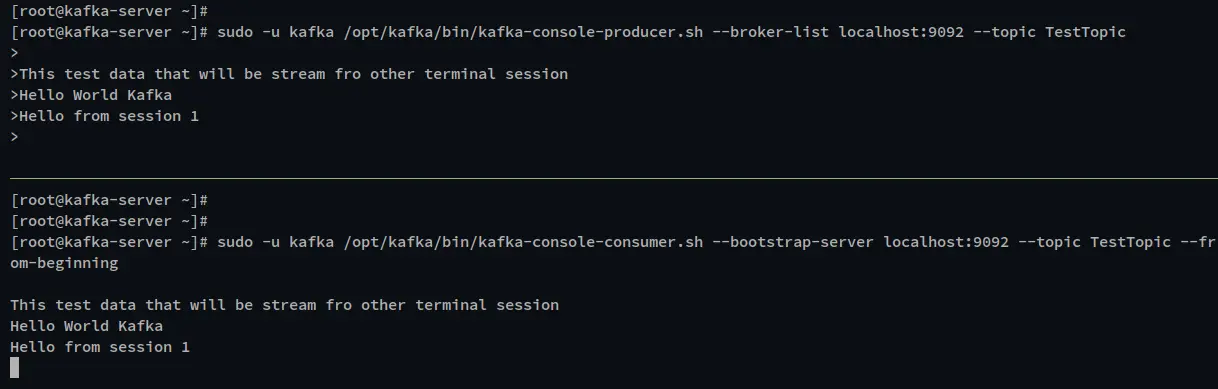
sudo -u kafka /opt/kafka/bin/kafka-console-producer.sh --broker-list localhost:9092 --topic TestTopic
After you have got the Kafka Console Producer, input any message that will be processed.
Next, open a new terminal session and log in to the server. Then open the Kafka Console Consumer via the script 'kafka-conosle-consumer.sh'.
Run the below command to start the kafka Console Consumer and specify the topic to 'TestTopic'.
sudo -u kafka /opt/kafka/bin/kafka-console-consumer.sh --bootstrap-server localhost:9092 --topic TestTopic --from-beginning
In the below screenshot, you can see all messages from the Kafka Console Producer is processed to the Consumer Console. You can also type other messages on the Console Producer and the message will automatically be proceeded and be displayed on the Console Consumer screen.
Now press Ctrl+c to exit from both Kafka Console Producer and Kafka Console Consumer.
To clean up your Kafka environment, you can delete and remove the 'TestTopic' via the following command.
sudo -u kafka /opt/kafka/bin/kafka-topics.sh --bootstrap-server localhost:9092 --delete --topic TestTopic
Streaming Data with Kafka Connect Plugin
Apache Kafka provides multiple plugins that can be used to stream data from multiple sources. Additional Kafka library plugins is available by default on the '/opt/kafka/libs' directory, you must enable kafka plugins via the config file '/opt/kafka/config/connect-standalone.properties'. In this case, for the Kafka standalone mode.
Run the following command to edit the Kafka configuration file '/opt/kafka/config/connect-standalone.properties'.
sudo -u kafka nano /opt/kafka/config/connect-standalone.properties
Uncomment the 'plugin.path' line and change the value to the plugin's library directory '/opt/kakfa/libs'.
plugin.path=/opt/kafka/libs
Save the file and exit the editor when you are done.
Next, run the following command to create a new file '/opt/kafka/test.txt' that will be used as the data source for the Kafka stream.
sudo -u kafka echo -e "Test message from file\nTest using Kafka connect from file" > /opt/kafka/test.txt
Now run the following command to start the Kafka Consumer on standalone mode with configuration files 'connect-file-source.properties' and 'connect-file-sink.properties'.
This command and configuration is a default example of the Kafka data stream with the source file 'test.txt' that you just created. This example also will automatically create a new topic 'connect-test' that you can access via the Kafka Console Consumer.
cd /opt/kafka
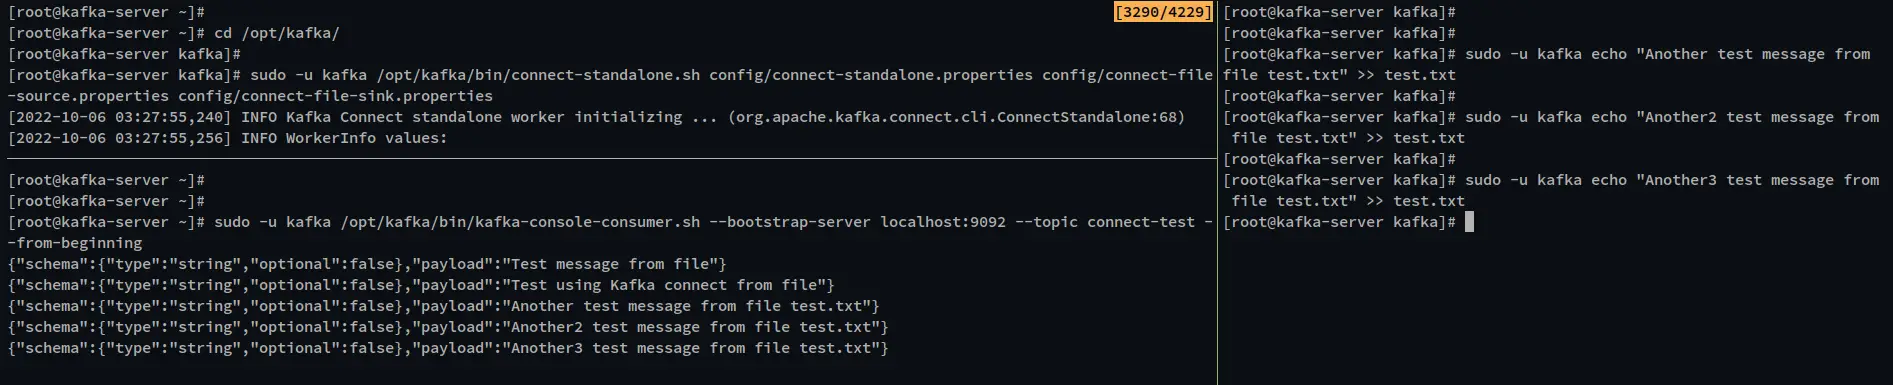
sudo -u kafka /opt/kafka/bin/connect-standalone.sh config/connect-standalone.properties config/connect-file-source.properties config/connect-file-sink.properties
Now, open another terminal session and run the following command to start the Kafka Console Consumer. Also, specify the topic to 'connect-test'. You will see the message from the file 'test.txt'.
sudo -u kafka /opt/kafka/bin/kafka-console-consumer.sh --bootstrap-server localhost:9092 --topic connect-test --from-beginning
Now you can update the file 'test.txt' and the new messages will automatically be processed and streamed on the Kafka Console Consumer.
Run the following command to update the file 'test.txt' with new messages.
sudo -u kafka echo "Another test message from file test.txt" >> test.txt
In the following output, you can see the new messages is automatically processed by Kafka when there is changes on file 'test.txt'. You have now completed the basic usage of the Kafka connect plugin to stream messages via files.
Conclusion
Throughout this guide, you have learned how to install Apache Kafka on the Rocky Linux system. You also have learned the basic usage of the Kafka Producer Console for producing and processing messages and the Kafka Consumer for receiving messages. In the end, you have also learned how to enable Kafka plugins and use the Kafka Connect Plugin for streaming messages in real-time from a file.

