How to Install and Configure S3 Compatible Object Storage Server using Minio on Ubuntu 20.04
On this page
Object storage is the storage and retrieval of unstructured blobs of data and metadata using an HTTP API. Instead of storing files in a conventional manner by breaking them into blocks to store on disk using a filesystem, we deal with whole objects stored over the network. These objects could be an image, video, logs, HTML files, backups, container images, or any self-contained blob of bytes. They are unstructured because they don't follow any specific schema or format.
Minio is a popular open-source, self-hosted, Amazon S3 compatible object storage server. Minio is written in Go, comes with OS independent clients, and a browser interface. In this tutorial, you will install the Minio server on a Ubuntu 20.04 server, protect it using an SSL certificate from Let's Encrypt, and access it using a command-line client.
Prerequisites
- An Ubuntu 20.04 server with a non-root user with sudo privileges.
- A fully registered domain name,
minio.example.com. - An Ubuntu 20.04 machine to act as a client.
-
The system is updated.
$ sudo apt update
-
Few packages that your system needs.
$ sudo apt install wget curl nano ufw software-properties-common apt-transport-https ca-certificates -y
Some of these packages may already be installed on your system.
Step 1 - Install Minio Server
Minio, being written in Go, ships as a simple binary file. Download the binary file from Minio's official website.
$ wget https://dl.min.io/server/minio/release/linux-amd64/minio
Make the file executable.
$ chmod +x minio
Move the binary to the /usr/local/bin directory.
$ sudo mv minio /usr/local/bin
Verify the installation.
$ minio --version
minio version RELEASE.2022-01-28T02-28-16Z
Step 2 - Prepare Object Storage Disk
We need to prepare a dedicated block device to store objects. The path for storage can either be on your disk or a second disk attached to your server. For our tutorial, we are using a secondary disk.
$ lsblk
NAME   MAJ:MIN RM SIZE RO TYPE MOUNTPOINT
sda      8:0    0  50G  0 disk
??sda1   8:1    0  50G  0 part /
sdb      8:16   0  50G  0 disk
Install parted application to create and modify disk partitions.
$ sudo apt install parted
Run the following commands to mount the secondary disk to the /data directory.
$ sudo parted -s -a optimal -- /dev/sdb mklabel gpt
$ sudo parted -s -a optimal -- /dev/sdb mkpart primary 0% 100%
$ sudo parted -s -- /dev/sdb align-check optimal 1
$ sudo mkfs.ext4 /dev/sdb1
$ echo "/dev/sdb1 /data ext4 defaults 0 0" | sudo tee -a /etc/fstab
$ sudo mkdir /data
$ sudo mount -a
Step 3 - Configure Minio
Minio server should never be run as root to prevent any damages. Therefore, we will create a user and group called minio-user.
$ sudo useradd -r minio-user -s /sbin/nologin
The -s flag sets the shell for the user account to /sbin/nologin, which does not allow user login.
Change the ownership of the Minio binary file.
$ sudo chown minio-user:minio-user /usr/local/bin/minio
Give ownership of the /data directory to minio-user.
$ sudo chown minio-user:minio-user /data -R
The next step is to create a configuration file for Minio. Create a directory to store the configuration file.
$ sudo mkdir /etc/minio
Give ownership of the directory to the minio-user user.
$ sudo chown minio-user:minio-user /etc/minio
Create the environment file to store the default configuration. This file is to be stored in the /etc/default directory.
$ sudo nano /etc/default/minio
Paste the following code with environment variables to define Minio.
MINIO_ROOT_USER="minio"
MINIO_VOLUMES="/data"
MINIO_OPTS="-C /etc/minio --address your_server_ip:9000 --console-address :9001"
MINIO_ROOT_PASSWORD="miniostorage"
Let's check all the variables and what they do.
- MINIO_ROOT_USER: sets the access key/user to access the Minio user interface. It should be a minimum of 3 characters in length.
- MINIO_VOLUMES: specifies the storage directory for the data.
- MINIO_OPTS: sets various options for the Minio server. The
-Cflag specifies the configuration directory created earlier. The--addressflag specifies the IP address and the port to bind to. If you don't specify the IP address, Minio will bind to every IP address on the server, including localhost or any Docker related IP addresses. The default port is 9000. The--console-addressflag sets the port 9001 for the web console of Minio. - MINIO_ROOT_PASSWORD: sets the private key/password to access the Minio interface. It should be a minimum of 8 characters in length. Choose a strong and complicated secret key.
Save the file by pressing Ctrl + X and entering Y when prompted.
Step 4 - Install Minio Service
Download the Minio service file from the official Github repository.
$ curl -O https://raw.githubusercontent.com/minio/minio-service/master/linux-systemd/minio.service
Open the file with Nano editor.
$ nano minio.service
You will find the following code.
[Unit]
Description=MinIO
Documentation=https://docs.min.io
Wants=network-online.target
After=network-online.target
AssertFileIsExecutable=/usr/local/bin/minio

[Service]
WorkingDirectory=/usr/local/

User=minio-user
Group=minio-user
ProtectProc=invisible

EnvironmentFile=/etc/default/minio
ExecStartPre=/bin/bash -c "if [ -z \"${MINIO_VOLUMES}\" ]; then echo \"Variable MINIO_VOLUMES not set in /etc/default/minio\"; exit 1; fi"
ExecStart=/usr/local/bin/minio server $MINIO_OPTS $MINIO_VOLUMES

# Let systemd restart this service always
Restart=always

# Specifies the maximum file descriptor number that can be opened by this process
LimitNOFILE=1048576

# Specifies the maximum number of threads this process can create
TasksMax=infinity

# Disable timeout logic and wait until process is stopped
TimeoutStopSec=infinity
SendSIGKILL=no

[Install]
WantedBy=multi-user.target

# Built for ${project.name}-${project.version} (${project.name})
This service starts Minio using the minio-user user that we created earlier. It uses /etc/default/minio as the environment file we configured in step 3. Once satisfied, close the file by pressing Ctrl + X and entering Y when prompted.
Move the service file to the /etc/systemd/system directory.
$ sudo mv minio.service /etc/systemd/system
Reload the service daemon.
$ sudo systemctl daemon-reload
Enable the Minio Service.
$ sudo systemctl enable minio
Created symlink from /etc/systemd/system/multi-user.target.wants/minio.service to /etc/systemd/system/minio.service.
Step 5 - Start Minio Server
Start the Minio Server.
$ sudo systemctl start minio
Verify the status.
$ sudo systemctl status minio
? minio.service - MinIO
     Loaded: loaded (/etc/systemd/system/minio.service; enabled; vendor preset: enabled)
     Active: active (running) since Tue 2022-02-01 13:30:44 UTC; 5s ago
       Docs: https://docs.min.io
    Process: 26068 ExecStartPre=/bin/bash -c if [ -z "${MINIO_VOLUMES}" ]; then echo "Variable MINIO_VOLUMES not set in /etc/default/minio"; exi>
   Main PID: 26076 (minio)
      Tasks: 6
     Memory: 55.3M
     CGroup: /system.slice/minio.service
             ??26076 /usr/local/bin/minio server -C /etc/minio --address 209.208.26.129:9000 --console-address :9001 /data
Allow ports 9000 and 9001 using the Uncomplicated Firewall (UFW).
$ sudo ufw allow 9000
$ sudo ufw allow 9001
Enable the firewall.
$ sudo ufw enable
Open the URL http://your_server_ip:9001 in the browser, and you will see the following screen.

Step 6 - Secure Minio using SSL
We will use Let's Encrypt to secure Minio. To get a free SSL certificate, we need to download the Certbot tool. We will use the Snapd package installer for that.
Install Snap installer.
$ sudo apt install snapd
Ensure that your version of Snapd is up to date.
$ sudo snap install core
$ sudo snap refresh core
Install Certbot.
$ sudo snap install --classic certbot
Use the following command to ensure that the Certbot command runs by creating a symbolic link to the /usr/bin directory.
$ sudo ln -s /snap/bin/certbot /usr/bin/certbot
Generate an SSL certificate.
$ sudo certbot certonly --standalone --agree-tos --no-eff-email --staple-ocsp --preferred-challenges http -m [email protected] -d minio.example.com
The above command will download a certificate to the /etc/letsencrypt/live/minio.example.com directory on your server.
Copy the files privkey.pem and fullchain.pem into the certs directory under Minio's configuration folder.
$ sudo cp /etc/letsencrypt/live/minio.example.com/privkey.pem /etc/minio/certs/private.key
$ sudo cp /etc/letsencrypt/live/minio.example.com/fullchain.pem /etc/minio/certs/public.crt
Change the ownership of the copied certificates.
$ sudo chown minio-user:minio-user /etc/minio/certs/private.key
$ sudo chown minio-user:minio-user /etc/minio/certs/public.crt
Allow HTTP and HTTPS ports through the firewall.
$ sudo ufw allow 80
$ sudo ufw allow 443
Open the Minio configuration file.
$ sudo nano /etc/default/minio
Add the following line at the bottom.
MINIO_SERVER_URL="https://minio.example.com:9000"
Even though the console is accessed via port 9001, the SSL server URL uses port 9000 to access the Minio API.
Save the file by pressing Ctrl + X and entering Y when prompted.
Restart Minio Server.
$ sudo systemctl restart minio
You can access the Minio console via the URL https://minio.example.com:9001 in your browser.
Step 7 - Connect to Minio and Setup Buckets
Login to the Minio Console using the user and password set earlier to access the Minio Dashboard.
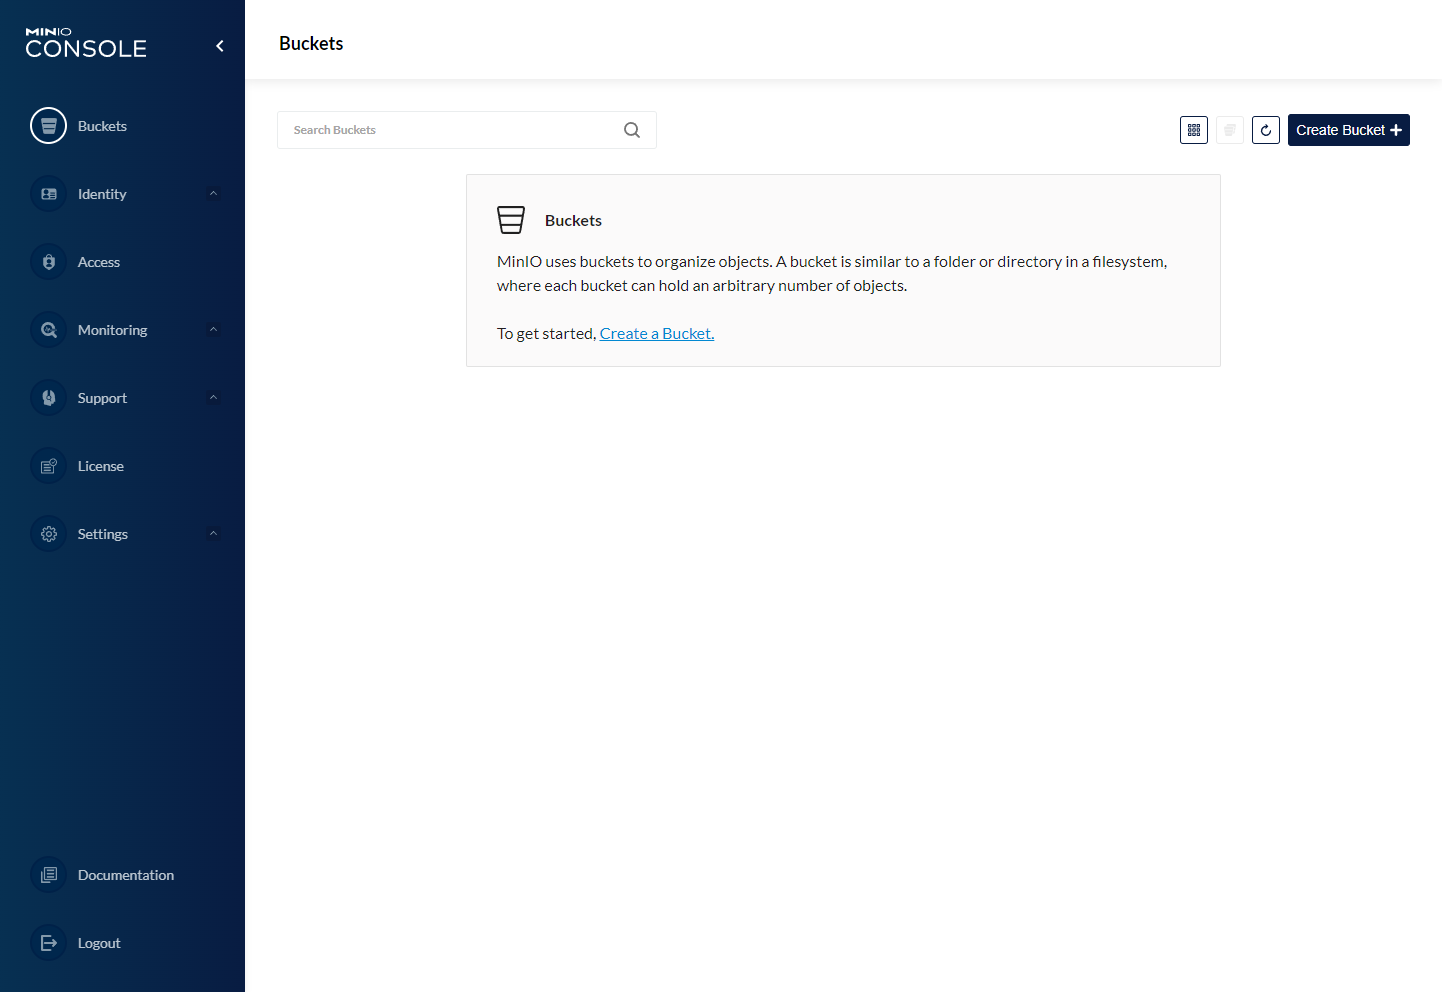
Click the Create Bucket button to create your first bucket.
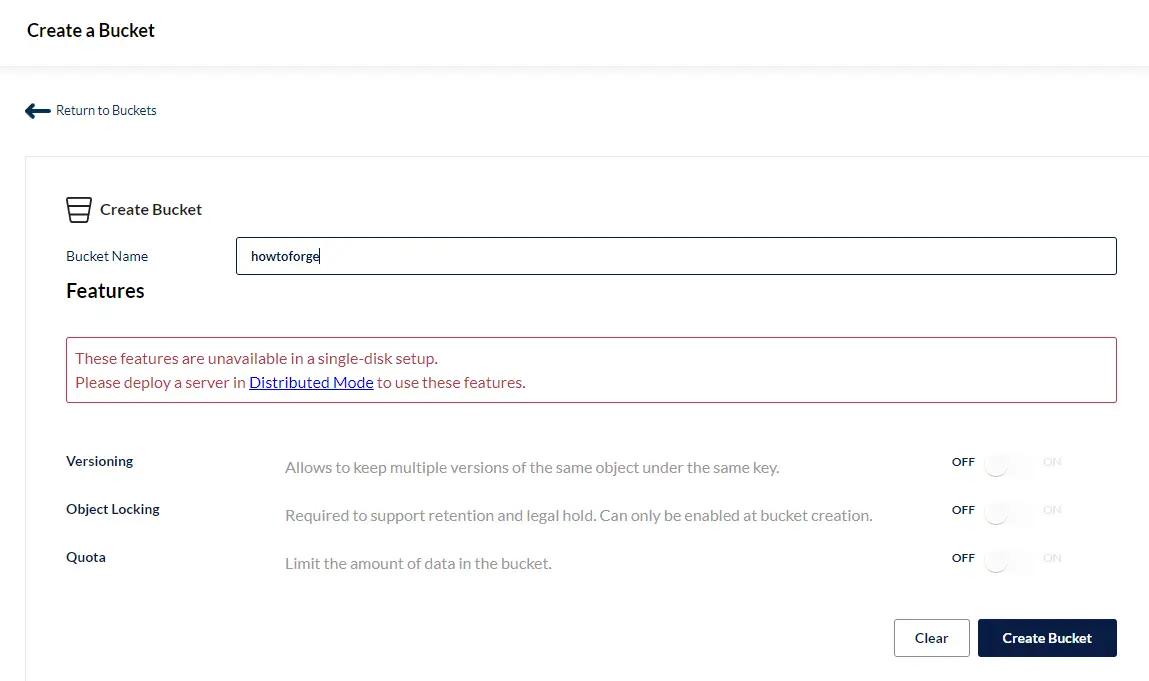
Since we are installing Minio on a single server/disk, some of the features are disabled. Enter the name of the bucket and click the Create Bucket button to proceed. You will get the following screen once finished.
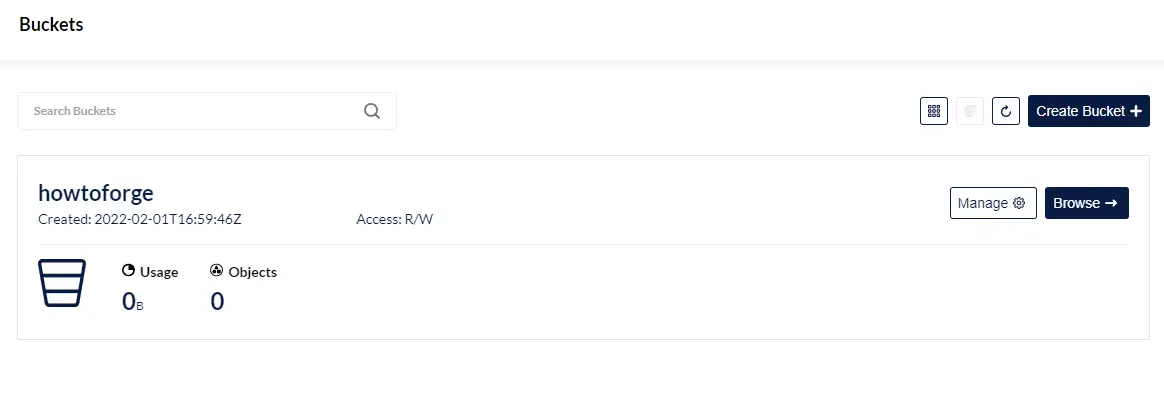
To upload files, click on the Browse button, and the following page will appear.

Click the Upload Files button and select Upload Files again to open the File Browser on your PC. You can select multiple files at once to upload.
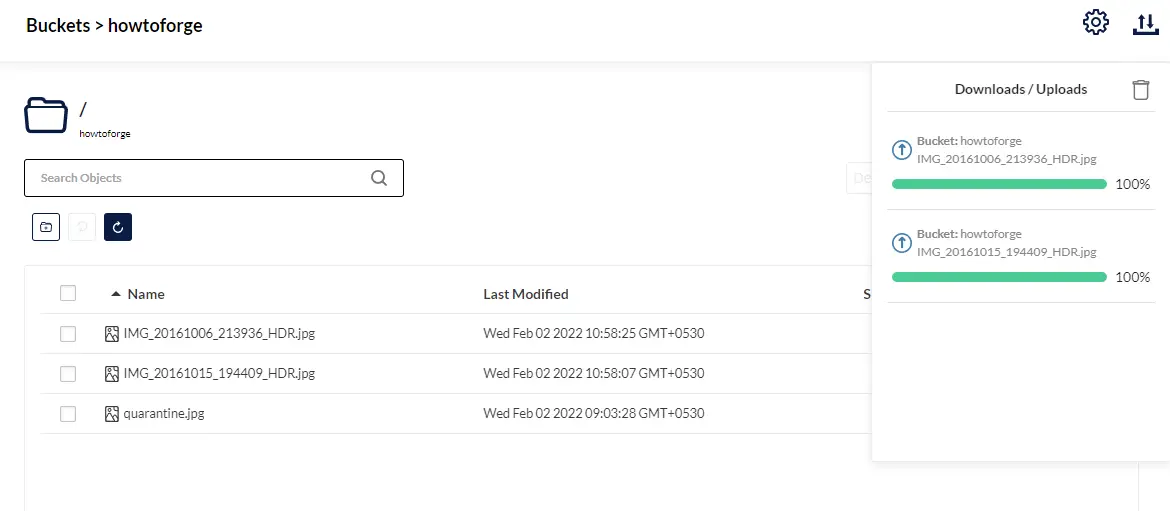
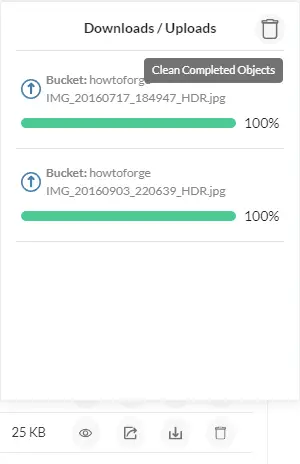
Click on the recycle bin button to clear the upload queue once finished.
That is all for now. You have created your first bucket and uploaded some files. Next, we will connect to the server using a client, access this bucket. and manage it.
Step 8 - Install Minio Client and access Files
We will install Minio's Command-line client on a different Ubuntu 20.04 based machine for our purpose. You can also download Desktop clients from Minio's official download page.
Download the official Minio binary.
$ wget https://dl.min.io/client/mc/release/linux-amd64/mc
Make the binary file executable.
$ chmod +x mc
Move the binary to the /usr/local/bin directory.
$ sudo mv mc /usr/local/bin
Verify the installation.
$ mc --version
mc version RELEASE.2022-02-02T02-03-24Z
Set an alias for your Minio server so that you can access it using an easily identifiable name. Replace minio and miniostorage with your chosen username and password for the server.
$ mc alias set howtoforge https://minio.example.com:9000 minio miniostorage
mc: Configuration written to `/home/<user>/.mc/config.json`. Please update your access credentials.
mc: Successfully created `/home/<user>/.mc/share`.
mc: Initialized share uploads `/home/<user>/.mc/share/uploads.json` file.
mc: Initialized share downloads `/home/<user>/.mc/share/downloads.json` file.
Added `howtoforge` successfully.
Minio client stores all the configurations in the /home/user/.mc directory.
Get the Minio server information. We use the admin sub-command for this.
$ mc admin info howtoforge
?  minio.example.com:9000
   Uptime: 2 minutes
   Version: 2022-01-28T02:28:16Z
   Network: 1/1 OK

9.6 MiB Used, 1 Bucket, 5 Objects
To list all the buckets under your Minio server, use the following command.
$ mc ls howtoforge
[2022-02-01 16:59:46 UTC]     0B howtoforge/
To list all the objects/files in a given bucket, use the following command.
$ mc ls howtoforge/howtoforge
[2022-02-02 05:32:28 UTC] 2.9MiB STANDARD IMG_20160717_184947_HDR.jpg
[2022-02-02 05:32:00 UTC] 2.2MiB STANDARD IMG_20160903_220639_HDR.jpg
[2022-02-02 05:28:25 UTC] 2.4MiB STANDARD IMG_20161006_213936_HDR.jpg
[2022-02-02 05:28:07 UTC] 2.2MiB STANDARD IMG_20161015_194409_HDR.jpg
[2022-02-02 03:33:28 UTC]  25KiB STANDARD quarantine.jpg
You can create a new bucket using the following command.
$ mc mb howtoforge/bucket2
Bucket created successfully `howtoforge/bucket2`.
Let us create a new file to be copied to this bucket.
$ touch test.txt
To copy a file to the newly created bucket, use the following command.
$ mc cp test.txt howtoforge/bucket2
/home/nspeaks/test.txt:    0 B / ? ??????????????????????????????????????????????????????????????????????????????????????????????????????????????
List the newly copied file.
$ mc ls howtoforge/bucket2
[2022-02-02 07:06:44 UTC]     0B STANDARD test.txt
You can check all the commands by using the --help argument.
$ mc --help
NAME:
  mc - MinIO Client for cloud storage and filesystems.

USAGE:
  mc [FLAGS] COMMAND [COMMAND FLAGS | -h] [ARGUMENTS...]

COMMANDS:
  alias      set, remove and list aliases in configuration file
  ls         list buckets and objects
  mb         make a bucket
  rb         remove a bucket
  cp         copy objects
  mirror     synchronize object(s) to a remote site
  cat        display object contents
  head       display first 'n' lines of an object
  pipe       stream STDIN to an object
  share      generate URL for temporary access to an object
  find       search for objects
  sql        run sql queries on objects
  stat       show object metadata
  mv         move objects
  tree       list buckets and objects in a tree format
  du         summarize disk usage recursively
  retention  set retention for object(s)
  legalhold  manage legal hold for object(s)
  diff       list differences in object name, size, and date between two buckets
  rm         remove object(s)
  version    manage bucket versioning
  ilm        manage bucket lifecycle
  encrypt    manage bucket encryption config
  event      manage object notifications
  watch      listen for object notification events
  undo       undo PUT/DELETE operations
  anonymous  manage anonymous access to buckets and objects
  tag        manage tags for bucket and object(s)
  replicate  configure server side bucket replication
  admin      manage MinIO servers
  update     update mc to latest release
  support    Support related commands

GLOBAL FLAGS:
  --autocompletion              install auto-completion for your shell
  --config-dir value, -C value  path to configuration folder (default: "/home/<user>/.mc")
  --quiet, -q                   disable progress bar display
  --no-color                    disable color theme
  --json                        enable JSON lines formatted output
  --debug                       enable debug output
  --insecure                    disable SSL certificate verification
  --help, -h                    show help
  --version, -v                 print the version

TIP:
  Use 'mc --autocompletion' to enable shell autocompletion

VERSION:
  RELEASE.2022-02-02T02-03-24Z
Conclusion
This concludes our tutorial where you installed the Minio object storage server on a Ubuntu 20.04 based server. It is accessible via a web console protected by a Let's Encrypt SSL certificate. You also installed Minio command-line client on another Ubuntu machine to manage and access the Minio server.
If you have any questions, post them in the comments below.

