How to Create a Static Website on an AWS S3 Bucket
S3 Bucket is an Object Storage Service of AWS. We can use AWS S3 Bucket to host a static website. AWS S3 does not support server-side scripting, but AWS has other resources for hosting dynamic websites. To host a static website on Amazon S3, we need to configure an AWS S3 bucket for website hosting and then upload our website content to the bucket we created. When we configure a bucket as a static website, we enable static website hosting.
After we configure our bucket as a static website, we can access the bucket through the AWS Region-specific Amazon S3 website endpoints for our bucket.
To configure our AWS S3 bucket for static website hosting, we are going to use the AWS Management Console in this article.
To know the steps to create a simple S3 bucket and know more about it, click here. This document has been written by me. You can use it to create a simple public S3 Bucket.
Pre-requisites
- AWS Account (Create if you don’t have one).
- S3 Public Bucket.
What will we do?
- Refer this article to create and know more about S3 Public Bucket.
- Configure the existing S3 Public Bucket to work as a static website.
Configure the existing S3 Bucket to work as a static website
Before proceeding further, I assume you have created an S3 Bucket.
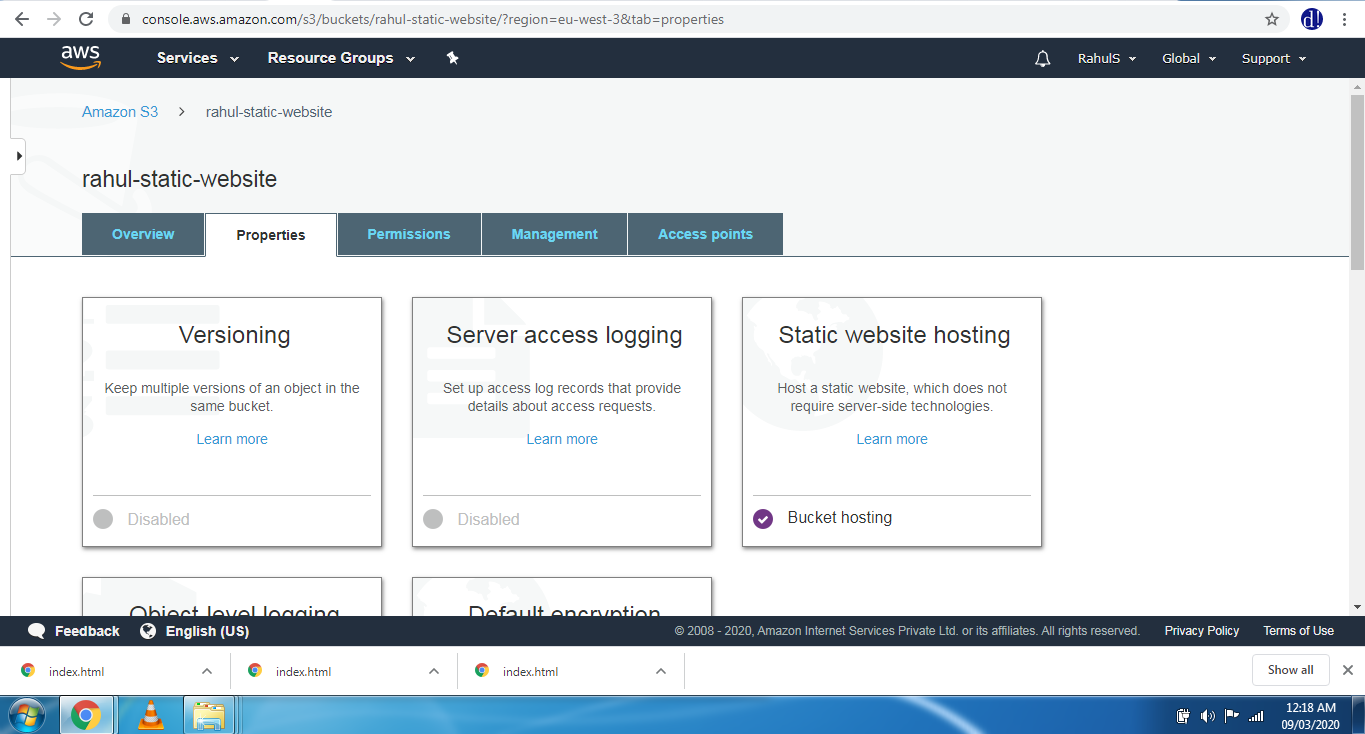
Once you have your public S3 Bucket in place, select the S3 Bucket and click on "Permissions" and then select "Static website hosting".
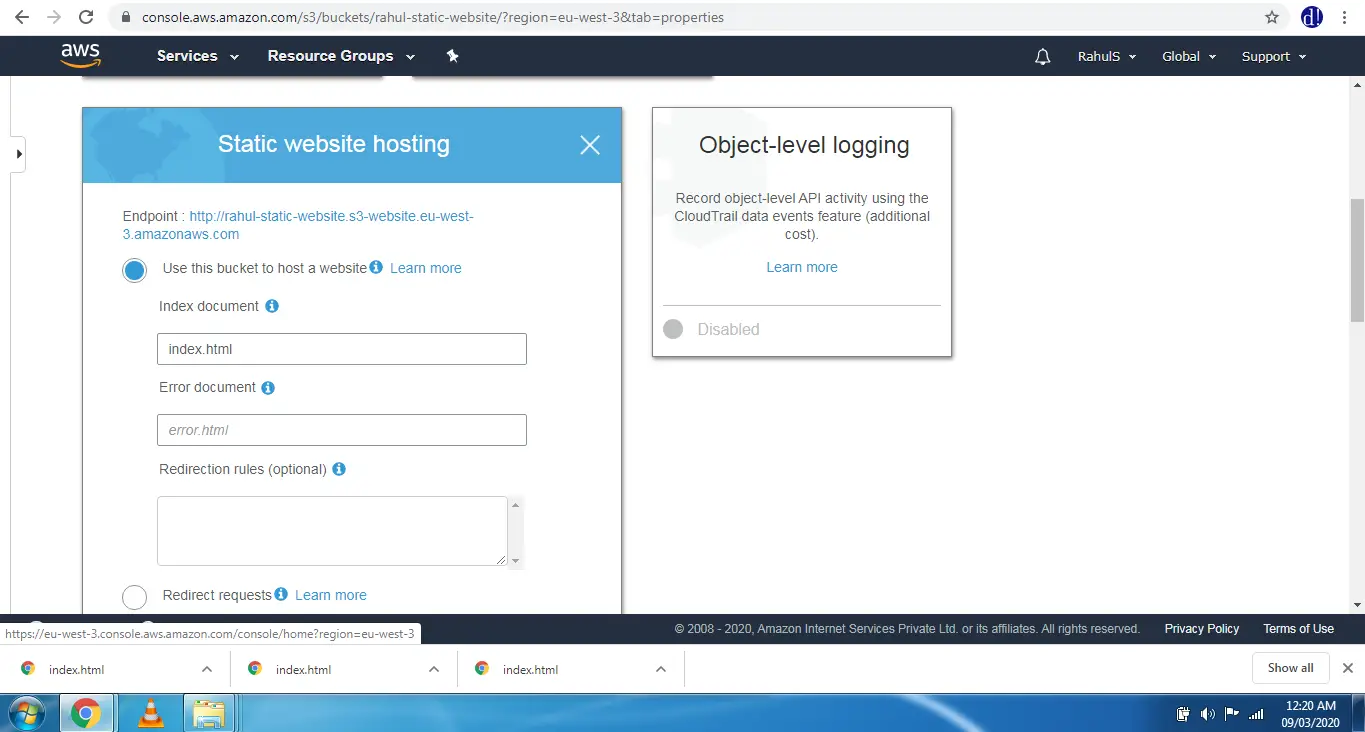
Scroll down and Select 'Use this bucket to host a website' and scroll down & click on save the settings.
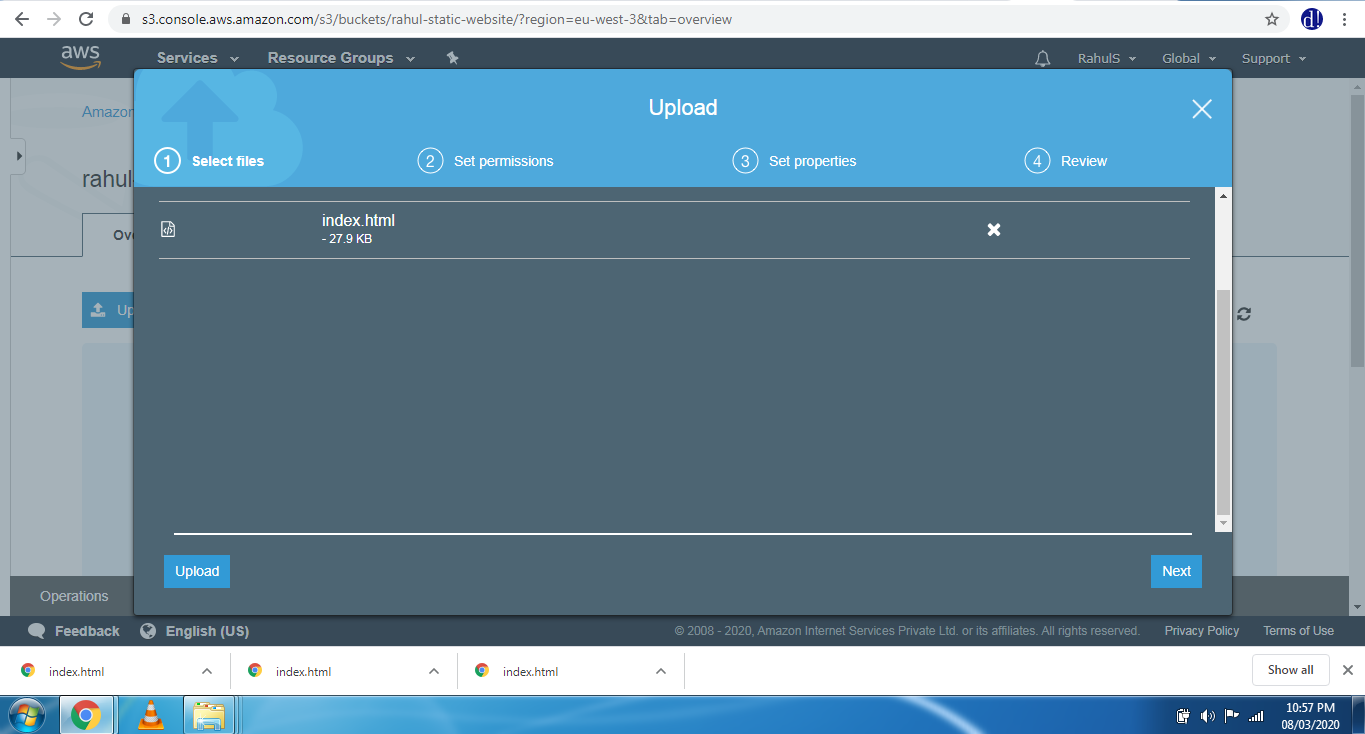
Once you have an S3 Public Bucket with you, go to S3 Buckets’ main screen and click on your bucket -> Upload. You will get a screen where you can upload your Static Website’s Content or just a single index.html page. Here I am uploading just a single file named index.html.
Make sure while creating an S3 bucket that the name of the S3 bucket is unique universally and no other existing bucket has the same name.
Click on “Next” and change the “Manage public permissions” to “Grant public read access to the obects/s” and then click on Upload.
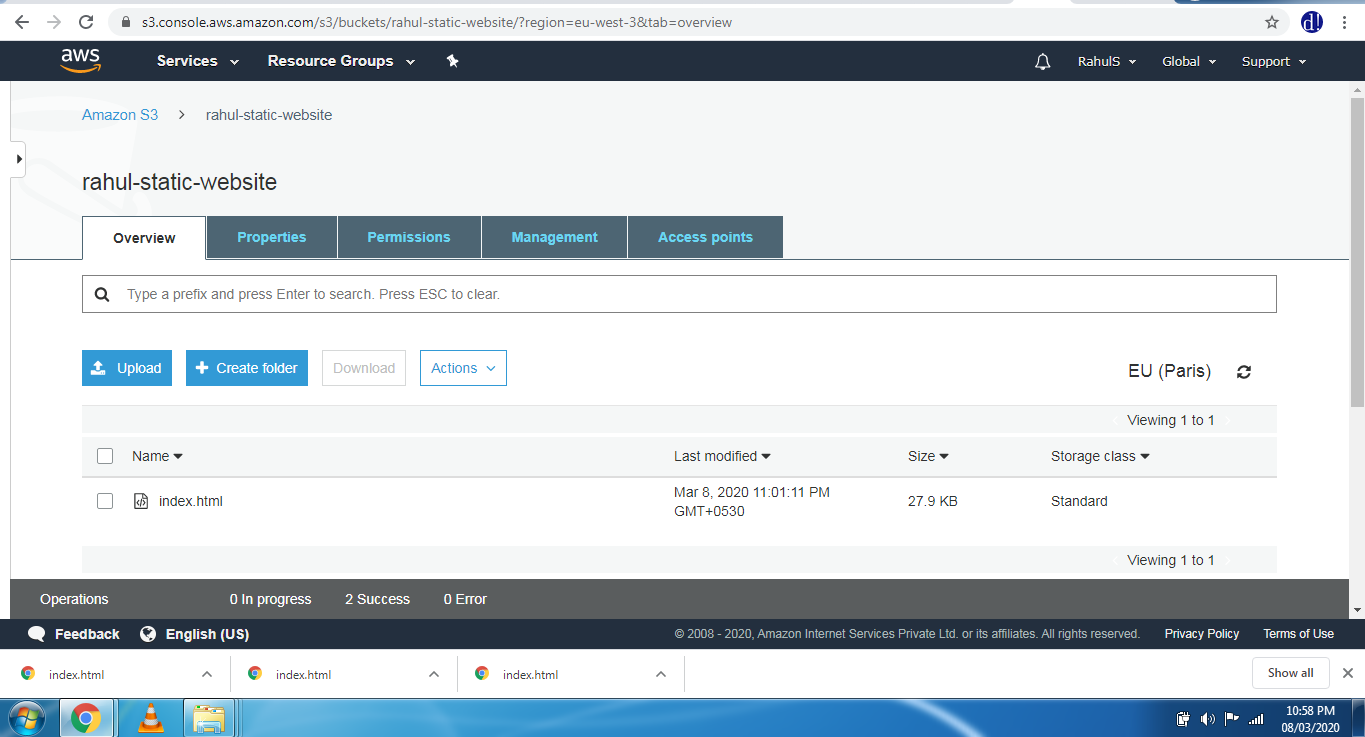
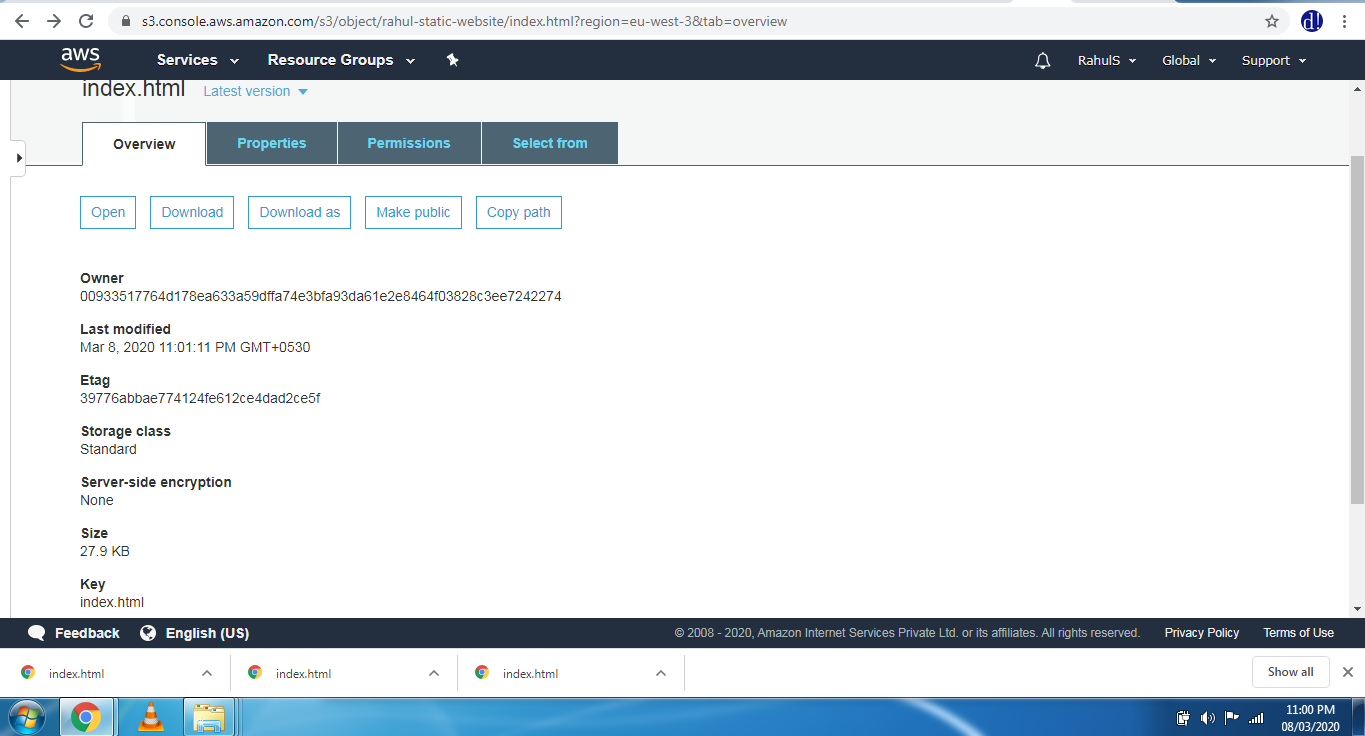
Once you have successfully uploaded the index.html file (or your static website), you can see it in the console. Select the “index.html". Here, I have created a sample index.html of the main page of https://www.howtoforge.com/. You can have your own sample web page.
Once you click on the object, click on “Make public” to make it public so that the page can be accessed from anywhere. If you don't make it public, the page can not be accessed from the internet by everyone.

Here, you can see the files on the main page which have been uploaded by you.
Once you click on the object, click on “Make public” to make it public so that the page can be accessed from anywhere, else your webpage will not be accessible by everyone.
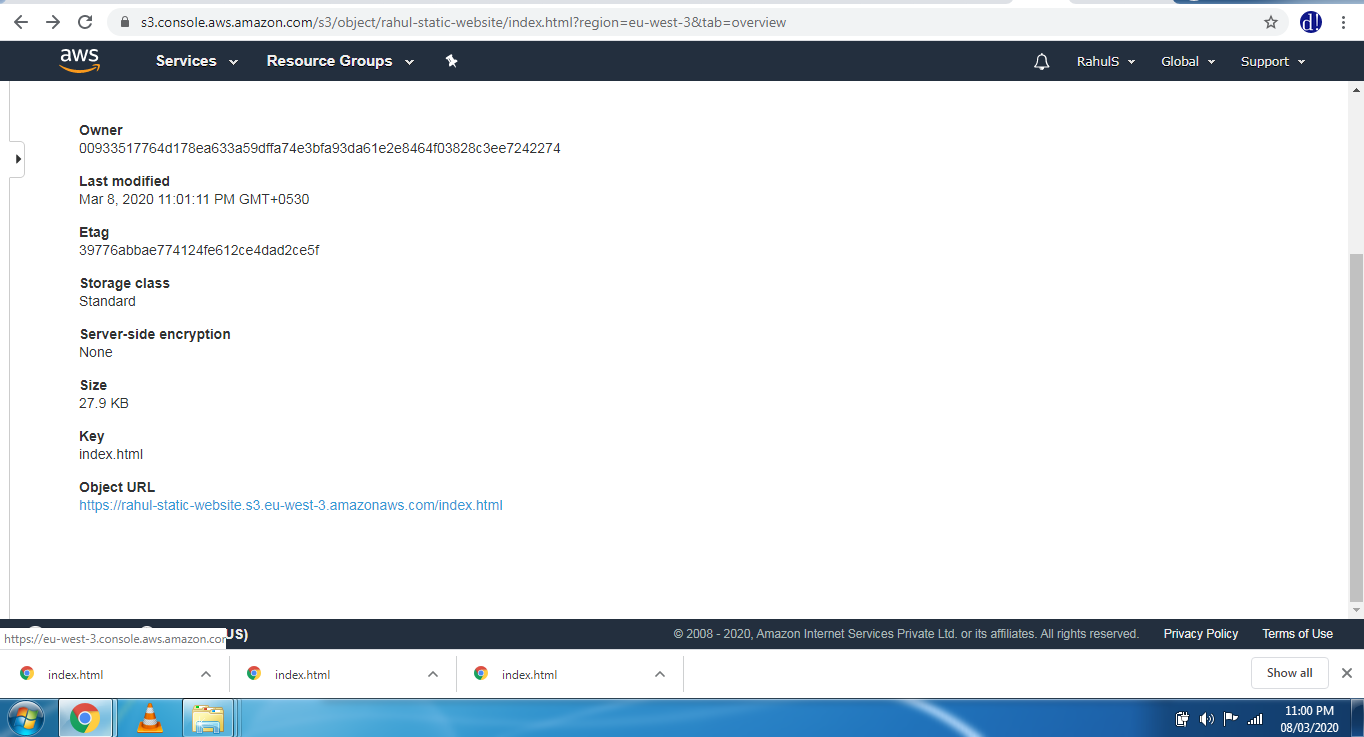
Scroll down and click on the “Object URL” to view the static webpage.
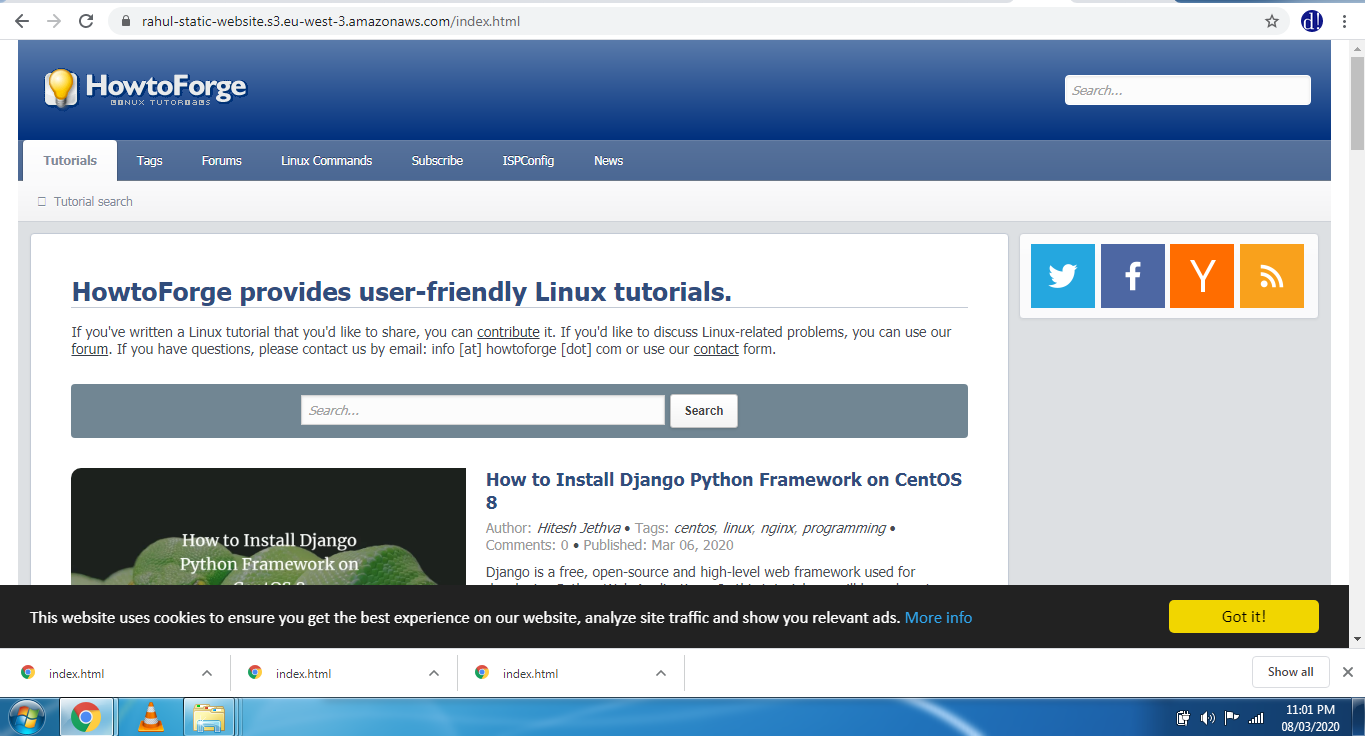
I had saved and uploaded the main page of howtoforge.com, which can be seen in the following image. You can have and upload your own .html page of the complete static website or just a single webpage.
Conclusion
In this article, we saw the steps to upload a static webpage, change its permissions, and access it using a “Static Website” of S3.

