Network-Attached Storage With FreeNAS - Page 4
4 Configuring Our First Hard Drive For Network-Attached Storage
The caption is a little bit misleading. In fact we want to configure the second partition (the data partition) for NAS, not the whole disk. Please note: You cannot configure the partition for NAS where FreeNAS is installed on! So from the first hard drive we cannot use the first partition because FreeNAS is installed on it.
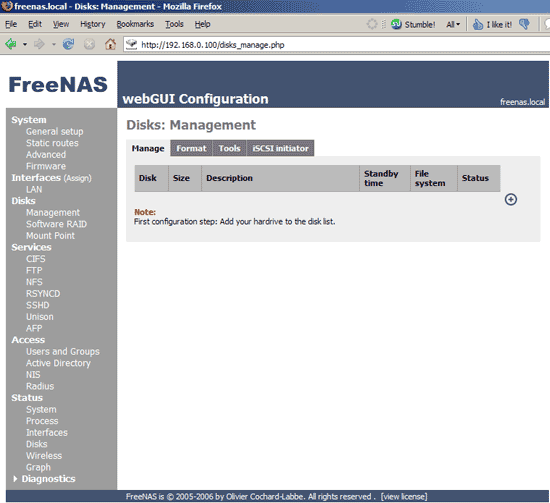
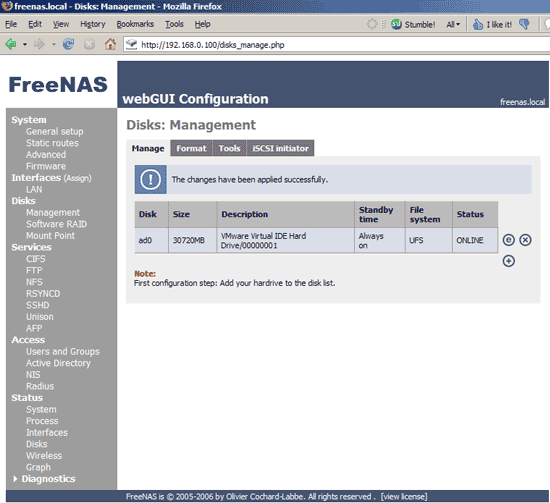
Go to Disks -> Management and click on the + sign on the right:
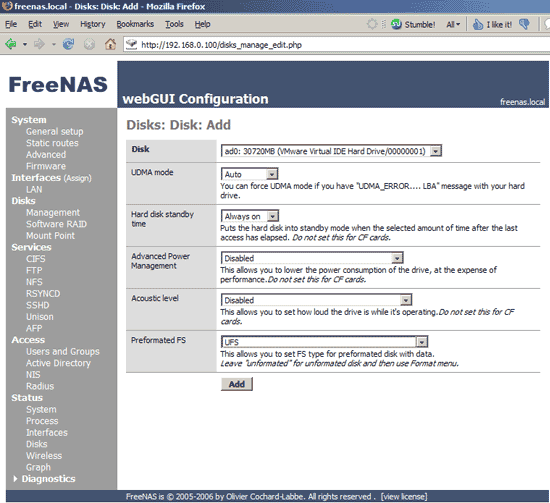
On the next page select the ad0 disk (that's where the data partition is on) and select UFS under Preformated FS (during the FreeNAS installation the installer formatted both partitions on the first hard drive with UFS, whereas the second and third hard drive are still unformated):
On the next screen hit Apply changes:
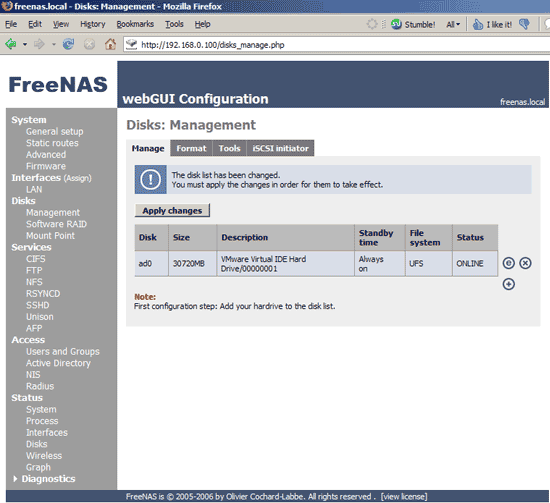
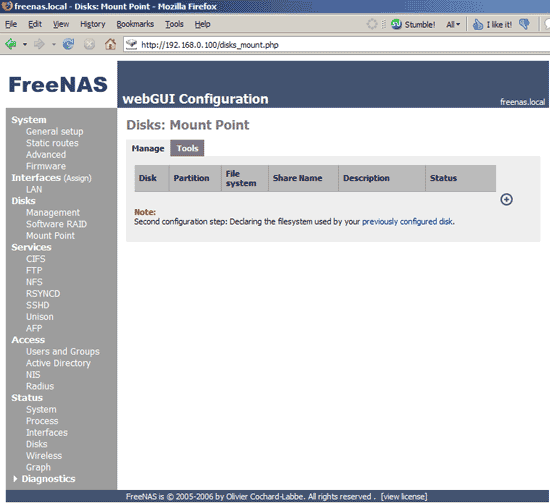
The data partition has now been added to FreeNAS:
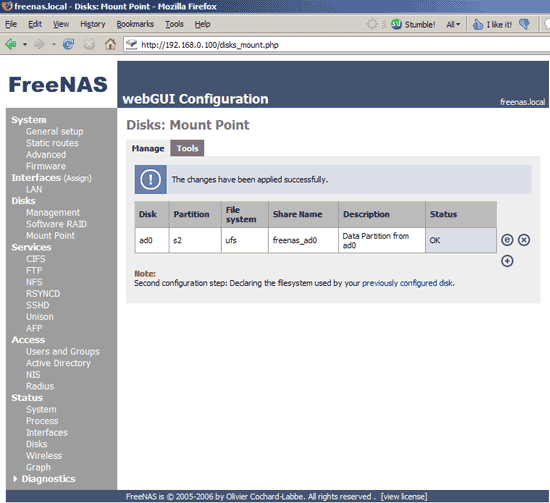
To use it, we must mount it. Therefore we go to Disks -> Mount Point and click on the + sign on the right:
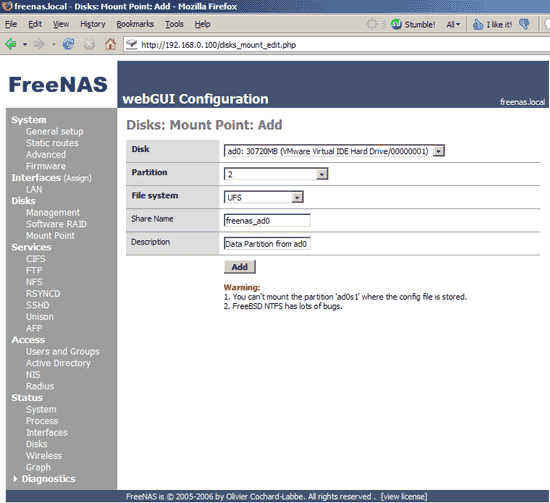
Select the ad0 disk, the partition no. 2 (that's the data partition), the file system UFS, and under Share Name and Description you specify a name for the share (only characters a-z, 0-9, and the underscore _ are allowed) and a short description that allows you to identify the share. Then click on Add:
Then apply the changes:
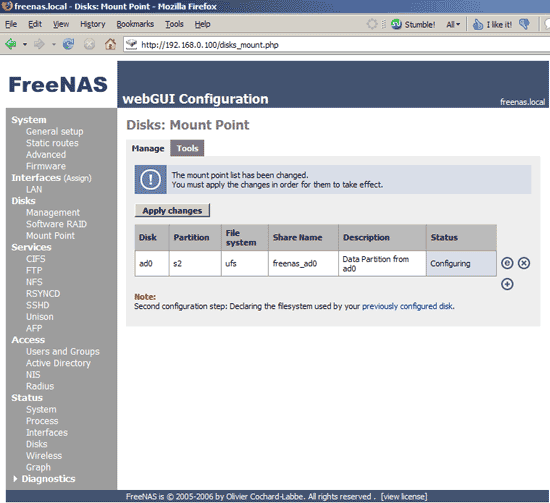
The data partition is now mounted and ready for use: